
First, turn off and disconnect the gas, let the grill cool, then remove the grates, flavorizer bars, and ash catcher. Brush loose carbon with a soft‑bristle brush, spray a non‑toxic grill cleaner, let it sit, and wipe with a damp paper towel. Use a stainless‑steel brush or razor scraper for stubborn flakes, then scrub the grates with a nylon brush and a baking‑soda paste for 8‑12 hours. Rinse, dry, coat the grates with vegetable oil, and reassemble, checking all connections. Continue for a deeper exploration into schedule and troubleshooting.
Gather Tools to Clean a Grill
Before you start scrubbing, gather the specific brushes, cleaners, and scrapers that match your Weber’s grates, interior surfaces, and exterior finish. Choose a stainless‑steel bristle brush for heavy debris, a heavy‑duty nylon T‑shaped brush for edges, and an 18‑inch angled brush to keep hands safe. Add bamboo or hardwood brushes if you prefer non‑metal tools. Select a non‑toxic, phosphate‑free grate grill cleaner spray, a stubborn stain remover for carbon buildup, and mild dish soap with steel‑wool pads for the bowl. Include heavy‑duty grate scrubbers, pumice griddle scraper bricks, and nylon scouring pads for tough residue. Pack specialized accessories such as detail brushes for spider guards and a one‑touch kit for ash removal. Finally, have a seasoning cast iron grates oil ready to protect the grates after cleaning, as regular grill maintenance is essential for preventing rust buildup and extending your grill’s lifespan. The angled bristle head keeps hands safely away from heat.
Multipurpose tool for grates, cookboxes, burners and more

Set of 3 includes Spatula, Locking Tongs, and Cold Cleaning Brush.

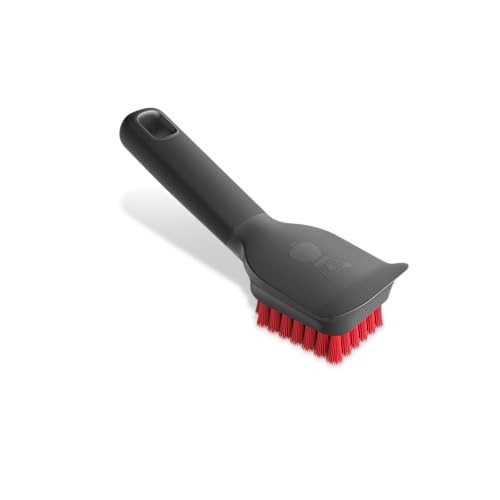
NYLON BRISTLE GRILL BRUSH: Designed for cleaning cooled grill grates, the durable nylon bristles help scrub away residue after cooking, making this brush a practical tool for routine grill maintenance at home or outdoors.
Cool, Disassemble, and Protect the Grill
Once the grill’s heat has dissipated and the surface is cool enough to touch, you can begin the disassembly and protection steps. First, perform a gas supply disconnection if your model is gas‑powered; turn the valve, disconnect the hose, and cap the line. Then, remove the cooking grates, warming rack, and Flavorizer bars to expose the interior. Pull out the heat deflectors, grease tray, and ash catcher in that order, emptying the ash catcher last to avoid corrosion. For charcoal units, execute disassembling charcoal by extracting the charcoal grate and discarding residual bits. Wipe the lid, bowl, and underside of the lid with a mild detergent. Finally, inspect the ash catcher, clear any debris, and store the grill in a dry environment to protect it until the next use. Regular maintenance seasoning after each cookout helps preserve the grill’s performance and longevity. Cleaning while hot prevents drippings from hardening, making removal easier.
Clean the Exterior Lid and Side Tables
You’ll want to start by making sure the lid is completely cool, then clear loose debris with a dry cloth or scraper before applying any cleaning solution. Position the lid for full access, shield surrounding surfaces, and spray warm soapy water or Weber Exterior Grill Cleaner onto the steel shell. Use a non‑lint cloth, wiping side‑to‑side with the grain, then rinse and dry immediately to avoid streaks. For stainless steel tables, repeat the same wash, then apply a mild stainless steel cleaner, buffing with a clean cloth to a polished appearance. Spot treat stubborn grease with a scouring pad, never scratching the protective coating. Finally, dry all exterior parts thoroughly, confirming a uniform, gleaming finish. This regular maintenance helps avoid buildup of grease that can accumulate on exterior surfaces over time. Warm, soapy water helps loosen grime before scrubbing.

Removes dirt and grime build-up, and is great for everyday cleaning on any exterior grill surface

Cleans, polishes & protects stainless steel: Our stainless steel cleaner for appliances, which won a 2026 Good Housekeeping Cleaning Award, helps clean delicate, hard-to-clean surfaces. This appliance cleaner removes grease, fingerprints, water spots and residue while restoring a polished, like-new shine.

Cleans, polishes & protects stainless steel: Our stainless steel cleaner for appliances removes fingerprints, grease, residue, and water spots. Weiman appliance wipes leave a streak-free shine and a protective barrier that helps prevent future smudges.
Remove Carbon Inside the Grill Lid
Carbon buildup inside the Weber grill lid appears as flaky, gray‑black residue that can drop onto food if left unchecked. First, let the lid cool completely, then detach it from the hinges using pliers for full access. Begin cover removal by brushing loose carbon deposits with a soft‑bristle brush in a back‑and‑forth motion; switch to a stainless‑steel brush for stubborn flakes. Use a single‑sided razor scraper around the perimeter and the thermometer dome to dry‑scrape heavy layers. Spray Citrusafe Grill Cleaner on the remaining deposits, let it sit five minutes, then wipe with a damp paper towel. Follow with Dawn Power Dissolver, let it sit ten minutes, and scrub with #0000 steel wool. Rinsing thoroughly removes stubborn residue, similar to soaking grates in cleaning mixtures for deep cleaning. Dry with a rag, and reassemble the lid. Avoid abrasive materials to prevent surface damage.
Deep‑Clean Grill Grates & Flavorizer Bars
After clearing the lid’s carbon, turn your attention to the grill grates and flavorizer bars, which accumulate grease and food residue that can affect heat distribution and flavor. Begin with the baking‑soda paste: mix 1 ½ cups baking soda, ¼ cup dish soap, and ¼ cup white vinegar until frothy, brush onto grates (avoid burners), close the lid, and let sit 8–12 hours. After the soak, scrub with a nylon‑bristled brush, wipe with a damp sponge, and dry. For stubborn spots, sprinkle baking soda, wait 10 minutes, then scrub with a crumpled aluminum‑foil ball. Apply Weber Stubborn Stain Remover to flavorizer bars, agitate, wipe clean, and dry. Regularly cleaning and removing drip pans helps prevent grease fires and maintains optimal grill performance. Finally, coat grates with vegetable oil, heat on high, and season grates properly to restore shine on stainless steel. Cleaning with baking soda is safe for all grill materials and avoids harsh chemicals.

Is Your Grill Brush Safe? - With all the concern about metal wire bristles, we decided to develop a safe grill brush that leaves your grill clean and free of metal wire bristles.

MATERIAL: Emerald, grit-infused nylon bristles—5X thicker for safe, high-visibility cleaning

【Durable Nylon Bristles Protect Grates】Designed for safe and effective cleaning, this BBQ grill brush has durable, heatproof nylon bristles that won’t scratch your grill grates. A great choice for keeping your grill in pristine condition with regular upkeep
Safely Clean Burner Tubes and Ports
A few careful steps will let you clean the burner tubes and ports safely and restore even flame distribution. First, turn the grill off, let it cool, and remove the grates and flavorizer bars. Wear leather gloves and safety glasses, then use a stainless‑steel bristle brush in an up‑and‑down motion to scrub each port, avoiding side‑to‑side strokes that could scale debris. Knock loose buildup with a wire brush, then remove the single retaining screw with a flat‑head screwdriver. Lift the tube vertically, twist to disengage the gas connection, and detach the igniter. Soak the tube in hot, soapy water, scrub the interior, and rinse. Dry for 30–60 minutes, reinstall, snap the igniter back, and light the grill to verify even flame. Finally, inspect burner connections and guarantee no excessive burner residue remains. Using a protective grill cover between cleaning sessions will help prevent debris buildup and reduce the frequency of deep maintenance required. The Weber Q series is known for its portable convenience, making regular maintenance essential for optimal performance.
Scrape, Wash, and Protect the Grease Tray
When the grill has cooled and the burners are off, you can begin cleaning the grease tray to keep flame performance ideal. First, remove the slide‑out tray and place a catch pan beneath it for grease disposal. Use a putty knife or scraper to push carbonized debris from the cookbox bottom into the tray, then scrape the tray’s contents into the catch pan. Perform multiple passes if needed; a wire‑brush attachment can tackle stubborn spots, but avoid scratching the surface. Next, spray a food‑safe grease cutter, let it dwell, then scrub with a Dawn‑plus‑hot‑water solution and a scotch‑brite pad. Rinse thoroughly, dry, and apply a thin coat of high‑temperature oil for tray protection before reinstalling. This systematic routine prevents buildup and guarantees safe disposal of grease. Dry rag should be used to wipe down the exterior of the tray after cleaning.
Reassemble the Grill and Perform a Quick Safety Check
Ready to reassemble your Weber grill? Begin on a flat, level surface and remove protective film from stainless parts. Fasten the black cross brace to left side panel L until you feel resistance, then snug. Overlap the brace onto the right panel and install fasteners at the marked spots. Insert the axle, add wheels, and secure with clips. Align push pins on side shelves, click them into the four corners, and attach side tables so the holder chain faces front. Use a Phillips screwdriver to tighten all fasteners, two per corner, to resistance without over‑tightening. Bundle gas lines on top of the panel, then verify gas connections before routing wires outside the frame. For porcelain-coated grates like those on Weber grills, preheat and brush the grates before first use to ensure optimal cooking performance. Finally, twist the gas knob, shake handles, and confirm no loose movement, completing a quick safety check. Remove all packaging before starting the reassembly.
Plan a Regular Grill‑Cleaning Schedule
If you want consistent performance, set a tiered cleaning routine that matches your usage pattern: daily brush‑off of the grates after each cook, a weekly exterior wipe‑down and tray check, and a monthly deep‑clean that tackles burners, carbon buildup, and side‑table maintenance. Align the schedule with a comparison of daily vs occasional user schedules: daily users scrub grates each session and perform weekly exterior checks, while occasional users clean grates before and after each use and schedule deep cleans twice yearly. Emphasize the benefits of consistent grill maintenance—preventing temperature loss, reducing rust, and extending component lifespan. To protect your grill from rust formation, apply a protective layer of oil after deep cleaning sessions. For weekend users, add a 6‑8‑week deep clean focused on high‑fat residue. Document each step in a log to verify compliance and adjust frequency seasonally. Regular cleaning also helps to prevent flame‑ups caused by accumulated grease.
Troubleshoot Common Grill‑Cleaning Issues
Why do grill‑cleaning problems persist despite regular maintenance? Because residue accumulates in hard‑to‑reach zones, compromising appliance performance and fuel efficiency. First, address lid buildup: brush porcelain enamel with a stainless‑steel brush before each cook, then wipe the warm lid with paper towels or a mild soap‑and‑water solution. For carbon stains, apply a stubborn‑stain remover or a citrus‑cleaner mix. Next, eliminate cooking‑grate residue by preheating 10‑15 minutes, scrubbing both sides with a scouring pad and degreaser, and using a food‑safe grease cutter on a Scotch‑Brite pad. You can also try the natural method of rubbing a cut onion along the grill grates to remove light carbonization and charred food. Flip grates to clean undersides, then oil to prevent rust. Finally, clear burner clogs by brushing ports crosswise, cleaning spider guards with a toothbrush, and checking for rust or debris; replace damaged parts to maintain even heating and ideal fuel efficiency. Small debris may appear as paint‑like deposits on the lid.