
Butter the outer sides of two bread slices with a thin, even layer of butter or mayo. Spread cheese on the unbuttered side, add ham, then top with another cheese slice. Prehear a sturdy pan over medium-low, place the sandwich centered, and cook 2 minutes until golden; flip with a firm spatula, cover, and let the cheese melt while the second side browns. Rest 1-2 minutes before slicing, and you’ll uncover even more tips ahead.
Ham and Cheese Sandwich: Ingredients & Tools
Which breads, cheeses, and hams should you gather for a perfect grilled ham and cheese? Choose crusty artisan bread or country white sourdough for a sturdy bite and airy crumb; thick‑cut white bread works if you prefer a softer texture. For meat quality, pick shaved Black Forest deli ham (85 g) or thinly sliced smoked Virginia ham, ensuring each slice is fresh and evenly sliced. Pair with sharp cheddar or Gruyère for robust flavor, or use a blend of American and Muenster for meltability. Butter the outer sides (1 Tbsp total) to promote even browning and prevent sticking. Consider using lower-fat cheese varieties to reduce saturated fat content while maintaining great taste. Have a non‑stick skillet or cast‑iron pan ready, and keep a spatula on hand for flipping. These ingredients and tools set the foundation for a superior sandwich. Bringing the cheese to room temperature helps it melt more evenly.

Our high country interpretation of the classic San Francisco Sourdough.

DELICIOUS SANDWICH BREAD: Perfect for crafting gourmet sandwiches, this sourdough bread features a soft texture and firm crust, making it ideal for busy lunches or family meals
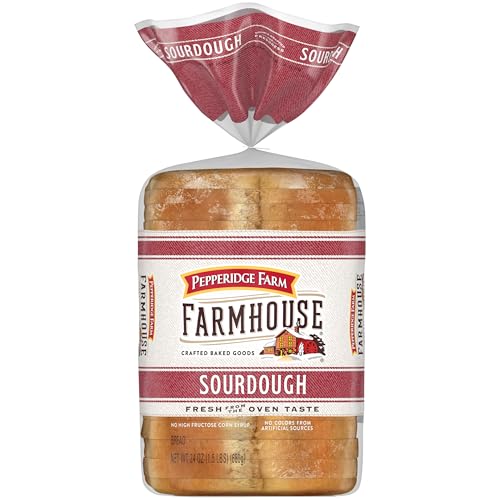
Sourdough bread: perfectly baked sourdough bread with classic flavor and farmhouse goodness in every slice
Assembling the Ham and Cheese Sandwich Stack
Start with the buttered side of the bottom slice down on the work surface, then spread the cheese evenly over the unbuttered side. Use cheese layering techniques that cover the entire slice, ensuring a uniform base for melt. Place the ham directly atop the cheese, employing ham stacking and positioning that spans the bread from edge to edge; two to four slices work, depending on thickness. Add a second cheese layer over the ham, again using cheese layering techniques for full coverage and to shield the meat from the top bread. Finish with the top slice, buttered side facing outward, ready for the pan. This precise order guarantees even browning, perfect melt, and structural integrity. For best results, consider using cheeses like white cheddar or muenster that melt evenly and create that ideal creamy texture. Spread the cream cheese on the opposite slice before assembling for extra moisture and flavor.
Low‑Heat Pan Setup for a Ham and Cheese Sandwich
When you set a pan to medium‑low heat and preheat it for about 30 seconds to a minute, you create the ideal environment for a grilled ham and cheese sandwich: the bread will toast evenly while the cheese has enough time to melt without burning. Choose a sturdy frying pan, ascertain the surface is clean, and place it on the stove. Let the pan reach a stable temperature; this guarantees even heat distribution across the cooking area. Lay the assembled sandwich flat, aligning the bread edges with the pan’s center for consistent contact—sandwich alignment prevents one side from over‑cooking. For the best results, apply mayo on the outside of your bread for superior browning and heat tolerance. After two minutes, flip, re‑butter if needed, and cover with a lid to finish melting the cheese while maintaining the golden crust. Use ½‑inch strips of ham and tomato for even layering.
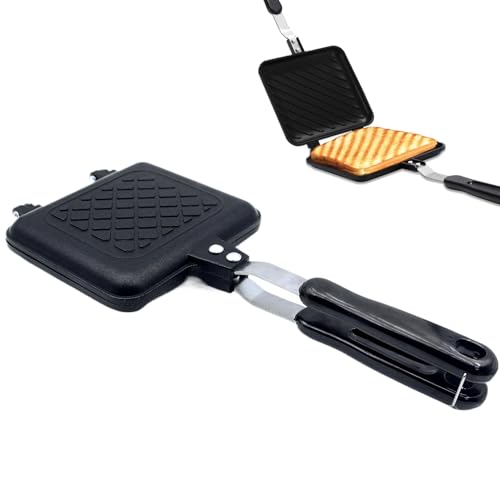
Our sandwich maker is made of high-grade aluminum alloy. The double sided pan can be heated on both sides, all connecting parts are securely fixed with double screws. It uses a non stick coating of double sided for easy release of food

High Quality Material: SOUJOY Sandwich maker is made of high quality aluminum alloy, each part is tightly connected and not easy to loosen, it is finished with non-stick coating which is convenient for cooking and effortless food release

Nonstick & Easy to Clean: The Switzerland ILAG nonstick coating is very effective in preventing anything from sticking to the surface, even with minimal oil, and also makes cleaning a breeze, just wipe it with a paper towel or rinse it with water. Free of PFOA and PFOS.
Butter the Bread for a Crunchy Ham and Cheese Sandwich
After the pan reaches a steady low‑heat, focus on the bread: butter the outer sides to build the crunchy crust. Choose high‑quality butter—unsalted for a neutral base or clarified for a higher melt point—so the crust browns without burning. Use room‑temperature butter for a smooth spread, or melt clarified butter and brush it with a pastry brush for an even film. Keep the butter application thickness thin; a light coat covers the entire exterior, including the crusty edges, without soaking the loaf. Aim for about one teaspoon per side of a sandwich, which equals roughly 1 tablespoon for two sandwiches. This thin, uniform layer guarantees a golden, crisp exterior while preserving the interior’s softness. If you prefer alternatives to butter, tasty substitutes like aioli and mayonnaise can create similarly crispy results with complementary flavors. The author is a self‑described butter freak who loves using butter as the star of every sandwich.

Brought to you by Whole Foods Market

1 pound of unsalted butter in 4 sticks (1/2 cup each)

Flipping & Covering the Ham and Cheese Sandwich
You’ll want to flip the sandwich once the first side turns a deep golden brown, then cover it to finish melting the cheese. Use the ideal flip technique: press a spatula firmly on top, lift the pan, and invert the sandwich onto the spatula. Slide the uncooked side back into the pan, keeping the buttered exterior in contact with the heat. Immediately apply covering during flipping—place a lid or heat‑safe dish over the pan to trap heat. Reduce the temperature to medium‑low; let the second side grill 2–3 minutes while the cover melts the cheese uniformly. This method prevents spillage, guarantees even browning, and yields a crisp, gooey interior. For leftover sandwiches, consider reheating in a 350°F oven to restore the crispness and melted cheese quality. Rest the sandwich 1–2 minutes before serving. The simplicity of using just two slices of bread and cheese makes this technique accessible to cooks of any skill level.
Typical Ham and Cheese Sandwich Mistakes
If you ignore the fundamentals—temperature, bread, butter, equipment, and heat distribution—you’ll end up with a soggy, bland, or burnt sandwich. One common mistake is incorrect cheese selection; using a cheese that doesn’t melt evenly leaves a rubbery interior while the crust browns. Pairing a high‑moisture cheese with high heat causes pooling, making the bread soggy. Another error is insufficient sandwich press; without firm, even pressure the layers shift, the cheese slides, and the crust fails to achieve a uniform golden hue. Skimping on butter adds dryness and can introduce water that steams the sandwich. For optimal results, consider using quality bread such as sourdough or thick-sliced Texas toast as your foundation. Finally, using a thin aluminum pan or low‑quality equipment leads to uneven heat, resulting in a half‑cooked, half‑burnt result. Evenly applying a layer of fat all the way to the edge of the bread ensures a perfectly crispy texture.
Cheese & Ham Variations for Your Sandwich
When you mix ham varieties with complementary cheeses, you instantly elevate a simple sandwich into a flavor‑rich experience. Choose cheese pairing options that melt evenly: sharp cheddar pieces, Swiss slices, or Colby Jack work well. Pair them with ham variety pairings such as honey ham for sweetness, smoked Virginia ham for depth, peppered ham for spice, spiral ham for texture, or thin‑shaved Black Forest ham for layered richness. Spread butter on the exterior for a golden crust, then layer thin cheese slices on both sides of the ham to lock in moisture. Use a hot pan or grill to melt the cheese while crisping the bread. The result is a balanced, melt‑rich sandwich that showcases each ingredient’s character without overwhelming the palate. For best results with smoked ham varieties, consume your sandwich shortly after preparation or store leftovers in airtight containers to maintain quality. Adding a thin slice of arugula provides a fresh, peppery contrast that brightens the overall flavor.
Serving, Resting & Pairing Your Ham and Cheese Sandwich
After the grill clicks off, let the sandwich rest for a minute or two so the cheese settles and the crust stays crisp. Transfer it to a cutting board, then slice diagonally for easy handling and a clean presentation. Keep temperature maintenance in mind: if you’re serving a batch, hold the sandwiches at 140 °F or higher in a low oven or warming drawer until you’re ready to plate. Aim for the ideal serving temperature, letting the interior reach 145 °F for at least 15 seconds to preserve meltiness. Pair each half with a bowl of baked potato soup or a tangy ketchup‑mayonnaise dip, or consider other classic soup pairings to balance the rich, cheesy flavor. For appetizer style, stack two halves, secure with a toothpick and basil leaf, and serve immediately. Use softened butter on the bread for an even crispier crust.
Troubleshooting a Burnt Ham and Cheese Sandwich
Excessive heat will char the bread before the cheese has a chance to melt, so keep the pan at medium‑low and test the temperature by sprinkling a few drops of water—if they sizzle and evaporate slowly, you’re in the right range. For troubleshooting burnt bread, start by using a thin, even butter layer and a non‑stick surface; avoid over‑buttering which pools and smokes. If the crust darkens, scrape the charred bits with a fork or peel them off with a knife, then slice the sandwich lengthwise to discard only the burnt edges. To recover from a burnt sandwich, re‑toast the salvaged pieces briefly, cover the pan briefly to melt cheese without extra heat, and press lightly to keep heat distribution even. This preserves up to 80 % of the sandwich. Grate the burnt cheese with a small‑setting grater to remove charred portions. Just as nonmetallic pads are recommended for cleaning grill surfaces without damage, use similar gentle tools when scraping burnt cheese to avoid scratching your cookware.


