
First, position the grill outdoors at least ten feet from any structure, clear a safety zone, and check hoses, extinguisher, and nearby combustibles. Open the lid, light a chimney starter, and arrange charcoal in a pyramid; monitor temperature with a lid thermometer and hand test. Scrub warm grates (250‑300 °F) using a stainless‑steel brush, apply a 1:1 vinegar‑water solution, then oil them lightly. Deep‑clean flame tamers, burners, and baffles with brushes and a mild degreaser, followed by a 20‑minute burn‑off. Empty ash, brush the drip pan, dry thoroughly, and coat firebox walls and side walls with high‑heat oil. Reassemble components, tighten bolts, and preheat with open vents. Continue for the full maintenance guide.
Prepare the Grill Safely and Check Temperature
Before you light the charcoal, position the grill outdoors at least ten feet from any building, overhang, or flammable material, then establish a clear safety zone free of children and pets. Perform fire hazard prevention by inspecting hoses for leaks, confirming the extinguisher is accessible, and clearing nearby combustibles. Open the lid before ignition, use a chimney starter, and avoid lighter fluid. For optimal results, arrange your charcoal in a pyramid shape before lighting to ensure even ignition. Once the coals ignite, conduct proper temperature monitoring: place a lid thermometer on the grate, then validate with the hand test—hold your palm five inches above the surface; 2–4 seconds indicates high heat (450–550 °F). Adjust airflow to reach the desired range, and maintain the safety zone while the grill preheats to the target temperature. Follow CDC guidance for safe outdoor cooking to reduce the risk of foodborne illness.
Scrub and Restore the Cooking Grates for a Clean Surface
When the grill’s grates are still warm—around 250–300 °F—scrub them immediately to loosen burnt‑on residue before it hardens. Use a stainless‑steel bristle brush or a sponge‑based scrubber; avoid wire brushes that shed metal. Apply a 1:1 white‑vinegar‑water solution for two minutes, then scrub vigorously. Rinse thoroughly, then coat the grates with a thin layer of oil to achieve seasoned grate protection. For stubborn deposits, spread a baking‑soda‑and‑dish‑soap paste, let it sit 45 minutes, and remove with a nylon‑bristle brush. If residues persist, perform a soaked grate restoration by immersing the grates in a vinegar‑baking‑soda bath for several hours, rinse, dry, and re‑oil. Maintaining your grill’s interior with a stainless steel sponge and degreaser will further prevent buildup of food residue and grease. This systematic approach guarantees a clean, protected surface ready for the next grilling session. Regular brushing after each use prevents flare‑ups and extends the grill’s lifespan.

EFFORTLESS CLEANING - Our Grill Brush for Outdoor Grill Quickly removes burnt on residue and quickly gets your grill clean. A great gift idea. Supports cleaning on hot surfaces up to a maximum of 250° F.
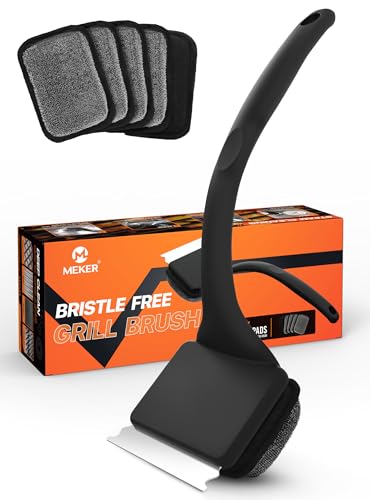
【ULTRA SAFE CLEANING】BBQ is a wonderful thing, but cleaning the grill can be a challenge! MEKER Grill Cleaner Brush can help you! Our grill cleaner brush ensures a bristle-free cleaning experience, eliminating the risk of swallowing dangerous metal bristles. Enjoy safe, worry-free grilling with our innovative design.
Bristle-free Safety: This grill brush features a patented stainless steel design with no loose wires or sharp edges, helping reduce the risk of broken grill brush bristle ending up in food. Designed with family health in mind, it offers a safer approach to BBQ cleaning.
Give Flame Tamers, Burners, and Baffles a Deep Clean
Now that the grates are clean and oiled, turn your attention to the flame tamers, burners, and baffles. Remove each flame tamer, inspect its underside for residue, and set it aside. Scrub with a stainless‑steel wire brush, then soak in a mild degreaser (e.g., Dawn) to remove stuck on grime. Rinse thoroughly, avoiding caustic or bleach cleaners. For a natural alternative, consider using baking soda and vinegar paste to break down stubborn grease without harsh chemicals. For burners, scrape exteriors one at a time with a grill brush, then brush tubes to clear grease from ports. Use a paperclip to unclog gas ports, wiping each with a damp rag to guarantee proper airflow. Finally, scrub baffles and deflectors with a stiff brush, scrape off any buildup, and reassemble. Perform a 20‑minute burn‑off to confirm a clean, functional heat‑distribution system. Regularly cleaning the flame tamers helps maintain even heat.

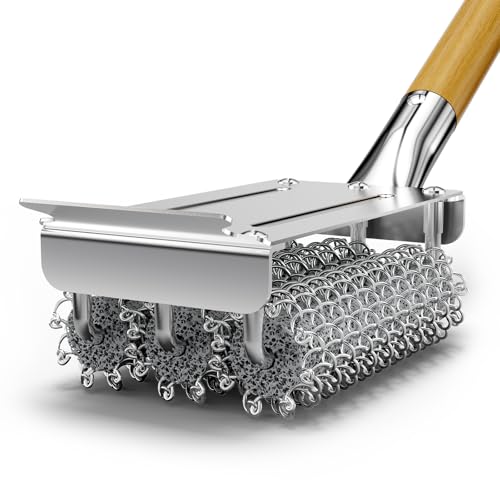
PRACTICAL: Wire brushes are ideal for removing paint stains, rust, welding slag,solder,scale, Great for remove corrosion and more from parts, equipment, machinery and other surfaces. Also great for cleaning threads, grills or tile.

[Safe Wire Brush & Scraper ] - Grill cleaning brush with sharp stainless steel grill scraper can easily scrub stubborn grease and dirt effortless. Our bbq brush tools reuseable after clean.It's also the perfect Father's Day gifts for dad, family, friends, and barbecue enthusiasts.

Extra Strong Ergonomic Handle - Still believe that as long as the bristles are stiff enough, the grill cleaning brush can live up to the name - a good barbecue brush? Of course not! A soft and sturdy handle with a stainless steel ring for hanging can make the clean work easier. No possibility such as the handle breaking up or snapped. You can succeed in using this BBQ cleaner for a very long time!
Remove Ash and Clean the Drip Pan to Prevent Corrosion
If you let ash and moisture linger in the grill bowl, corrosion will quickly develop on the drip pan and underlying metal. First, pull the ash tray or drip pan from under the fuel compartment and dump its contents into a metal container, heavy‑duty trash bag, or a non‑combustible aluminum bin. Spray the ash lightly with water to cool it, then seal the container for ash disposal safety. Next, use a metal scoop, dustpan, or small shovel to remove residual ash from the bowl; for fine particles, run a shop vacuum with a filtered wet/dry attachment. Brush corners with a medium‑bristled paintbrush, then wipe the pan with a damp cloth. Finally, inspect the pan for rust, dry thoroughly, and reinstall, completing ash corrosion prevention. To maintain your grates and prevent rust damage, consider regular cleaning and oiling as part of your grill maintenance routine. Mix cleaning solution in a spray bottle and shake well before each use to ensure the solution remains effective for most grill surfaces and safe for food‑contact areas.

12 oz (340g) Powder Cleaner for Stainless Clad Pots and Pans

Remove Stains & Tarnish: Bar Keepers Friend Cookware Cleanser & Polish is a kitchen stainless steel cleaner and degreaser for pots, pans and bakeware. This stain remover and glass cleaner cuts through heavy oil, hard baked-on food and rust stains

BURNT POT & PAN BOTTOM CLEANER – Formulated for blackened pot bottoms, scorched pan exteriors, baked-on grease and stubborn burnt residue. The thick cleaning paste targets heavy buildup caused by repeated high-heat cooking, especially on stainless steel cookware bottoms.
Brush and Protect the Firebox and Side Walls for a Clean Grill
After emptying the ash tray and drying the bowl, focus on the firebox walls and side panels. First, run the grill on high for 10‑15 minutes to burn off loose carbon, then let the temperature drop to 250‑300 °F. Using a stainless‑steel wire brush, scrub each firebox wall and side wall in a linear motion, removing residue and preventing corrosion. For stubborn spots, employ a brass‑bristle brush or a nail brush. Once the metal is clean and dry—use a leaf blower if needed—apply a thin coat of high‑heat cooking oil to maintain a seasoning layer and safeguard the surface. Avoid chemical damage by skipping caustic cleaners; stick to mild detergent only on removable components. Always ensure your grill is in a well-ventilated outdoor space to prevent gas accumulation during maintenance. Inspect the metal throughout to guarantee no corrosion begins. Disconnect the gas line before deep‑cleaning to ensure safety.
Wash the Grill’s Exterior and Lid Without Harming the Enamel
When you wash the grill’s exterior and lid, start with a warm, soapy solution—mix a few drops of dish soap into hot water and apply it with a soft sponge, moving the cloth with the grain of any stainless‑steel parts to avoid scratches. Work methodically across handles, knobs, and greasy zones, letting the solution loosen residue before you scrub. Rinse with a gentle stream of pressurized water, then immediately dry each surface using a microfiber towel to prevent water spots and streaks. For enamel coating preservation, wipe ash with a wet rag, avoiding abrasive pads, and finish with a dry rag to restore shine. Before cleaning, ensure your charcoal grill is completely cool by closing all vents to safely extinguish any remaining coals. Apply a dedicated exterior grill cleaner, follow with a damp rag, and seal with a dry rag to complete stainless steel maintenance and protect the enamel. Use a stiff wire grill brush to remove stubborn debris before applying the soap solution.
Inspect, Reassemble, and Store the Grill After Cleaning
Start by giving the grill a thorough visual and tactile inspection, confirming that every leg, hinge, bolt, and latch is stable, correctly aligned, and free of damage before you reassemble anything. Verify legs are straight and weld bolts sit flush; inspect feet for stability before reassembly. Check hinges, pins, and washers for wear, and guarantee lid hinges are properly aligned. Confirm the charcoal grate stopper engages its latch and that ash‑pan guides are clear. Reattach legs with M8 bolts, tighten hand‑first, then fully after base attachment. Install the bottom rack, axle, wheels, and end caps, aligning holes precisely. Slide the charcoal grate into the firebox, hook the stopper, and secure clips with M6 bolts. Close vents, tighten all hardware, cover the grill, and store it in a dry, elevated location. Ensure the right side of the firebox has its air vents correctly positioned before final assembly. After reassembly, preheat the grill with opened vents to verify that all components are functioning properly and heat distributes evenly throughout the cooking chamber.


