First, soak the grates in white vinegar overnight, then spray stubborn spots and sprinkle baking soda to fizz for 10‑15 minutes. Next, use a stiff wire brush on a stable surface, scrubbing both sides firmly and flipping the grate to reach every rung. Follow with coarse‑to‑fine aluminum‑oxide sandpaper (40‑80 → 120‑150 → fine) and apply stainless‑steel polish to seal the metal. Finally, coat the clean grates with a light layer of cooking oil and store them dry; continuing will show you how to prevent future rust and when to replace a grate.
Gather the Right Tools for Quick Rust Removal
One effective approach is to start with a stiff wire brush, which quickly strips rust from cast‑iron grates without excessive effort. You’ll then need a selection of abrasive cleaning pads for areas where bristles could damage the surface. Pair these with chemical cleaning agents such as non‑toxic rust removers or a PBW powder‑based washer to dissolve stubborn spots before scrubbing. For precise work, wrap sandpaper around each rung and rub firmly up and down, reserving this for the most heavily corroded sections. Keep a soft brush on hand to loosen flakes before applying the pads, and a cleaning rag to wipe debris after each pass. This toolkit guarantees rapid, controlled rust removal while preserving the grate’s integrity. Using vinegar and salt can further loosen rust before scrubbing.

PRACTICAL: Wire brushes are ideal for removing paint stains, rust, welding slag,solder,scale, Great for remove corrosion and more from parts, equipment, machinery and other surfaces. Also great for cleaning threads, grills or tile.

3pcs Wire Brush Set: Wire brush set includes stainless steel brush, nylon bristles and brass brush. These will be good for tackling most light duty jobs at hand particularly those requiring reaching small spaces

40% Denser & Ultra-Stiff Bristles – Solves “Too Soft” Brush Problems Each brush features 29 tightly-packed stainless steel bristle clusters (vs. 20 in common 7” brushes), engineered to cut through rust, grease, grime, and burnt-on oil with ease. The stiff, durable bristles resist bending and deformation, saving significant time and effort on heavy-duty cleaning. Ideal for tackling stubborn residue on air fryer baskets, grill grates, pellet stove burn pots, and oven wire racks.
Soak Grates in Vinegar for Deep Rust Penetration
You’ll soak the grill grates in white vinegar to let the acid penetrate and dissolve deep rust. Begin by placing the grates in a shallow pan, ensuring full submersion. Let them sit overnight; the low pH attacks heavy corrosion while preserving metal integrity. After 10 minutes, spray additional vinegar onto stubborn spots and sprinkle baking soda to trigger a vigorous fizz. This DIY vinegar soak method creates a baking soda paste reaction that loosens rust particles. Allow the mixture to bubble for 10‑15 minutes, then let the grates remain in the acidic bath for a total of 24 hours. This controlled exposure maximizes penetration without harsh chemicals, preparing the surface for subsequent mechanical cleaning. For light carbonization and charred food buildup, you can also use the onion rubbing technique as a chemical-free complementary method. Acidic marinades can speed up rusting, so ensure the vinegar solution is not overly concentrated.
Brush Rust off With a Wire Brush – Step‑By‑Step
The wire‑brush method removes surface rust quickly and prepares the grates for deeper treatment. First, detach the grates and set them flat on a stable concrete surface. Scrape loose debris with a grill brush, then grip a stiff wire brush, ensuring you maintain bristle count to avoid stray fragments. Slide the brush across the top side in a firm back‑and‑forth motion, applying controlled pressure to dislodge rust. Flip the grate, repeat on the bottom, and stand it on its side to reach between rungs. Inspect the brush regularly; replace it if bristles loosen. After brushing, wipe residual rust with an old rag, rinse, and dry thoroughly. For stubborn rust that wire brushing cannot remove, consider using sandpaper carefully to avoid damaging the grill surface. Finally, coat the grates with vegetable oil to protect the metal and minimize grate warping. The salt acts as a gentle abrasive to remove the rust.

[Safe Wire Brush & Scraper ] - Grill cleaning brush with sharp stainless steel grill scraper can easily scrub stubborn grease and dirt effortless. Our bbq brush tools reuseable after clean.It's also the perfect Father's Day gifts for dad, family, friends, and barbecue enthusiasts.

Extra Strong Ergonomic Handle - Still believe that as long as the bristles are stiff enough, the grill cleaning brush can live up to the name - a good barbecue brush? Of course not! A soft and sturdy handle with a stainless steel ring for hanging can make the clean work easier. No possibility such as the handle breaking up or snapped. You can succeed in using this BBQ cleaner for a very long time!

【The Safest Bristle Free Grill Cleaner】:No wire bristles at all, no melting like nylon grill brushes; With this safe grill brush and scraper, your food will stay 100% Bristle Free. No more worry about swallowing some metal pieces, Let's free to gobble up some favorite barbecue! Save your effort and time, let’s just have fun! (PATENTED design)
Pick Sandpaper or Stainless‑Steel Polish for Rust Removal
After brushing off the loose rust, you’ll need a more controlled abrasive or a polish to eliminate the remaining oxidation and restore a smooth surface. If the rust is light to moderate, select aluminum‑oxide sandpaper and progress from coarse to finer grits: start with 120‑220 grit for light spots, 80‑150 grit for moderate, and finish with 240‑320 grit for a uniform finish. Use long, even strokes under moderate pressure, allowing the abrasive to work without deep scratching. For heavy rust, begin with 40‑80 grit, then move to 120‑150 grit before the final fine grit. After sanding, wipe the area, then apply stainless steel polish to seal the surface and protect against future rust corrosion. Ensure proper ventilation while working to avoid inhaling dust particles. Regular maintenance and protective sealing will help preserve your grill’s structural integrity and prevent the costly repairs that can result from prolonged rust damage.

24PCS SANDPAPER SHEETS 9x11: 4 sheets each of 120, 150, 180, 240, 320 grit, and 2 sheets each of 400 and 600 grit. Covers everything from aggressive material removal to high-gloss polishing. Coarse grits for shaping and stripping, medium grits for smoothing and prepping, fine grits for final finishing on paint, wood, and plastics. Perfect for drywall, woodworking, and general automotive workshop projects.
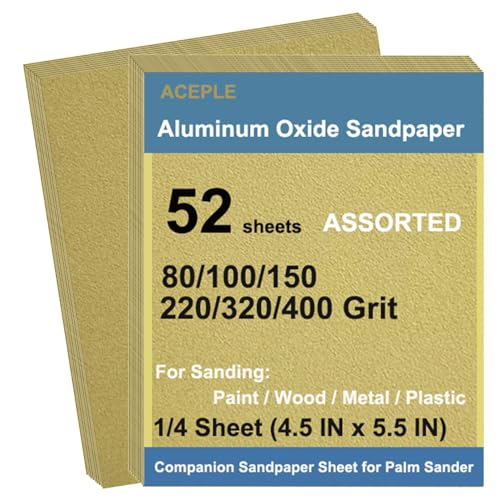
[❤️Convenient Pack] Perfect selection of grits from coarse to fine, including 8 sheets of each grit: 80/100/150/220 and 10 sheets of each grit: 320/400, total 52 sheets - Switching between different grits for different stages of your projects without having to make multiple purchases or run to the store.

Use it by hand, on a sanding block, or cut it to size for a power tool sander
Preheat & Burn‑Off to Aid Rust Removal From Grill Grates
When you preheat the grill to about 350 °F, the lingering heat burns off surface rust and begins seasoning the grates, making subsequent cleaning far easier. First, fill the fire bowl with lump charcoal, insert fire starters, and ignite with a torch. Allow coals to gray for ten minutes, then spread them evenly using a grate lifter. Position the cooking grates, close the hood, and set the top damper to three and the bottom damper one, maintaining a steady preheat intensity of 350 °F for twenty minutes. This burn‑off phase oxidizes rust particles and creates a protective layer. After the timer expires, let the grill rest for a defined cooling duration before scraping with a bristle‑free brush to remove loosened debris. For comprehensive grill maintenance, consider soaking grates in soapy water to loosen stubborn grime that may remain after the initial scraping. This methodical cycle repeats each use to keep rust at bay. Season the grates with a light coating of cooking oil before preheating.
Season Your Grill: Easy Oil Routines for Iron & Stainless
If you want a durable, non‑stick surface on both iron and stainless grill grates, start by selecting a high‑smoke‑point oil and applying it in a thin, even coat before heating the grill to the oil’s smoke temperature. Choose canola, grapeseed, peanut, sunflower, or avocado oil; all have smoke points 420‑500 °F and neutral to mild flavors, which supports seasoning for longevity while avoiding strong flavors. For iron, brush off rust, then oil the grate, heat to smoke, and repeat 5‑6 cycles, letting each coat polymerize fully. For stainless, apply a single thin layer, heat to the oil’s smoke point, and cool. Maintain the barrier with occasional thin coats after each use, never over‑applying, to preserve a clean, non‑sticky surface. Proper seasoning also extends the grill’s lifespan by preventing rust and wear.
Dry, Store & Cover Grates to Prevent Future Rust
Seasoning gives you a protective film, but without proper drying, storage, and covering the film can’t do its job and rust will form. First, wipe each grate with a dry cloth or paper towel immediately after cleaning, then run the grill on low heat for five minutes to evaporate residual moisture. Use a dry brush for a final pass, confirming no wet spots remain. Store grates off damp surfaces; elevate them or place them indoors in a low‑humidity area to maintain temperature control and minimize humidity exposure. For long-term protection, apply high-smoke point oil as a final seasoning layer before storage. Cover the grill with an all‑weather, waterproof, breathable cover after it cools completely. Inspect the cover regularly for tears and replace if needed, ensuring the barrier remains intact against moisture ingress. The porous nature of cast iron allows moisture to be absorbed quickly, accelerating rust formation.
Fix Common Rust Problems & Know When to Replace a Grate
Even before you start scrubbing, identify the grate material—cast iron, stainless steel, or porcelain‑coated—because each requires a specific rust‑removal technique and the wrong tool can exacerbate corrosion. For cast iron, use a wire brush or grinder wheel; for stainless steel and porcelain‑coated, a soft brush prevents scratches that accelerate rust. Apply a thick baking‑soda paste, let it soak ten to fifteen minutes, then scrub with aluminum foil or a non‑metallic brush. For stubborn spots, spray vinegar, sprinkle baking soda, and let the fizz lift rust; repeat with lemon juice if needed. After cleaning, rinse thoroughly and dry completely to protect the chromium oxide layer that provides corrosion resistance. Inspect for deep pitting, metal thinning, or loss of seasoning—these signs demand replacement rather than further maintenance. Proper rust prevention and regular maintenance extend grate life. Rust can negatively impact flavor.