Grill your brats for 12‑22 minutes, flipping often, until a meat thermometer reads a steady 160 °F (71 °C) inside. Preheat the grill first so the grates are hot enough to sear, then use direct high heat for thin links and a two‑zone setup for thicker ones. Keep the temperature consistent, avoid pressing the sausages, and let them rest 5‑10 minutes before serving. Master these steps and you’ll uncover even more tips for perfect brats.
Grill Brats in 20 Minutes – Quick Answer
If you crank the grill to 450‑500 °F and keep the lid open, you can sear raw brats in about 8‑10 minutes, turning them frequently to avoid bursts, and they’ll hit the safe 160 °F internal temperature in roughly 20 minutes total. This method is the core of perfecting grill timing: high‑heat, direct exposure creates a charred crust while the interior stays juicy. Flip every two minutes, watch for flare‑ups, and pull the brats as soon as the thermometer reads 160 °F to prevent overcooking. The open lid lets steam escape, preserving texture. If you prefer a milder flavor, switch to a medium‑heat, closed‑lid zone after the initial sear, but keep the total time near twenty minutes to stay safe and flavorful. Using an instant-read thermometer ensures you avoid undercooking or overcooking your brats to exact precision. Aim for a 70/30 lean‑to‑fat ratio to ensure juicy, flavorful brats.
Why 160°F Is the Safe Temp for Grilling Brats
One key reason you must hit 160 °F (71 °C) when grilling brats is that the USDA and FoodSafety.gov set that temperature as the minimum to kill harmful bacteria like Salmonella and E. coli in ground pork. This ideal temperature range guarantees pathogen destruction while preserving moisture. Use a digital thermometer, inserting it horizontally into the thickest part without piercing the casing, for precise doneness verification. Remove the sausages at about 155 °F; carry‑over heat will lift them to the safe 160 °F during a 3‑5‑minute rest, preventing overcooking. Skipping the thermometer leaves you guessing, and visual cues can’t confirm safety. Consider using quality smokewood to enhance the flavor profile of your grilled brats. Consistently hitting 160 °F meets USDA standards, eliminates food‑borne risk, and delivers reliably juicy brats. Proper temperature control is essential for both safety and flavor.
How to Time Your Gas Grill for Perfect Brats
Mastering the timing on a gas grill means preheating to a steady 300‑350°F, oiling the grates, and using a low‑heat zone for the first 10‑15 minutes while you turn the brats every 5 minutes. Start by optimizing preheat process: set burners to medium‑low, close the lid, and let the grill reach the target range before placing the brats. Maintaining consistent grill temperature prevents casing splits and safeguards even cooking. After the initial phase, move the brats to a high‑heat side once they hit 145°F internally, then sear for 2‑5 minutes until 160°F is reached. For best results, allow the internal temperature to guide your cooking progression as you approach the final stages. Flip with tongs every 2‑5 minutes, rotating for uniform caramelization. Total time should hover around 15‑20 minutes, depending on thickness. Frequent turning ensures the casings stay intact and the heat distributes evenly.
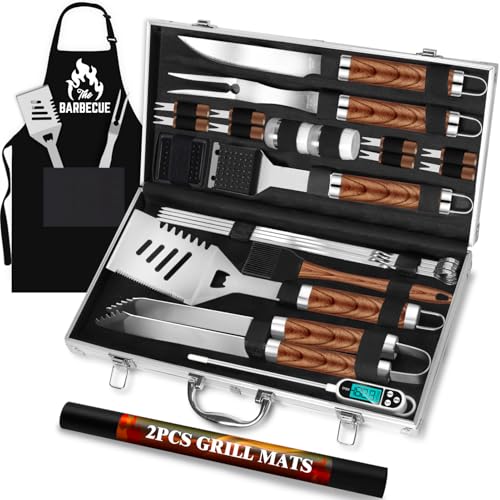
【MOST COMPLETE AND VERSATILE BARBECUE SET】:Our 26pcs professional grill utensils set includes nearly everything you need for a barbecue. 1* Slotted spatula, 1*Fork, 1*Tongs,1*Knife,1*Basting brush,1*Meat thermometer,1*Grill brush, 1*Extra cleaning head,1*Cooking Apron,2*Shakers for pepper & salt,2*Grill mats, 4*Skewers, 8*Corn holders,1*Aluminum case for easy storage.

【ESSENTIAL & FUNCTIONAL BBQ ACCESSORIES SET】:RINPIR 31pcs grilling accessories set comes with all the professional tools needed to start a barbecue hobby, including 1*Multi-purpose Spatula, 1*Locking Tongs, 1*BBQ Fork, 1*BBQ Knife, 1*Basting Brush, 1*Stiff-bristled Grill Brush, 1*Meat Thermometer, 1*Grill Mat, 2*Shakers for pepper & salt, 4*BBQ Skewers, 8*Corn Holders, 8*Hooks for Hanging Utensils, 1*Durable zipper bag.

Complete Grilling Set: The BBQ tools have 4 in 1 spatula, meat fork, power tongs, meat injector, meat thermometer, cleaning brush, extra brush head, 8 corn holders, salt and pepper shakers, knife, basting brush, 4 BBQ skewers and aluminum case
How to Time Your Charcoal Grill Using a Two‑Zone Setup
Set up a two‑zone charcoal grill by lighting a chimney of 12‑15 briquettes, letting them turn white, then dumping them onto one side of the grill while leaving the opposite side empty for indirect heat. Open the bottom vents fully, then adjust them to keep the hot zone at 350‑450 °F and the cool side around 250‑300 °F. Use the top vents over the cool side to draw smoke past the meat and out the exhaust. Place the brats on the indirect side, close the lid, and turn them every few minutes for 15‑18 minutes until they reach 155 °F. When the internal temperature is right, slide the brats to the hot side for a brief, high‑heat finish, applying controlled temperature regulation and consistent searing techniques to achieve a crisp snap without splitting. Adjust the airflow as needed to maintain a steady temperature, ensuring the heat zone stays consistent throughout cooking. Preheating the grill with opened vents ensures even cooking temperature across both zones.
Charcoal Flavor on Your Gas Grill: Transform part of your gas grill into a charcoal-powered cooking zone for bold, smoky flavor—perfect for anyone upgrading their grill accessories for outdoor grill setup or enhancing their charcoal bbq experience.

AMERICA’S TEST KITCHEN BEST CHARCOAL GRILL ACCESSORY (2021): The Slow ‘N Sear is the only charcoal basket independently tested and ranked #1 by America’s Test Kitchen. No advertising, no paid placement — just head-to-head testing against every competitor on the market. SnS Grills' products are backed by 11 patents, no imitation can replicate the engineering that earned that recognition.

Premium Charcoal Basket for Weber Kettle & Charcoal Grills: Heavy-duty charcoal FireBasket designed for Weber kettles, kamado-style grills, and other charcoal BBQ smokers. Perfect for indirect cooking, heat management, and high-performance backyard grilling.
Two‑Zone Method: Low‑and‑Slow Then High‑Heat Sear
After you’ve established the two‑zone charcoal layout, the next step is to apply the low‑and‑slow then high‑heat sear sequence. Place fresh brats on the cool side and close the vents; let them cook indirectly for 15‑20 minutes, keeping the temperature around 225‑250 °F. This low‑and‑slow phase gives you cooking temperature flexibility and guarantees the interior reaches 160 °F without drying. For added flavor and to firm up the casings, consider parboiling the brats in beer or broth for 10-15 minutes before grilling to prevent bursting. When the internal heat is near target, shift the brats to the hot zone. Sear each side for 2‑3 minutes until a crisp crust forms, locking in juices and achieving desired texture. For precooked brats, reduce the indirect time to 8‑10 minutes and sear 3‑5 minutes, following the same temperature‑control principles. The two‑zone method also prevents flare‑ups by providing a cooler zone for excess fat to drain away.
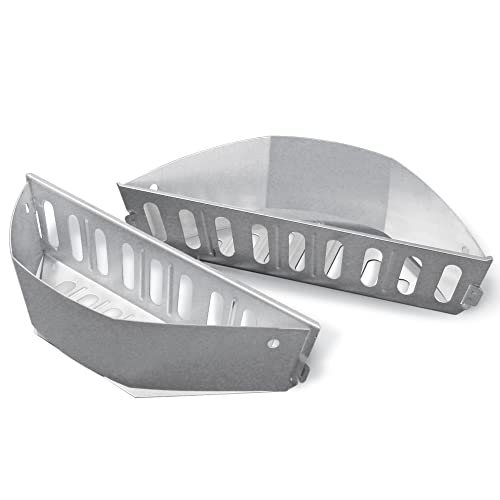
Fit up to 10 regular-sized briquettes in each charcoal holder

The Weber Jumbo Joe Premium Charcoal Grill has a durable-plated, steel cooking grate, crafted from premium steel for enhanced durability; Cooking grate offers a resilient surface that stands up to the demands of frequent grilling
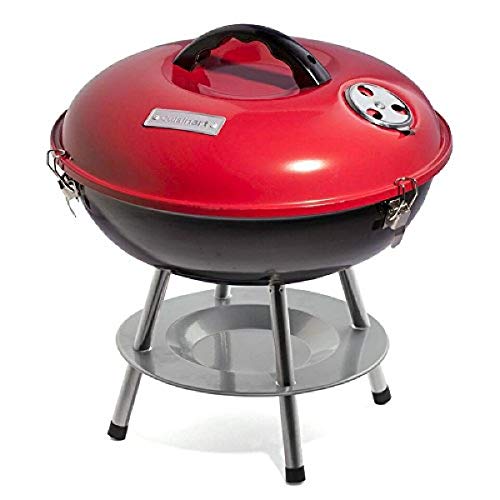
SPACIOUS COOKING: This small charcoal grill features a 196 sq. in. chrome-plated grate resists rust and makes cleaning quick and easy.
Parboil Brats for Even Cooking – When & How
If you want perfectly cooked brats without a burnt exterior, parboiling them first is the most reliable method. Choose a gentle boil with beer, onions, and a pinch of salt, then submerge the brats. Choosing right parboiling duration means simmering 10–12 minutes until the internal temperature reaches 145 °F; this tightens the casing, locks in moisture, and infuses flavor. While the liquid simmers, monitor internal temperature during parboil with a probe—don’t exceed 150 °F or the casing may become rubbery. After the timer, pat the brats dry and grill 2–3 minutes per side for a crisp snap. Avoid puncturing the sausages; the pre‑cooked interior will stay juicy during the final sear. Boiling the brats in beer also adds an extra layer of flavor.
Top Overcooking Mistakes and How to Fix Them
Even after a perfect parboil, many home cooks still ruin their brats by overcooking them on the grill. High heat bursts casings, leaving a burnt shell and raw interior; switch to medium heat (≈350 °F) or use indirect heat after a quick sear. Apply proper searing techniques for a crisp exterior, then finish gently. Skip the guesswork—insert a thermometer into the thickest part, avoid the casing, and pull the brats at 5 °F below the safe 160 °F (or 165 °F for poultry). Overcrowding traps moisture and steams the meat; cook in batches with space between links. Sausage docking methods, like pin‑hole docking, release steam without draining juices. Finally, rest the brats in a beer bath for a few minutes to offset carryover cooking and lock in moisture. Using a meat thermometer ensures the brats reach the proper internal temperature for safety and juiciness. For best results, maintain consistent heat control by preheating your grill to the target temperature before placing your brats on the grates.


