
Preheat your grill to 450 °F, then drop it to a steady 400 °F. Pat the steak dry, season lightly, and let it sit at room temperature for 15 minutes. For a 3/4‑inch cut, grill 4 minutes on the first side and 2‑3 minutes on the second for rare, 4 / then 3 minutes for medium‑rare, or 5 minutes then 3 minutes for medium. Use an instant‑read thermometer, pull the meat 5‑10 °F below your target, and let it rest; the next sections will show how to adjust times for thicker cuts and perfect the sear.
Core Grill Times for a 3/4‑Inch Steak at 400°F
When you fire up a grill to 400 °F, the 3/4‑inch steak cooks quickly enough that you can treat each side almost like a timed sprint. First, achieve an ideal grill setup: preheat to 450 °F, then dial back to medium heat (≈400 °F) before the steak hits the grates. Proper meat prepping matters—pat the steak dry, season lightly, and let it rest at room temperature for 15 minutes. For rare, sear side 1 for 4 minutes, flip, and finish side 2 in 2 minutes; for medium‑rare, keep side 1 at 4 minutes, side 2 at 3 minutes. Medium requires 5 minutes on the first side and 3 minutes on the second. Well‑done calls for 7 minutes then 5 minutes. Remove the steak when internal temperature matches your target, then let it rest five minutes before serving. Consider using a reliable meat thermometer to monitor doneness throughout the cooking process. Grill heat should be reduced to medium before cooking.
Adjusting 400°F Timing for 1‑Inch and 1½‑Inch Steaks
Three‑inch steaks at 400 °F need about 5–6 minutes per side for medium‑rare, while 1½‑inch cuts require roughly 6–7 minutes on the first side and 5–6 minutes on the second. For a 1‑inch steak, aim for 5–6 minutes per side for medium‑rare, adding a low heat extension of 1 minute total if you prefer a gentler sear level adjustment. A 1½‑inch steak follows the 1¼‑inch chart: start with 6–7 minutes on side 1, then 5–6 minutes on side 2, tweaking the sear level adjustment by a minute if the crust looks too dark. Use an instant‑read thermometer, pull the steak 5–10 °F below target, and let carry‑over cooking finish the job. Preheat grill to 450‑500°F for a proper sear before lowering to 400°F.
Why 400°F Works So Well for Searing and Finishing
Sear your steak at 400 °F and you hit the sweet spot where the Maillard reaction ignites without draining moisture. At this temperature the amino‑acid and sugar chemistry accelerates, producing the rich, meaty aromas that define a great steak. The 400‑500 °F band sits squarely in the Ideal searing temperature range, delivering enough heat to trigger the reaction while avoiding the burn‑risk of 930 °F+. You’ll see a deep brown crust and a pronounced flavor profile, yet the interior retains its juiciness because moisture loss is minimal. This balance yields the Flavor generation benefits that make the sear‑first method both fast and delicious, letting you finish the steak in the oven without sacrificing texture or taste. For best results, allow your steak to come to room temperature before grilling to ensure even cooking throughout. Using a high‑smoke‑point oil further ensures the surface crisps without burning.

Graza Frizzle Oil Made from 100% Olives: A neutral-flavored, high heat cooking oil made from 100% peak harvest olives. With a smoke point of up to 490 degrees, Frizzle is your high-heat kitchen hero. 1 bottle/750ml.

Light Buttery Flavor That Elevates Every Meal: Algae Cooking Club Chef-Grade Algae Oil enhances every dish with subtle richness. Its neutral profile makes it ideal for searing, baking, and dressings, transforming everyday meals into gourmet experiences.

100% GRAPESEED OIL BULK SIZE: Expertly crafted by The Olive Oil People using wine grape seeds imported from France
400°F Steak Timing Chart for Rare to Well‑Done
You’ll find the timing chart below translates the 400 °F grill heat into concrete per‑side minutes for each doneness level, adjusted for steak thickness. For a ¾‑inch cut, aim for 4 min on the first side and 2–3 min on the second side for rare, 4 min/3 min for medium‑rare, 5 min/3 min for medium, and 7 min/5 min for well‑done. A 1¼‑inch steak needs roughly 5 min/4 min (rare), 6 min/5‑6 min (medium‑rare), 7 min/5‑6 min (medium), and 9 min/7‑8 min (well‑done). Use proper steak thickness selection to match these intervals, and maintain ideal searing conditions by pre‑heating the grill to a steady 400 °F before placing the meat. This guarantees consistent heat transfer and the desired interior temperature without overcooking. The surface temperature must reach at least 285 °F to trigger the Maillard reaction.
Using a Meat Thermometer at 400°F to Verify Doneness
The timing chart gives you exact searing windows, but the only way to safeguard those windows hit the desired doneness is to check the steak’s internal temperature with a meat thermometer. You’ll insert the probe into the thickest part, avoiding bone or fat, which ascertains proper thermometer placement and prevents temperature loss. Use an instant‑read model, checking as often as needed without piercing the juices. Aim for the target range: 120‑130 °F for rare, 130‑140 °F for medium‑rare, and 140‑150 °F for medium, pulling the steak 5‑10 °F below the final goal to account for carryover. Verify the reading in multiple spots, then let the steak rest so juices redistribute and the temperature stabilizes. For even better results, consider butter basting during the final stages to enhance flavor and crust development. This method delivers consistent, precise doneness at 400 °F. Oven baking can be a game changer for achieving both tenderness and flavor.

2.0 inches large auto-rotating backlit display: Digital food thermometer has a 180° auto-rotating backlit display, making this kitchen thermometer perfect for left-hand users and allows you to use it in low light conditions

【8X Faster + 4X More Precise】: Upgraded with an industrial-leading professional thermocouple sensor, Themomonster meat thermometer digital with NIST certified ±0.5℉ precision provides you the accurate temperature of your food in just 0.5 Seconds.

【Ultra-Fast & Precision Accurate】This meat thermometer digital delivers accurate readings within ±1°F/±1°C in just 2–3 seconds, with a wide temperature range of -58°F to 572°F (-50°C to 300°C). No more waiting over the heat - know your food's exact temperature instantly.
Typical Timing Slip‑Ups and Quick Fixes at 400°F
When you grill a steak at 400 °F, the most common timing slip‑ups stem from treating every cut as if it were the same thickness, which quickly leads to over‑ or undercooking. You’ll overcook a 3/4‑inch piece by searing 5 min on side 1 and 3 min on side 2, while a 2 ¼‑inch steak needs 14 min then 12‑13 min to avoid well‑done. Ignoring thickness, flipping late, and failing to monitor grill temperature all amplify error. Quick fixes: measure thickness, set a per‑side timer, flip at the exact interval, then move the steak to an indirect zone and finish at 300‑350 °F. Managing heat flux with a lid and a stable zone keeps the interior even and prevents surprise doneness. For the most accurate results, choose an instant-read thermometer to verify the internal temperature matches your desired doneness. Use a meat thermometer to verify the internal temperature matches your desired doneness.
Reverse‑Sear vs. Direct‑Grill at 400°F: When to Choose Each
I’ll break down when to pick a reverse‑sear versus a direct‑grill at 400 °F, focusing on cut thickness, time constraints, and desired crust. If you have a steak over 1.5 inches—ribeye, tomahawk, porterhouse—lean on reverse sear benefits: indirect low‑heat cooking to 10‑15 °F below target, then a 1‑2‑minute high‑heat blast. This yields uniform pink, maximum moisture, and a smoke‑infused crust without a gray band. For thinner cuts like skirt or flank, or when you’re short on minutes, the direct grill tradeoffs win: start with a 2‑3‑minute sear at 450‑600 °F, rotate for diamond marks, then finish indirect if needed. Like brisket, steak benefits from resting after cooking to allow muscle fibers to reabsorb juices. Choose reverse for precision and thickness; choose direct for speed and bold crust. Direct grilling over a moderate wood fire provides authentic Santa Maria flavor.
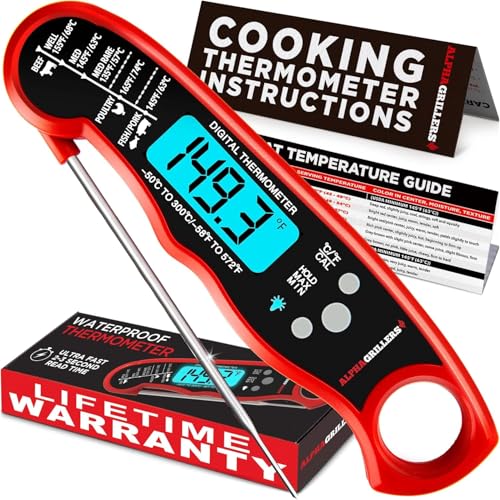
Instant Read Food Thermometer | Our instant read thermometer features a temperature probe and advanced, highly accurate technology with 1-2 seconds response time; Instructions, meat temperature chart, comes pre-calibrated for your convenience, and recalibrating feature if needed.
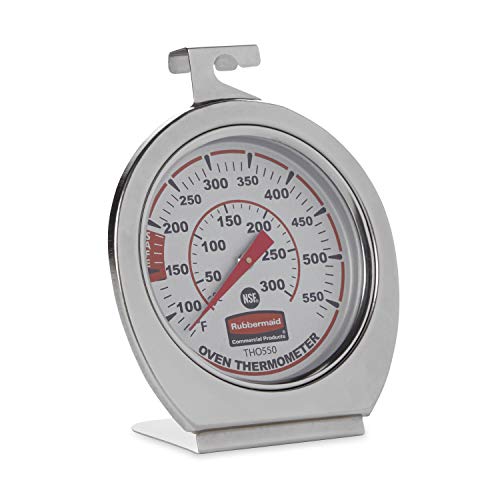
FOOD SAFETY: Thermometer displays true oven temperature instantly to ensure safe food preparation

Smart Display Base with Control: The ThermoMaven G1 wireless meat thermometer features a versatile smart display base that offers real-time temperature readings and allows you to set temperatures directly on the device—no app required. With our user-friendly one-click setup, you can connect the probe, pair it with the base, and start cooking in seconds—no complicated setup needed!
Resting the Steak After a 400°F Cook: How Long and Why It Matters
After you’ve decided whether a reverse‑sear or direct‑grill best fits your 400 °F steak, the next step is letting it rest. Resting lets tightened muscle fibers relax, reabsorbing juices and preventing a dry slice. During the resting duration effect, internal temperature rises 5‑10 °F, so pull the steak 5‑10 °F below your target doneness to account for carry‑over cooking. For a 6‑8 oz cut, aim for 5‑7 minutes; a 1.5‑2‑inch thick piece needs 8‑12 minutes, and larger cuts may require 15 minutes or more. Tent loosely with foil, avoid tight covering, and keep the crust intact. This temperature redistribution guarantees even doneness, juiciness, and flavor retention. Heat moves from the outside of the meat into the center, helping the juices redistribute uniformly. Proper resting also complements the flavorful crust you’ve developed during the searing process, ensuring that all your grilling effort results in a perfectly cooked steak.