First, pat your steak dry, season it generously with salt and pepper, then let it sit on a wire rack exposed in the fridge for a few hours to develop a dry‑brine. Preheat a two‑zone grill: keep one side at 200‑300 °F for indirect cooking and heat the other side until the grates are scorching hot. Cook the steak indirect until its internal temperature hits about 115 °F, then move it to the hot side. Brush it with a high‑smoke‑point oil infused with thyme, garlic, and peppercorns, and sear each side 1‑2 minutes until a deep, crunchy crust forms. Let it rest 5‑10 minutes, tented with foil, before slicing across the grain. Continue on for the full reverse‑sear method.
Set the Grill for the Ideal Reverse‑Sear
When you set up the grill for a reverse‑sear, start by creating two distinct zones: a low‑heat indirect side and a scorching direct side. Bank coals on one side of a charcoal grill or set half the burners low‑medium on a gas grill to hold 200‑300°F on the indirect zone. Light a few coals, the Minion method, for a steady low‑and‑slow burn. Place the steak’s fat side toward the heat source on the cool side, season generously, and let it rest 20 minutes. Close the lid and monitor internal temperature; the cooking time will be 45‑60 minutes until you’re 10‑15°F below target. This two-zone approach helps maintain moisture and avoid the gray band of overcooked meat that can occur with single-temperature grilling. Then crank the direct zone to its highest searing temperature, open the lid, and prepare for a rapid 1‑2‑minute sear per side. Use a meat thermometer to ensure precise doneness.
Pick the Best Steak Cut and Thickness for Grilling
Choosing the right steak cut and thickness is the foundation of a perfect grill. For high‑heat searing, prioritize ribeye, New York strip, or porterhouse because their marbling yields robust flavor and juiciness. If tenderness is paramount, filet mignon or flat‑iron deliver melt‑in‑mouth results, while flank, hanger, or inside‑skirt provide lean, intense beef when sliced thin against the grain. Aim for at least 2 inches of thickness; thicker cuts (2‑3 inches) create a pronounced crust while keeping the interior moist, satisfying ideal thickness considerations. Remember that quality grade importance cannot be overstated—Prime or Choice grades guarantee the fat distribution needed for a superior sear. Let the steak come to room temperature before grilling to ensure even cooking throughout. Select a cut that matches your flavor, tenderness, and thickness goals before you fire up the grill. Marbling is a key indicator of flavor and juiciness.
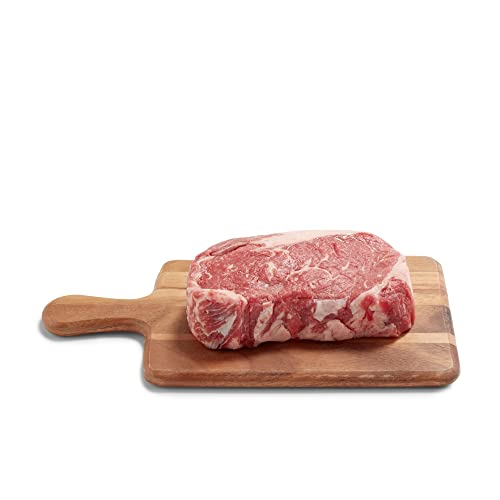
100% grass-fed

One value pack of boneless beef ribeye steak weighing between 1 and 2.4 pounds

This item is only available for delivery or pick-up between 9am and 10pm
Season and Rest Your Reverse‑Sear Steak
A solid reverse‑sear starts with a dry, well‑seasoned surface: pat the steak thoroughly with paper towels, then coat every side generously with coarse salt, cracked pepper, and, if you like, a blend such as Holy Cow BBQ Rub. After seasoning, place the steak on a wire rack over a sheet tray and refrigerate exposed for 2‑24 hours. The dry‑air environment evaporates surface moisture, sharpening the crust and allowing the rub to penetrate. When you’re ready to grill, monitor the internal temperature with a probe, aiming for about 115 °F before the final sear. This precise temperature monitoring lets you control sear timing, ensuring a perfect, caramelized exterior without overcooking the interior. The low‑temperature cooking phase softens the fat and enhances juiciness. Allowing the steak to reach room temperature before searing helps ensure even cooking throughout the meat.
Create a Two‑Zone Grill for Precise Temperature Control
Two‑zone grilling gives you a hot direct side for searing and a cooler indirect side for gentle cooking, letting you finish a reverse‑sear steak without overcooking the interior. Set up a gas grill by lighting burners on one side only; keep the opposite side off to create a searing temperature variations. Adjust the flame to reach 500‑550°F on the hot side while the indirect zone stays around 250‑300°F. For charcoal, use a chimney starter, fill it two‑thirds, and dump the ashy coals onto one half of the grill. Arrange a half‑moon deflector or coal separator to maintain a sharp gradient—this is the ideal charcoal configuration. Fine‑tune vents in small increments, monitor ambient heat with a dome thermometer, and keep the lid closed once the steak hits the sear zone. Direct heat grilling creates a high‑temperature surface that quickly forms a flavorful crust. This two‑zone approach complements the reverse sear method by allowing you to move steaks between zones to achieve precise temperature control throughout the cooking process.

BBQ charcoal pit temperature gauge with large degree scales and numbers , easy to read even from far away.
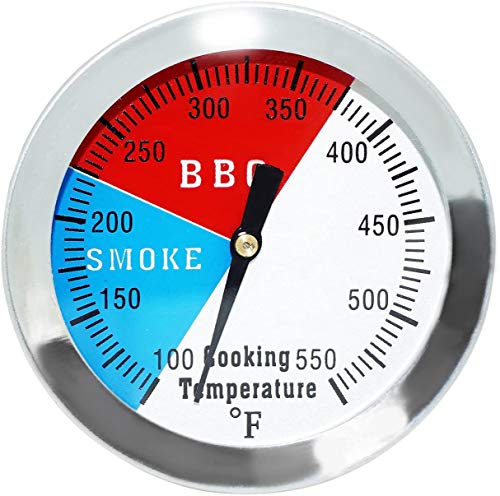
2" BBQ grill smoker pit thermometer stainless steel thermostat pit temp gauge

Check Steak Temperature With a Reliable Thermometer
Ever wondered how to guarantee perfect doneness on the grill? You achieve consistent internal temperatures by utilizing a digital food thermometer that reads instantly and accurately. Insert the probe into the thickest part of the steak, avoiding bone and fat, and read the temperature through the side. Aim for 120–129 °F for rare, 130–134 °F for medium‑rare, 135–144 °F for medium, 145–154 °F for medium‑well, and above 155 °F for well‑done. Remember that USDA requires a minimum of 145 °F for safety, and certified Angus recommends a 3‑minute rest after reaching target. Account for weather, altitude, and grill hot spots by checking the reading a few seconds before you pull the steak off the grill. For best results, grill your steak at higher temperatures between 450–500°F to achieve a better sear and flavor development. This precise method locks in juiciness and texture every time. Carryover cooking can raise the internal temperature by 5‑10 °F while the steak rests.

【Fast & Accurate】Our meat thermometer digital delivers accurate readings within ±1°F in just 1–2 seconds, with a wide temperature range of -58°F to 572°F (-50°C to 300°C). No more waiting over the heat - know your food's exact temperature instantly.

Instant Read Meat Thermometer | Our instant read thermometer features a temperature probe and advanced, highly accurate technology with a 1-2 second response time. Our instant read food thermometer comes pre-calibrated with instructions and a meat temperature chart, plus a recalibration feature if needed.

【8X Faster + 4X More Precise】: Upgraded with an industrial-leading professional thermocouple sensor, Themomonster meat thermometer digital with NIST certified ±0.5℉ precision provides you the accurate temperature of your food in just 0.5 Seconds.
Move the Steak to Direct Heat for the Final Reverse‑Sear
When the steak’s internal temperature is about 10–15 °F below your target, slide it onto the grill’s hot zone—whether that’s a 450‑500 °F direct‑heat side or a preheated cast‑iron skillet—and let the sear begin. Position the steak on the lowest rack or directly on the grates to maximize contact, and keep the lid open so the crust forms unimpeded. Monitor the thermometer closely; a cooking time adjustment of 2–3 minutes per side usually suffices, but thicker cuts may need a brief extra minute. If you notice the surface browning too fast, lower the searing temperature variation slightly to avoid burning while the interior catches up. Flip once halfway through, then remove when the target internal temperature is reached. After searing, allow the steak to rest so that carryover cooking completes and juices redistribute throughout the meat. Low‑and‑slow cooking infuses the meat with smoke before the final high‑heat sear.
How Long to Sear Each Side for a Crusty Reverse‑Sear?
How long should you sear each side to achieve a crusty reverse‑sear? You’ll want about 1.5–2 minutes of direct heat per side, flipping every 30 seconds for even Maillard development. Preheat the grill to 450–500 °F, then place the steak in a blazing‑hot cast‑iron skillet. Maintain sear timing precision by using a wireless thermometer; watch for the internal temperature to climb from 105‑110 °F to 130 °F. During the 4‑minute total sear, monitor each side’s crust color and flip consistently. This reverse sear monitoring technique prevents grey outer rings and guarantees a uniform, crunchy brown surface. After the final flip, let the steak rest ten minutes before slicing, which allows residual heat to finish the cooking process for optimal juiciness. Thick‑cut steaks require the low‑and‑slow pre‑cook step to ensure even doneness.
Add Aromatics and Oil While Searing
A high‑smoke‑point oil is your first line of defense when the steak hits the scorching grill, forming a non‑stick barrier and delivering a uniform heat transfer that fuels the Maillard reaction. Choose refined avocado, grapeseed, or peanut oil; their 400‑500 °F smoke points keep flames at bay while evenly distributing heat. Immediately before searing, brush the steak with a thin layer of infused oil application—mix a tablespoon of dried thyme and rosemary into three cups of oil, add smashed garlic, a pinch of peppercorns, and a leaf of bay for complementary aromatics. The oil seals moisture, prevents sticking, and locks seasonings onto the meat. As the grill sizzles, those aromatics release fragrant oils that meld with the crust, elevating flavor without burning. Using a thin even coating ensures the oil does not pool and cause flare‑ups. For bacon-wrapped steak or similar items, consider using indirect heat and a drip pan to prevent excessive flare-ups from the rendered fat.
Rest the Steak for 5‑10 min to Preserve Juices
A brief 5‑10‑minute rest after grilling lets the steak’s muscle fibers relax and reabsorb the juices squeezed to the surface during cooking, resulting in a juicier, more tender bite. Transfer the steak to a warm cutting board or platter, then tent it loosely with foil to keep heat in while allowing fibers to unwind. During this ideal resting duration the internal temperature climbs 3‑5 °F, completing the carry‑over cook without over‑cooking the exterior. As fibers relax, pressure on the surface releases, letting moisture redistribute evenly for improved tenderness. The juice retention debate acknowledges that non‑rested steaks lose a teaspoon of liquid, yet most chefs favor resting because the re‑absorption yields a noticeably juicier bite. Remove the foil before slicing to preserve the final moisture balance. Letting the meat carry over for a few minutes also ensures a more even temperature throughout.
Slice Across the Grain and Serve at Desired Doneness
Grain direction determines tenderness, so after the steak rests, locate the visible muscle fibers and cut perpendicular to them in ¼‑½‑inch slices; this shortens fibers and locks in juices. Use an instant‑read thermometer to confirm you’ve hit the ideal doneness temperatures—115°F for rare, 125°F for medium‑rare, 140°F for medium, 150°F for medium‑well, or 160°F for well‑done—remembering the steak will rise 5°F while resting. Slice against the grain to preserve the evenly browned exterior while delivering a tender bite. Serve each portion immediately, checking visual texture: bright red for rare, pink for medium‑rare, brown throughout for well‑done. For optimal results, the reverse-sear technique ensures both deep flavor development and a perfectly tender interior. This method guarantees consistent flavor, texture, and safety across every serving. Thicker steaks are easier to control temperature during cooking.