Spatchcock the bird, pat it dry, and rub the skin with avocado oil; lift the skin and season underneath, adding butter under the thighs if you like. Set your grill for indirect heat, leaving a drip pan beneath, and preheat to a steady 400 °F, confirming the zone sits between 375‑400 °F with a thermometer. Place the chicken breast‑side up, legs facing the heat, and rotate 90° every 15 minutes for even browning. Pull it when the breast reaches 157 °F and the leg 170‑175 °F, let it rest ten minutes while carry‑over heat brings the breast to 160‑165 °F, then finish with a brief high‑heat blast for crisp skin. Continue for and you’ll uncover deeper tips on moisture control, troubleshooting, and carving.
Spatchcock Your Grilled Whole Chicken for Even Cooking
Spatchcocking a whole chicken is the quickest way to achieve uniform cooking on the grill. You’ll start by discarding giblets, then pat the bird dry with paper towels—dry skin is essential for the maximize crisping strategy. Place the chicken breast‑side down on a stable board, locate the backbone, and use kitchen shears to cut it out from tail to neck. Flip the bird, press firmly on the breastbone, and flatten it until all parts lie even. The increased surface area lets the rub flavor technique adhere evenly, enhancing taste and browning. With the bird flattened, heat circulates uniformly, reducing cook time, preventing dry breasts, and rendering fat for juicier meat and crispier skin. Maintaining controlled low temperatures ensures the chicken cooks through without drying out. Crispier skin is achieved because the exposed, flattened skin renders fat more effectively.

Curved, tapered design is precision-engineered to access hard-to-reach spots

Professional-Grade Durability & Corrosion Resistance: Forged with rust-proof molybdenum-vanadium steel and precision-tempered 3.5mm blades, these poultry shears cut through poultry bones effortlessly. The corrosion-resistant coating prevents stains, while industrial-grade aluminum handles withstand 10x more pressure than regular scissors.

Professional-Grade Durability & Corrosion Resistance: Forged with rust-proof molybdenum-vanadium steel and precision-tempered 3.5mm blades, these poultry shears cut through poultry bones effortlessly. The corrosion-resistant coating prevents stains, while industrial-grade aluminum handles withstand 10x more pressure than regular scissors.
Set Up Indirect Heat for Grilled Whole Chicken
Set up indirect heat by arranging your grill so the flame or coals heat one side while the other remains empty, then place a drip pan under the grate on the cool side and position the spatchcocked chicken over it. For a three‑burner gas grill, ignite the left and right burners to medium, leave the center off, and slide the drip pan onto the non‑lit middle burner. On a four‑burner, fire the two left burners, keep the two right burners off, and set the pan over the dark side. With charcoal, light a chimney, dump coals to one half, leave the opposite half clear, and put the pan on the empty side. Close the grill lid, maintain about 375 °F, and orient the bird so legs face the heat source while the breast stays on the cooler side. This charcoal arrangement and grill lid positioning deliver steady, indirect heat, preventing flare‑ups and ensuring even cooking. Rotate after 45 minutes; total time ≈85 minutes until the internal temperature hits 165 °F. Use a digital meat thermometer inserted in the thickest part of the breast to verify doneness accurately. Dry brining enhances flavor and tenderness when done for 12‑24 hours before grilling.
Season Your Grilled Whole Chicken for Flavor & Crispy Skin
Now that the grill’s indirect heat is locked in, focus on building flavor and a crisp skin. Pat the bird dry, trim excess fat, and rub a thin coat of avocado oil onto the skin to raise the smoke point and prevent sticking. Choose a dry rub—BBQ chicken, Weber Kickin, or Badia with paprika and allspice—then lift the skin over the breast and thighs, sprinkling seasoning underneath for deeper penetration. If you like moisture, slip butter under the skin on the thighs. Let the seasoned chicken rest 30 minutes at room temperature; this stabilizes temperature and lets the rub adhere. When you finally sear, the oil and spices will help you achieve beautiful color and enhance mouthfeel. The chicken should reach an internal temperature of 165 °F to ensure safe consumption.

America's #1 Avocado Oil for Cooking — Every batch of Chosen Foods avocado oil is independently tested to confirm 100% pure avocado oil with no fillers or seed oil blends. Our purity standard was verified by UC Davis as one of only two avocado oil brands to pass their rigorous quality test. This bottle delivers the clean, neutral taste and consistent high-heat performance that has made Chosen Foods the avocado oil of choice for home cooks, professional chefs, and clean-eating households across the United States.

Chosen Foods Avocado Oil is 100% Pure, naturally refined, with a neutral taste and a high smoke point.

From America's #1 Avocado Oil Brand — A oil sprayer for cooking with the same purity standard you already trust, now in a fast, clean, propellant-free cooking spray format. Pair with Chosen Foods Avocado Oil pourable bottles, Avocado Mayo, Salad Dressings, and Dipping Sauces for a complete clean-label kitchen built on real ingredients and real avocados. From a Certified B Corporation on a mission to do good in the world by being good for the world.
Preheat the Grill to 400°F & Monitor Temperature
If you preheat the grill to a steady 400 °F before loading the chicken, you’ll create the ideal searing environment while keeping the indirect zone within the 375‑400 °F range that prevents skin burn. Close the lid immediately after the burners reach 400 °F; lid stability locks in heat and curbs temperature fluctuations. Use an oven thermometer on the unheated side to verify the indirect zone sits between 375 °F and 400 °F. Set high/low alarms at 300 °F/250 °F for safety, and check the gauge every 10‑15 minutes without lifting the lid. Adjust vents, burners, or fuel as needed to hold a steady 350‑400 °F range throughout the first hour, ensuring consistent cooking conditions. For boneless skinless chicken breasts, aim for 5‑6 minutes per side to achieve proper doneness.

Large Display: Features a 2 3/8 inches large face for clear visibility; Stem length of 2 7/8 inches enhances accessibility; Enables easy classification of food temperatures in various cooking environments
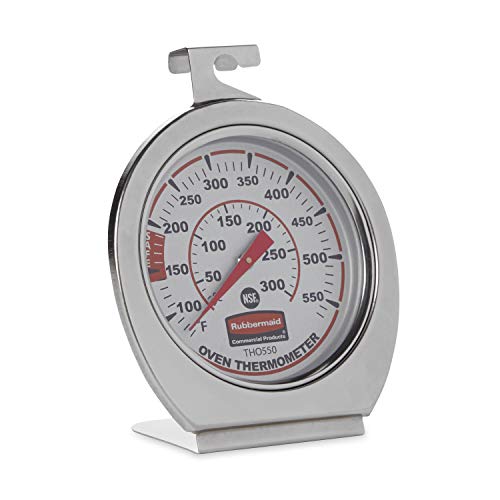
FOOD SAFETY: Thermometer displays true oven temperature instantly to ensure safe food preparation

Weber OEM replacement part (Diameter: 1-13/16" | Length of the probe is 1-1/2")
Cook and Rotate Your Grilled Whole Chicken for Uniform Browning
A solid 15‑minute skin‑side‑down start creates a golden crust, then you’ll need to rotate the bird every 15 minutes to keep browning even. Position the chicken over the indirect zone, legs lifted, and use a drip pan to catch juices. Every 15 minutes, check for color gain; if one quadrant darkens faster, rotate the bird 90° to maintain even color distribution. Precise rotation timing prevents hot‑spot burn and promotes uniform polymerization of skin oils. Flip the chicken by the legs, not the breast, to avoid tearing. Near the end, return it skin‑side‑up for extra crispness. Adjust burner output if flare‑ups appear, keeping the lid closed for consistent heat circulation. The chicken should be cooked at an indirect temperature of 400 °F to ensure even cooking.
Check Internal Temperature & Finish the Skin
Three key steps lock in safety and texture: probe the thickest breast and leg, pull the bird when the breast hits 157 °F (69 °C) and the leg 170‑175 °F (77‑79 °C), then let it rest ten minutes while carry‑over heat lifts the breast to the USDA‑approved 160‑165 °F (71‑74 °C). Use an instant‑read thermometer; insert it deep into the breast, avoiding bone, and spot‑check the leg. Monitor doneness every 15 minutes during indirect grilling to catch temperature variance early. When you pull at 157 °F, carry‑over adds 5‑10 °F, preventing overcooking while achieving a final safe range. After the rest, crank the grill to 400 °F (204 °C) for a brief high‑heat blast, rotating if needed, to crisp the skin without drying the meat. Low‑temperature cooking allows collagen in the meat’s connective tissues to dissolve into silky gelatin, ensuring moist, tender results. Resting the chicken post-cooking allows juices to redistribute throughout the meat for optimal flavor and texture.
Rest, Carve, and Serve the Perfect Grilled Whole Chicken
After the grill is turned down, let the chicken rest 15‑20 minutes, breast side up, so the juices redistribute and the meat stays tender. Apply a proper resting technique: remove the thermometer, untie any twine, and keep the bird on a sturdy board while you gather a sharp knife, meat fork, and cutting surface. Using a meat thermometer during cooking ensures your chicken reaches the safe internal temperature before resting. Carving a whole chicken is a budget‑friendly skill that lets you make the most of every juicy piece. When you’re ready, use a precise carving method. Position the bird breast side up, steady it with a fork, and slice lightly down the center to expose the breastbone. Separate legs by cutting the skin between leg and breast, popping the joint, then snapping the thigh from the drumstick. Follow the keel bone on both sides to free the breasts, then fan the slices across the grain. Arrange drumsticks, thighs, wings, and fanned breast strips on a platter, legs upright, wings forward, for an appealing presentation.
Troubleshoot Common Grilling Issues and Tips
If you’re seeing uneven browning, dry meat, or sticking, the culprit is usually temperature control, moisture management, or grill preparation. Keep the grill at 275‑325 °F and use indirect heat; a thermometer lets you hit the 165 °F internal target without scorching the exterior. For thick breasts, spatchcock or cut lengthwise to equalize thickness, then monitor the thinnest spots. Pat the bird dry, oil the grates, and oil the chicken to prevent adhesion and enhance flavorful basting. Apply a moist brining solution at least four hours before cooking to lock in juiciness and reduce evaporation‑driven dryness. Limit smoke exposure, choose mild woods, and adjust time—add roughly 15 minutes per pound over the base recipe. This systematic approach eliminates over‑cooking, sticking, and uneven heat. Use a food thermometer to verify that the internal temperature reaches 165 °F before serving.