Preheat your gas grill so the direct zone hits 500‑600 °F and the indirect zone stays around 250‑300 °F. Pat the tri‑tip dry, trim excess fat, and rub it with salt, pepper, garlic, onion, and paprika. Sear it 4‑5 minutes per side on the hot side until the crust forms and the internal temp reaches about 130 °F. Move it to the cooler side and cook until the thermometer reads 125 °F for medium‑rare, then let it rest 10‑15 minutes. Keep reading for exact timing charts and common pitfalls.
Pick the Ideal Grill Temp for a Tri‑Tip Sear
When you fire up the grill, aim for a chamber temperature of about 450 °F and let the grates settle at 400 °F ± 25 °F before you place the tri‑tip down; this high‑heat zone creates the rapid Maillard reaction needed for a robust crust while keeping the interior juicy. Perform accurate grill temperature calibration by confirming the grill’s built‑in gauge reads the target and adjusting burners until the thermal setpoints for ideal sear are stable. Keep the searing side at high heat for 3‑5 minutes per side, flipping once, then move to a slightly lower zone (375‑425 °F) to finish. Monitor the thickest part with a thermometer, pulling at 125 °F for medium‑rare and allowing a 3‑5 °F carry‑over rise during rest. After grilling, allow the tri-tip to rest for 15 to 20 minutes to allow juices to redistribute before slicing. This precise temperature control secures a caramelized exterior and a juicy interior. Dry‑brine the tri tip in the refrigerator for enhanced flavor before grilling.

BBQ / Grill pit thermometer, safe and environmentally friendly.

[FAST & ACCURATE READING] Respond just within 2-3 seconds. The diameter of the dial plate is 2-3/8”, which is big enough for easy reading. With a 4 color-coded temperature range, you can grasp the internal temperature of grills at a glance. Featuring high-temperature measurement sensitivity, the grill thermometer is capable to detect temperature changes with an accuracy of ±0.5% during the entire cooking process.

COMPATIBILITY: Direct replacement thermometer for Nexgrill models 720-0697, 720-0737, 720-0830H, and 720-0888 grills
Set Up Your Gas Grill in Two Zones – Direct & Indirect
After searing the tri‑tip at 450 °F, shift the grill into a two‑zone setup so you can finish the roast without overcooking. Turn one burner (or half the burners) to high, reaching 500‑600 °F for direct heat, and turn the rest off or set them low around 250 °F for indirect heat. Close the lid and preheat for 15 minutes; place an oven thermometer on each grate to monitor burner output and confirm the temperature differential. Move the meat to the cooler side once a crust forms, then close the lid and let the indirect zone finish the cook. Keep an eye on the thermometer and adjust cooking time if the indirect zone drifts from its target temperature. Preheating the grill with all burners before adjusting to fewer burners helps maintain stable temperatures throughout your cook. Using the 2‑zone method allows you to achieve a perfect sear while preventing the interior from drying out.
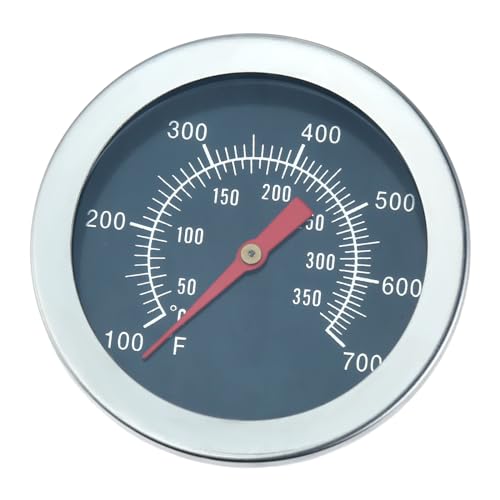
[𝐇𝐈𝐆𝐇 𝐐𝐔𝐀𝐋𝐈𝐓𝐘]: 2" Grill thermometer replacement for Charbroil 463251414, 463250212 is made of high-quality stainless steel material, featuring in ultra durability and safety, and well-tested by the manufacturer to meet the OEM standards and ensure to support a longer service life. The number in the dial is clear to read, and the needle in the dial helps you to measure the grill temperature.

It fits Genesis 300 series (2007-2016), Summit (2005-2016) models and Genesis II series (2017 and newer). Replacement for Weber 67088 / 67731 grill lid thermometer.

【Fit Check for Grill Lids】Compatible with selected Char-Broil, Char-Griller, Dyna-Glo, Jenn-Air, King Griller, Nexgrill, Kenmore, and Perfect Flame gas grill or smoker lids using a 0.4" opening.
Season and Prepare Tri‑Tip Before Grilling
A good tri‑tip starts with trimming excess fat and the silvery membrane, then patting the meat dry so the rub can cling. Remove large chunks, peel off the thin skin, and desiccate the surface. Next, mix salt, pepper, garlic powder, onion powder, paprika, and optional rosemary into a robust dry rub. Massage the blend all over the meat, ensuring every crevice is seasoned. For deeper flavor, marinate in olive oil, red wine vinegar, balsamic, salt, garlic, pepper, sugar, and herbs for at least 30 minutes, preferably up to eight hours. Let the rubbed tri‑tip sit exposed in the fridge up to 12 hours, then bring it to room temperature for 30‑40 minutes before grilling. Store tri tip seasoning in an airtight jar for future use, and consider preparing tri tip ahead of time to streamline your grill session. The tri‑tip is a triangular cut from the bottom sirloin, prized for its lean yet flavorful profile.
Sear Directly for a Golden‑Brown Crust
If you crank the grill to 500 °F and let the grates heat up, the tri‑tip will seize instantly, forming a deep, golden‑brown crust. Lightly oil the grates, place the meat directly over the flame, and let it sizzle. Use proper searing technique: keep the lid slightly ajar, resist the urge to move the meat, and rotate it 90° after five minutes to create cross‑hatch marks. The ideal searing duration is 4–5 minutes per side at 500 °F, or 1 minute per side at 600 °F+ if you need a faster crust. Watch the internal temperature rise to 130 °F; that’s when the crust is set and the exterior is crisp. Once the crust forms, you can finish cooking as desired. Tri tip should be trimmed of any remaining silver skin before cooking.
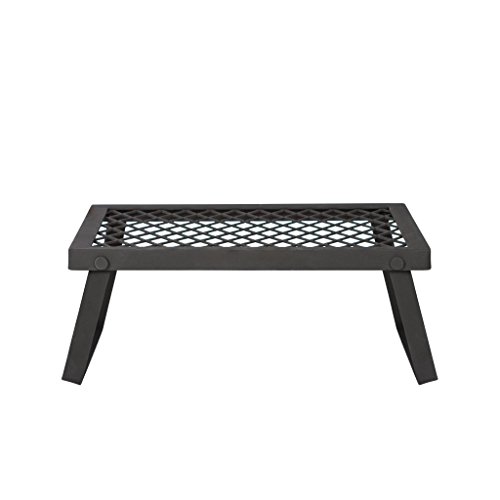
DURABLE CONSTRUCTION: Heavy-duty welded steel frame with steel-mesh grill top provides long-lasting performance for outdoor cooking

【Efficient Charcoal Utilization】 The design enhances airflow, making it easier to ignite charcoal, burn hotter with less fuel, and maintain high or low grill temperatures effortlessly. It prevents ash and charcoal clogging, reducing the need for frequent cleaning.

EASY CLEAN GRILLING: Grill topper prevents food from sticking or falling through grates, reduces black residue and odor, and eliminates messy grill cleanup. Perfect for BBQ, camping, and outdoor grilling.
Switch to Indirect Heat for a Medium‑Rare Finish
Shift the tri‑tip to the cooler side of the grill once the crust has formed, closing the lid to let gentle, indirect heat finish the cook. Preheat the gas grill to 350 °F, turn off one burner, and aim for 300 °F on the unlit zone. Position the meat over the foil‑lined rack farthest from the lit burner; this guarantees even heat distribution and accurate temperature control. Keep the lid closed so circulation remains steady. After about 30 minutes, the internal temperature should be near 100 °F. Continue cooking another 20‑30 minutes, watching the probe, until you reach 115 °F—ready for the final sear. This two-zone fire setup prevents the gray band of overcooked meat while maintaining a perfectly seared crust. This indirect phase preserves juiciness while preventing a burnt exterior, delivering a perfect medium‑rare finish. Marinating helps tenderize the meat, so a brief olive‑oil soak before grilling enhances flavor.
Monitor Internal Temperature and Rest Properly
Keeping a close eye on the tri‑tip’s internal temperature and allowing it to rest correctly are the final steps that lock in flavor and safety. Insert an instant‑read probe lengthwise into the thickest section, parallel to the grain, and check every few minutes as you near the end. Aim for a temperature about five degrees below your target—130 °F for medium‑rare, 145 °F for medium—because carryover cooking effects will raise it during rest. Tri‑tip is a triangular‑shaped cut from the bottom sirloin, known for its rich, beefy flavor and tender texture when cooked correctly. Using a thermometer to monitor your meat ensures you achieve the exact doneness you desire. Follow the resting duration guidelines: loosely cover with foil for ten minutes, or twenty‑to‑thirty minutes if you’ve smoked it. This brief pause lets the juices redistribute and the temperature climb another five degrees, ensuring a safe, juicy slice.
Avoid Overcooking: Common Mistakes and Fixes
After checking the temperature and letting the tri‑tip rest, the next biggest threat to a perfect slice is overcooking caused by common grill errors. First, preheat the grill to 450‑500°F and wait 10‑15 minutes; cold grates make the meat stick and tear, ruining even heat distribution. Keep the lid closed except for essential flips—each opening drops the temperature, stretches the cook time, and creates uneven doneness. Trim excess fat to less than a quarter‑inch; thick caps trigger flare‑ups that char the exterior while the interior stays undercooked. Use a two‑zone setup: sear directly for six minutes per side, then move to indirect heat at 325‑350°F. This shift prevents a burnt crust and guarantees the interior reaches the right temperature without drying out. Using a thermometer ensures the meat reaches the safe internal temperature without guesswork. Look for a thermometer with a fast response time to get accurate readings quickly while your meat is on the hot grill.
Tri‑Tip Quick Reference: Times, Zones, and Doneness
Wondering how to nail the perfect tri‑tip without a clock? Set a two‑zone fire: heat one side to 425‑450°F for direct searing, keep the opposite side low (225‑250°F) for indirect cooking. Sear each side 3‑5 minutes with the lid closed, then move the meat to the cooler zone. For medium‑rare, aim for a total of 25‑30 minutes, pulling at 130°F; rare finishes in 15‑20 minutes at 118‑120°F, medium at 138‑140°F. Rest the roast 5‑10 minutes, loosely covered. If you prefer rotisserie grilling options, mount the tri‑tip on the spit and maintain ideal grill positioning by keeping the heat source on one side, allowing the meat to rotate through direct and indirect zones evenly. This reference keeps you on track, no timer needed. Season the tri‑tip with a dry rub before cooking. After resting, slice the tri‑tip against the grain to ensure maximum tenderness and optimal texture in every bite.


