Prehear your grill to 400 °F, close the lid for 15 minutes, then shift one burner to medium‑high (≈325 °F) for indirect heat. Clean and lightly oil the grates, or place a cast‑iron griddle or grill mat for easy release. Lay thick‑cut bacon on the cooler side, flip once after 5‑7 minutes, and finish 3‑5 minutes on the hot side for crisp edges. Use a foil pan with raised edges to catch grease and prevent flare‑ups, and add wood chips or a glaze for extra flavor. Keep the temperature steady and press the strips gently with tongs for even cooking. Continue for and you’ll uncover more tricks for perfect texture and storage.
Preheat & Set Up Grill for Perfect Bacon
Before you even lay a strip of bacon on the grill, get the heat right: preheat to a steady 400 °F for about 15 minutes with the lid closed, then shift to a medium‑high zone (≈325 °F) on one side of the burners. Clean the grates, brush them lightly with oil, and set the grill configuration options for indirect heat by lighting only one burner. Place the bacon on the cool side, then use temperature adjustment techniques to drop the hot side to medium‑low after placement. Keep the lid partially closed, monitor the bacon every three minutes, and flip halfway for even crisping. This method prevents flare‑ups, guarantees consistent texture, and delivers perfect bacon without burning. Using a drip pan underneath helps contain grease and further reduces the risk of flare-ups during cooking. Use thick‑cut bacon for best results.
Choosing the Best Bacon for Grilling
Choosing the right bacon for grilling starts with balancing thickness, fat, and flavor so you get crisp edges without burning. Pick a standard thick‑cut slice for a reliable blend of chew and snap; it resists rapid burn while delivering tender centers. If you crave heft, slab bacon offers premium thickness, but expect longer cook times. Even fat streaking is vital—fat‑rich strips sizzle evenly and reduce splatter, yet too much fat can cause excessive shrinkage, so leaner cuts keep shape. Evaluate bacon curing methods: hickory‑smoked, applewood‑smoked, or uncured each impart distinct smoke profile selection. Match the smoke intensity to your dish—robust hickory for bold flavors, milder applewood for subtle sweetness. The heat output of your grill will also influence how quickly bacon cooks and whether you achieve the desired crispness. Consistent brand performance guarantees predictable texture and shrinkage. Wright offers thick, meaty slices that hold up well on the grill.
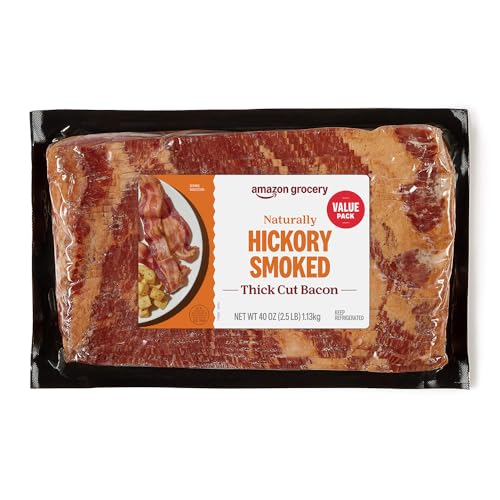
One 40 ounce package of Thick Sliced Hickory Smoked Bacon

All meat from the Whole Foods Market Meat department must meet standards for animal welfare, feed and more, so you can know about what you're buying (and eating). Here are some things you can count on with this selection:

Rise and Shine: Start your morning off with a boost of happiness so good, you can taste it. Our Premium Hickory Smoked Bacon is thick cut for a bold, yet balanced flavor that will brighten anyone’s morning.
Preparing the Grill Surface: Clean, Oil & Use Mats or Griddles
If you want bacon that stays crisp without tasting burnt, start by cleaning the grill grates thoroughly after the grill has cooled; a sturdy brush will remove soot and residual fat that could transfer unwanted flavors or ignite later. Scrape away any bacon fat removal, then wipe the surface with a damp cloth. Lightly coat the grates with vegetable oil using a paper‑towel held by tongs; this prevents sticking and promotes even heat. For extra control, place a cast‑iron griddle or a non‑stick grill mat on the grates; the griddle captures rendered grease while the mat stops strips from falling through. To maintain your grill’s durability and appearance, consider applying a specialized stainless steel cleaner to the grates after they cool completely. When you finish, you can sprinkle a thin layer of grated cheese application over the bacon for a quick flavor boost, then close the lid and grill. Spices and wood pellets are also available at Lanier’s Meat Market for added flavor.
Foil Pan Method – Step‑by‑Step Instructions & Timing Tips
Three steps get your foil pan ready and your bacon crisp: tear a double‑sized piece of heavy‑duty aluminum foil, fold it in half for strength, then roll up each edge about half an inch and tuck the corners inward to form a sturdy lip that traps grease. Position the pan in the center of the grill, leaving space around the edges for airflow, and preheat to medium‑high (≈400 °F). Lay bacon strips in a single, non‑overlapping layer; close the lid and cook 5‑7 minutes. Flip with tongs when the strips shrink and pools form, then cook another 3‑5 minutes until browned. Remove the pan, let grease cool, and store bacon drippings if desired. Transfer bacon to a paper‑towel‑lined plate, rest 3‑5 minutes, and enjoy. No greasy mess in the kitchen. This method preserves proper airflow and heat distribution compared to lining grates directly with foil.

2 COUNT PANS PER PACK: Glad full size disposable aluminum steam pans (2 count) for home cooks, hosts, and meal preppers who want a sturdy foil pan for big batches, holiday sides, potlucks, and quick cleanup after serving.
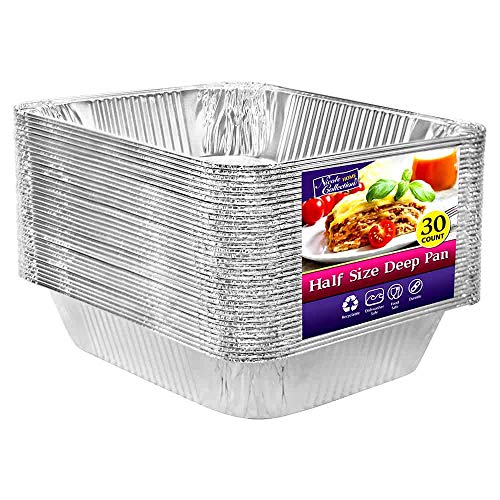
Premium Quality - Made with lightweight but durable, high grade thick aluminum and reinforced walls for a sturdy composition. Has superior heat conductivity for even baking, roasting & reheating

2 COUNT PANS PER PACK: 2-count Glad disposable half-size aluminum steam pans for home cooks, meal preppers, and hosts who want a sturdy foil pan that holds casseroles, sides, and saucy foods without a sink full of dishes.
Direct Grate Technique – Position, Flip, and Manage Flare‑Ups
After mastering the foil‑pan method, you can move to the direct‑grate approach, which gives bacon a smoky edge and a crispier bite. Clean the grates, brush them with neutral oil, and preheat to medium‑high (325‑400 °F). Position each strip perpendicular on the indirect‑heat side, leaving space around the edges for airflow. After 2‑3 minutes, reduce the temperature settings to low or medium‑low and flip with long tongs; you’ll need one or two flips over the next 10‑20 minutes to reach your desired crispness. Keep a spray bottle of water nearby for direct flare‑up management, and move any flare‑up‑prone pieces to a cooler zone instantly. For best results, apply oil right before cooking to ensure optimal grate performance. Transfer cooked bacon to paper towels, cover with foil, and serve. Thick‑cut bacon holds together better for direct heat grilling.
Cast‑Iron Skillet or Griddle Approach for Even Crispness
When you preheat both the grill and a cast‑iron skillet to a steady 400 °F, the heat spreads evenly across the pan, allowing bacon fat to render smoothly and preventing sticking. Position the skillet on the grates, then lay bacon strips in a single, non‑overlapping layer. The seasoned surface maintenance of the cast iron means you won’t need extra oil; the rendered fat creates a natural non‑stick layer that forms similarly to how a protective coating develops through regular seasoning and heating. Flip with tongs every few minutes, keeping the lid closed to maintain temperature regulation. Cook 7‑10 minutes per side, watching for uniform crispness without burning. Remove the bacon just before it reaches your ideal texture, as residual heat will finish the job. This method yields consistent crunch while containing grease safely. The origins of bacon remain shrouded in mystery, and ancient references suggest it has been prized for centuries.
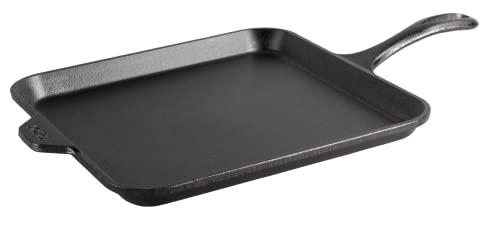
Versatile Square Cast Iron: The Lodge Seasoned Cast Iron Square Griddle Pan is ideal for perfectly cooked pancakes, eggs, and tortillas in any location

Steakhouse Sear At Home: The Lodge Square Cast Iron Grill Pan delivers high-heat searing and bold grill marks while channeling excess grease away

Nonstick & Easy to Clean: The Switzerland ILAG nonstick coating is very effective in preventing anything from sticking to the surface, even with minimal oil, and also makes cleaning a breeze, just wipe it with a paper towel or rinse it with water. Free of PFOA and PFOS.
Flavor Boosters for Grilled Bacon: Glazes, Herbs & Sweet‑Savory Finishes
If you want your grilled bacon to go beyond plain crisp, layer a glaze, herb, or sweet‑savory finish that amplifies its natural richness. Start with a balsamic glaze: whisk balsamic vinaigrette, honey, and hot sauce, brush onto skewers after ten minutes of indirect heat, and caramelize for three minutes, finishing with parsley. For a maple‑pepper glaze, infuse maple syrup with cracked black pepper and thyme, sear bacon in a cold pan, then simmer in the thickened mixture; add bourbon for depth. A bourbon‑infused glaze uses clover honey, bourbon, and Cody Road Maple Whiskey, dipping bacon before the final rub. Apply a brown‑sugar‑paprika rub after a bourbon dip for a sweet‑savory crust. Sprinkle coarsely ground black pepper and thyme on any glaze to boost flavor combinations. For enhanced smoke flavor, consider using a smoker box filled with wood chips to add depth to your grilled bacon. Grill over indirect heat to prevent flare‑ups and ensure even cooking.
Bacon‑Specific Grease Control & Fire Prevention
Glazing and herb‑infusing add layers of flavor, but they also increase the amount of liquid that can drip onto the grill. To keep flare‑ups at bay, use grease dispersal methods like a heavy‑duty foil pan. Fold the foil edges half an inch high, seal the corners, and place the pan in the grill’s indirect‑heat zone, leaving open grate space for airflow. For even tighter control, wrap bacon in a sealed foil packet, grill over medium indirect heat, and flip once. Position the packet away from the hottest spots, and avoid overlapping strips to prevent pooling. After cooking, let the foil cool, then discard it or soak excess grease with paper towels. Employ grill surface modifications such as a raised foil lip to block drips and maintain a clean, fire‑free cooking area. Keep a fire extinguisher nearby during grilling for quick response to any unexpected flare‑ups. Bacon grease is hydrophobic and tends to cling to surfaces, making it harder to rinse away.
Troubleshooting Common Issues: Burnt Edges, Uneven Cooking, Soggy Strips
Even though bacon can seem finicky, the key to flawless strips lies in mastering temperature, spacing, and timing; start with proper bacon thickness selection and set your grill for cooking temperature management at 250‑300°F. Keep strips on the cooler side of the grill, leaving at least one inch between them, and flip only once after the fat has rendered. For burnt edges, avoid direct coals and trim excess fat before grilling; reduce cooking time by two minutes. To prevent uneven cooking, let the grill stabilize, avoid overcrowding, and position strips away from hot spots. For soggy strips, press each piece with tongs, increase heat slightly for color, and ascertain steam can escape by maintaining adequate spacing. Thick‑cut bacon renders fat slowly, maintaining structural integrity while developing a proper crust. Using an instant-read thermometer helps ensure your bacon reaches optimal doneness while avoiding common overcooking mistakes.
How to Serve and Store Grilled Bacon for Maximum Crunch
After fixing temperature, spacing, and timing to avoid burnt edges and soggy strips, focus shifts to keeping that perfect crunch from plate to storage. Transfer the hot strips to a paper‑towel‑lined plate, let them rest one to two minutes so excess grease drips away, then serve immediately with sauces or in a BLT for maximum crispness.
When you need to store, cool the bacon completely on paper towels, then layer each strip between fresh towels in an airtight container. Keep the container at room temperature for no more than two hours; beyond that, refrigerate. For refrigeration, use a zip‑top bag lined with paper towels and store up to four or five days—this is your chilling storage strategy. To minimize air exposure and prevent deterioration, ensure your storage container is tightly sealed. Follow these shelf life tips, and reheat briefly in a hot skillet or 400 °F oven to restore crunch. The lid prevents much splatter mess.