Pick a well‑marbled, 1‑inch steak, pat it dry, brush a thin coat of high‑smoke‑point oil, and season liberally with a 3:1 kosher‑salt‑to‑pepper rub. Light a chimney starter, dump hot coals onto one side, and bank them to create a two‑zone fire at 450‑550°F. Sear the steak 2 minutes per side at a 45° angle, rotate 90°, then move it to the cooler zone until it’s 5‑7°F below your target. Rest five minutes, baste with herb butter, and you’ll get perfect crust and juiciness—more tips await if you keep going.
Choose the Ideal Steak Cut & Thickness for Grilling a Steak
One of the first decisions you’ll make is which cut and thickness to grill. Pick a ribeye if you want a high‑impact marbling profile; its extensive intramuscular fat yields a juicy, flavorful bite and resists overcooking even at 1½‑inch thickness. For lean‑budget comfort, choose a filet‑mignon—its buttery tenderness comes from a minimal marbling profile, so keep it at 1‑inch to avoid dryness. A T‑bone delivers both strip and tenderloin flavors, making it a solid yield choice for a 1‑inch slab that balances tenderness and leaness. Top sirloin offers robust flavor at a lower price; a 1‑inch cut maintains juiciness while staying lean. Strip steak, especially Kansas City, provides a reliable marbling profile and forgiving 1‑inch thickness for consistent results. Allowing your steaks to reach room temperature before grilling ensures even cooking throughout the meat. The Kansas City Strip is a top pick for grilling due to its balance of tenderness and beefy flavor.

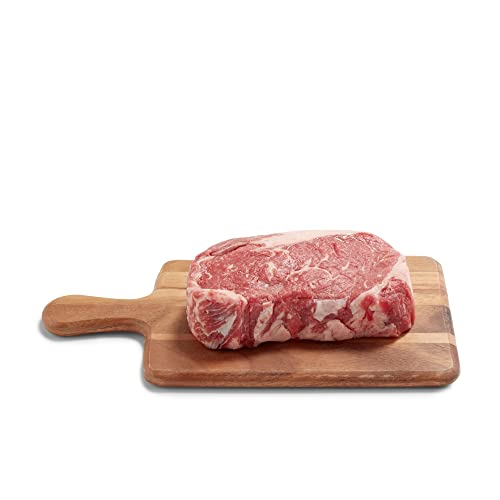
One boneless beef ribeye steak weighing between 0.5 and 1.2 pounds
100% grass-fed

One value pack of boneless beef ribeye steak weighing between 1 and 2.4 pounds
Create a Two‑Zone Charcoal Fire for Easy Heat Control
When you light the chimney starter and dump the hot coals onto one side of the grill, you instantly create a high‑heat direct zone and a cooler indirect zone, giving you precise control over searing and finishing. Bank the coals against one wall; the opposite side stays empty for indirect cooking. Use a silicone mitt to handle the chimney, and once the briquettes turn light‑grey with ash, spread them evenly for consistent heat. A charcoal arrangement flexibility lets you adjust zone size—add a few extra briquettes to raise indirect temperature, or pull some back for a milder finish. In a charcoal type comparison, lump charcoal ignites hotter and faster, while briquettes retain heat longer, letting you fine‑tune the 450‑550°F direct and 250‑350°F indirect ranges. Maintaining a clean ash catcher ensures consistent airflow throughout your cook. Close the lid, open bottom vents fully, and position top vents over the cool side to channel smoke across the meat. Adjust airflow to maintain steady temperatures throughout the cook.

Precision Two-Zone Cooking System for Kettle Grills: Transforms your kettle grill into a professional two-zone cooker — direct high-heat searing on one side and indirect low-and-slow smoking on the other. Perfect for steaks, brisket, pork butt, ribs, chicken, and more.

【Built-In Water Pan for Juicy BBQ & Stable Temps】 Stop guessing temperature control. The integrated water pan adds essential moisture to the cooking chamber, preventing meat from drying out during long smokes. It also acts as a heat sink to stabilize low temperatures, making it easier to maintain that perfect 225°F for briskets and ribs. Get that tender, fall-off-the-bone texture every time.

AMERICA’S TEST KITCHEN BEST CHARCOAL GRILL ACCESSORY (2021): The Slow ‘N Sear is the only charcoal basket independently tested and ranked #1 by America’s Test Kitchen. No advertising, no paid placement — just head-to-head testing against every competitor on the market. SnS Grills' products are backed by 11 patents, no imitation can replicate the engineering that earned that recognition.
Dry‑Pat and Oil the Steak to Maximize Sear and Prevent Sticking
With the two‑zone fire set, turn your attention to the steak itself: pat it dry, then brush a thin layer of oil before it hits the grill. Use clean paper towels to blot every surface, removing excess moisture that would otherwise evaporate and sap heat. A dry exterior lets the intense charcoal heat contact the meat instantly, driving the Maillard reaction for deep browning and maximizing flavor. After drying, drizzle a light coat of high‑smoke‑point oil and spread it evenly; the oil forms a non‑stick barrier that prevents the steak from adhering to the grates while still allowing a crisp crust. For best results, bring your steak to room temperature before cooking to ensure even heat distribution throughout the meat. This technique preserves internal juices, ensuring moisture retention and delivering a professional‑grade sear without tearing the meat when you flip it. The Maillard reaction is essential for achieving that coveted char.

Graza Frizzle Oil Made from 100% Olives: A neutral-flavored, high heat cooking oil made from 100% peak harvest olives. With a smoke point of up to 450 degrees, Frizzle is your high-heat kitchen hero. 1 bottle/750ml.

Light Buttery Flavor That Elevates Every Meal: Algae Cooking Club Chef-Grade Algae Oil enhances every dish with subtle richness. Its neutral profile makes it ideal for searing, baking, and dressings, transforming everyday meals into gourmet experiences.

America's #1 Avocado Oil for Cooking — Every batch of Chosen Foods avocado oil is independently tested to confirm 100% pure avocado oil with no fillers or seed oil blends. Our purity standard was verified by UC Davis as one of only two avocado oil brands to pass their rigorous quality test. This bottle delivers the clean, neutral taste and consistent high-heat performance that has made Chosen Foods the avocado oil of choice for home cooks, professional chefs, and clean-eating households across the United States.
Season a Steak With a Salt‑Pepper Rub: Amount & Technique
If you want a crust that’s both flavorful and evenly seasoned, start by measuring a 3 : 1 ratio of kosher salt to coarse ground black pepper—about one teaspoon of the blend per pound of steak—and sprinkle it liberally over every surface. Use a shaker to distribute the 50/50 salt‑pepper mix, then pat it into the meat; avoid rubbing, which creates clumps. For a 16‑oz ribeye, the teaspoon covers all sides; thicker 1‑inch cuts may need the full teaspoon, while thinner steaks require less. Apply the rub just before the grill, limiting exposure to three minutes to prevent premature drying. After grilling, using a meat thermometer helps verify your steak reaches the desired internal temperature for optimal doneness. This precise seasoning application technique guarantees consistent coverage, maximizes crust formation, and respects the salt pepper ratios essential for balanced flavor. Thicker cuts like a whole roasted tenderloin need more seasoning to ensure the interior is properly seasoned.
Cook the Steak Indirectly – Timing & Temp for Medium‑Rare
Although the steak’s sear forms on the hot side, you’ll finish it indirectly to hit a perfect medium‑rare. Set the grill to a two‑zone fire, keeping the overall temperature at 450‑550 °F. After searing, move the steak to the cooler side and close the lid, then monitor cooking temperature with an instant‑read thermometer inserted from the side. For a 1‑inch cut, sear 3‑4 minutes per side, then place it indirect for about 1 minute until the internal reads 130‑135 °F. For a 1.5‑2‑inch steak, sear 7‑9 minutes on the first side and 5‑8 minutes on the second, then indirect until 130‑140 °F. Manage air flow control by adjusting vents to keep heat circulating evenly, and pull the steak 5‑7 °F below target to allow carry‑over cooking while preserving juiciness. Properly resting the steak after cooking ensures maximum juiciness and optimal flavor development. Rest for five minutes before serving. Preheat the grill to 450‑550 °F before starting.
Sear Over Direct Heat – Cross‑Hatch Marks & Final Temp
A good sear begins the you place the steak at a 45‑degree angle on the hot grates, letting the flames kiss the surface for two minutes before you rotate it to create the first set of parallel grill marks. After the initial two‑minute burn, lift the steak gently and turn it 90 degrees, forming a cross‑hatch pattern that locks in flavor. Flip the steak, again positioning it at a 45‑degree angle, and repeat the two‑minute sear, followed by a second 90‑degree rotation. Throughout, keep temperature monitoring tight: use an instant‑read thermometer to check the internal reading, aiming for 130‑135°F for medium‑rare. If the grill runs hotter than 550°F, shift the steak to the indirect zone briefly to avoid overcooking before you finish the sear. Thin steaks only need one flip to achieve perfect grill marks.
Rest the Steak 5 Minutes and Add a Butter Glaze
After you pull the steak from the grill, let it rest for at least five minutes; this brief pause lets the juices redistribute, preventing them from spilling out when you slice. While the meat rests, prepare a butter glaze: melt 1.5 sticks unsalted butter, stir in minced garlic, chopped parsley, lemon juice, and a pinch of salt and pepper. For a richer profile, add Worcestershire sauce or a dash of red‑pepper flakes. When the timer hits five minutes, place a pat of the softened herb butter on the steak, allowing it to melt into the surface. Then, using a silicone brush, perform butter application techniques—basting the top for 30 seconds to seal the crust. For best results, use a quick-read meat thermometer to verify the steak has reached your desired doneness before removing it from the grill. This step delivers a flavor profile enhancement, delivering juicy, tender, and aromatic results. Butter basting helps develop a caramelized crust.
Troubleshoot Common Issues: Flare‑Ups, Uneven Cooking, Over‑cooking
Flare‑ups, uneven cooking, and over‑cooking are the three most common pitfalls that can ruin a perfectly grilled steak, and each has a clear, actionable fix. When fat drips onto hot coals, close the lid and vents quickly to starve the flame, then use the “burp” technique—open the lid slightly, let gases escape, then reseal. Keep a drip pan under the steak and Trim excess fat before grilling. To prevent uneven cooking, distribute charcoal evenly, set up direct and indirect zones, and adjust air flow constantly; rotate the steak and monitor grate height for consistent heat. Maintaining clean grill grates] ensures optimal heat transfer and prevents flavor contamination from old buildup. Avoid over‑cooking by staying near the grill, using the indirect zone for thicker cuts, and checking fuel levels so temperature never spikes unexpectedly.