
Yes, you can run just two burners on a three‑burner grill, and it’s actually a smart move. Turn on the rear burner for a hot, direct‑heat zone and leave one front burner off to create a cooler, indirect area for roasting or simmering. This setup gives you precise temperature control, cuts fuel use, and reduces flare‑ups by spreading the flame evenly. Just follow the safety checklist—inspect ports, keep the cylinder outdoors, and have a fire extinguisher handy. If you keep going, you’ll ascertain how to pair burners for ideal heat balance and avoid common two‑burner pitfalls.
Why Use Two Burners on a Three‑Burner Grill?
Why would you want to light just two burners on a three‑burner grill? You gain grill versatility options that let you carve the surface into a hot, direct‑heat zone for searing and a cooler, indirect zone for roasting. By firing only one side, you control temperature precision, moving foods from blistering to gentle heat without overcooking. The arrangement cuts hot spots, spreads flame evenly, and minimizes flare‑ups, so each bite cooks uniformly. Unlike charcoal grills that rely on radiant heat from embers, gas grills with two burners allow you to manage heat distribution more precisely through flame control. Because you’re not running all three burners, you conserve propane or natural gas, achieving efficient fuel usage while still delivering restaurant‑quality sear and low‑and‑slow tenderness. This two‑zone setup also lets you simmer, stir‑fry, or boil on the same grill, expanding your cooking toolkit without extra equipment. Multi‑flame distribution ensures even heat across the cookware base.
Pre‑Grilling Safety Checklist for Two‑Burner Use
Before you fire up the two burners, run a quick safety sweep that covers the grill, the gas cylinder, and the surrounding area. Start with a grill port inspection; look for rust, cracked connectors, or loose hoses that could leak gas. Verify the regulator, air shutter, and valve are clean and securely attached. Move to fuel tank positioning: place the propane cylinder outdoors, at least ten feet from walls, overhangs, and combustible surfaces, and keep it upright on a stable surface. Turn the tank valve off when not in use and check that the built‑in flow limiter and automatic shut‑off are functional. Clear a 20‑inch rear and a 7‑inch side clearance, and keep the lid open while lighting to prevent propane buildup. Have a fire extinguisher or sand bucket within arm’s reach, and familiarize yourself with the P.A.S.S. method to safely respond to potential flare-ups. Ensure the grill is placed at least 10 feet away from any combustible structure.
How to Light Two Burners Safely on a Three‑Burner Grill
Now that you’ve cleared the grill, the tank, and the surrounding area, you can move on to lighting the burners. Open the lid, turn every knob clockwise, then open the LP valve counter‑clockwise. Identify the ignition burner—usually marked with a flame or lightning symbol—and press its knob to high. If it’s electronic, press the button until a steady flame appears, confirming it through the grates. With the leftmost burner lit, turn the adjacent knob to high; the first flame will travel through the crossover, lighting the second burner and ensuring ideal gas flow distribution. Keep the lid open, stand clear, and verify both flames before closing. Before lighting your burners, ensure you’ve completed proper grill cleaning to remove any debris from burner ports that could interfere with ignition. This sequence maintains even heat and safe operation. Check that each burner is lit.

Multi-Purpose: This gas grill regulator and hose fits most gas grills heaters fire pits LP generators lanterns two burner camping stoves and side burners ideal for low pressure propane applications. It works perfectly as a replacement for Weber Genesis 300 series Genesis Silver C Genesis Gold Genesis Platinum Spirit E-210/E-310 and is compatible with Char-broil Nexgrill Monument Dyna-Glo Brinkmann grills with 3/8" male flare fittings. It’s a top-notch gas regulator for grill and nexgrill regulator replacement option.Note: Not for Weber Traveler, Q series, or any portable gas grills
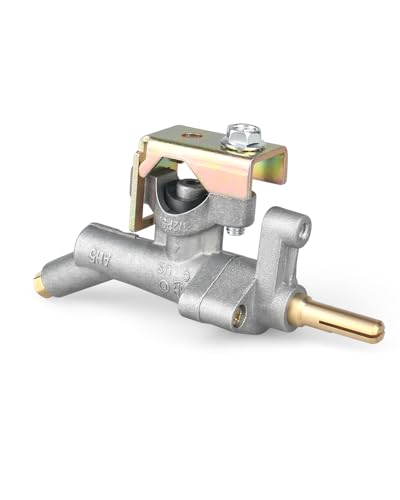
Wide Compatibility: Perfectly compatible with Weber Spirit (2013-current) and Spirit II E-210, E-310, E-315, E-320 series grills, supporting both Liquid Propane (LP)
Choosing Burner Pairings for Balanced Heat
Choosing the right burner pair on a three‑burner grill lets you balance heat without guesswork. Pair the rear burner with a front burner that has a larger flame‑tamer hole to boost front‑to‑back flow, creating a smooth temperature gradient control. If you want a hotter sear zone, activate the rear H‑shaped burner and keep the adjacent middle burner low, letting the ceramic diffuser spread the rear’s intensity across the front. For gentle simmering, use the front burner with a metal accordion diffuser and the middle burner on low, letting the rear stay off to maintain a cooler front. These ideal burner configurations let you fine‑tune zones, reduce hot spots, and keep gas consumption efficient. Because gas burners have more pressure at the rear, the rear zone naturally runs hotter. Understanding how burners and grates work together helps you maximize your grill’s versatility across different cooking styles.

Adjustable grill heat plates extend from 11.75” up to 21” long, 3.75” wide, fits most outdoor gas grills such as charbroil, nexgrill and etc. If installed reversely, the length will be extended from 11.75” to 18.37” only. Please measure the width of the mounting slot on your grill to confirm compatibility before ordering

【Fit Various Grills】 The length of this grill heat shield is ADJUSTABLE from 11.75" up to 21", fitting different size of grills like Char-Broil, Brinkmann, Dyna-Glo, Grill Master, Kenmore, Members Mark, Nexgrill. Please see description below for list of model numbers. If installed reversely, the length ranges from 11.75” to 18.37”. It's better to measure the dimension of your original grill heat plates before purchasing.

➤Each Heat Plate Dimensions: 14 9/16'' x 3 3/8''; ➤Material: Porcelain Steel, Includes 3 Grill Heat Plate, ➤Original Part Numbers: 1363786. ➤Note: Please measure the dimensions of the original parts before purchasing and compare them with the dimensions of our products. Only after confirming that the dimensions are the same should you make your purchase.
Creating a Hot Searing Zone With Adjacent Burners
By pairing the rear burner with a front burner that has a larger flame‑tamer hole, you already have a smooth temperature gradient; turning the two middle burners on high takes that a step further, forging a concentrated searing zone that spans a larger portion of the grate. Light those adjacent burners, close the lid, and let the grill reach 500–600°F for about 15 minutes. Place your steak or pork chop directly over the best zone; you’ll see bold sear marks and caramelization within 1–3 minutes per side. Rotate the meat 45° halfway through to create crosshatch marks, then slide it to a cooler area to finish. This method delivers an appropriate meat texture and respects the ideal grilling duration without flare‑ups. The direct heat zone is essential for achieving a strong Maillard reaction and crisp grill marks. For steaks, consider using the reverse sear method to monitor internal temperature carefully before applying this intense searing heat.

Replacement ceramic honeycomb burner plate for compatible gas heaters, stoves, ranges and gas grills that use this size and style of plate.

✅ Special Notes for this item: If you are looking for parts, the BRAND and MODEL No.# listed below are just for your reference. Please Kindly check again for the SIZE and MODEL of your original parts before purchasing. if you have any problem with the item, please feel free to contact us 7 * 24 Hours.
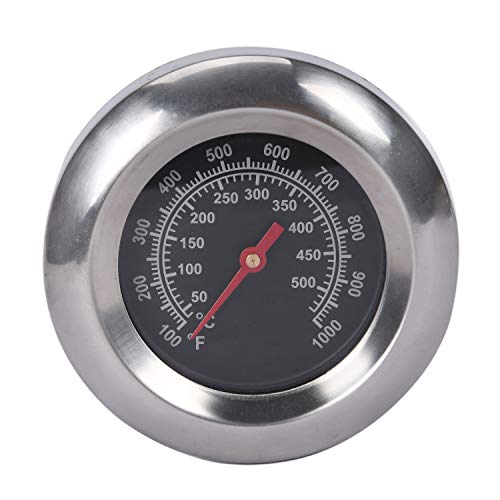
Wide temperature range: 100 F-1000 F/ 50 ℃- 500 ℃(Accurate Readings). Dimensions: 3" face, 2" stem, M10 nut (0.39" strew), Please check the dimensions of your grill before you order
Setting Up an Indirect Cooler Zone Using One Burned‑Off Burner
Kick off your grill session by lighting two burners and leaving the third off, then position the food directly over the unlit burner to create an indirect cooler zone. Preheat with the lid closed for about fifteen minutes until the grill reads 500‑550 °F, then lower the far‑right burner to medium‑high and the adjacent burner to low. Close the lid again; heat circulates around the off burner, giving you indirect zone control. Slip a water pan beneath the roast to keep moisture steady and place a probe thermometer in the meat’s thickest spot. Watch the readout and tweak the lit burners or vent openings to maintain temperature consistency around 225 °F. Rotate the cut if one side cooks faster, and enjoy even, low‑and‑slow cooking. Using direct and indirect heat allows you to sear and then finish cooking without over‑cooking the exterior.
Preventing Flare‑Ups on Two Burners
When you fire up two burners on a three‑burner grill, flare‑ups can happen fast, but you can keep them under control by managing heat and fat before they ignite. First, trim excess fat and use a drip pan to catch drippings; this alone cuts reducing flare ups dramatically. Next, set a cooler zone by turning off one burner and placing food there when flames flare. Keep the active burner at low‑to‑medium temperature, and never place meat directly over the flame. If a spark appears, move the piece to the cooler side or close the lid to smother it. Regularly brush the grates, scrape flavorizer bars, and empty solidified grease before it liquefies. Windy grilling conditions can also intensify flare‑ups, so consider shielding the grill from strong breezes. Maintaining good airflow by adjusting vents helps stabilize your heat and prevents temperature spikes that trigger flames. These steps, combined with utilizing temperature zones, keep your grill safe and your meals delicious.
Adjusting Temperature for Pans and Direct‑Heat Cooking With Two Burners
Adjusting the temperature for pans and direct‑heat cooking on a three‑burner grill is simple once you recognize the two‑burner layout creates a hot direct zone and a cooler indirect zone. Set the two active burners to medium‑high, about 375‑400°F, to get a sizzling direct zone for searing pans. Drop one burner to low (250‑300°F) for gentle sautéing or sweating vegetables, and use the third, unlit burner as an indirect zone that stays near 225°F when the lid is closed. Preheat your pan on the direct side to roughly 350°F for even browning, then slide it to the indirect side to finish without burning. Proper preheating ensures the grill reaches optimal searing temperatures and prevents food from sticking to the grates. By fine‑tuning knob positions and watching the grill thermometer, you’re optimizing grill configuration while regulating temperature fluctuations for consistent results. Proper temperature control ensures the grill maintains the desired heat throughout cooking.
Typical Two‑Burner Mistakes (and How to Fix Them)
Typical two‑burner mistakes stem from three core oversights: mistimed zone switches, insufficient preheat, and an all‑or‑nothing fire setup. You’ll notice food drying out when you wait too long to move it from a hot zone to a cooler one; a gentle sizzle means you’re safe, but a sudden pop forces an immediate shift. If the lid thermometer lies, check the grate temperature directly and keep it uniform. Skipping the Even Preheating Duration leaves food sticking and sear marks weak—reheat the grate after dumping coals and wait for a steady glow. Finally, avoid an all‑or‑nothing fire by leaving one burner low or empty, creating a safety zone that catches grease and preserves juiciness. Adjust these habits, and your two‑burner grill will perform like a three‑burner. Timing of zone switches is crucial because a delayed move can cause the meat to over‑cook before you notice the change in heat. For most meats and vegetables, maintaining a medium heat temperature between your two zones ensures even cooking without harsh charring.


