
On a charcoal grill, the crust forms through direct conduction: the hot coals heat the cast‑iron grate, which then transfers heat straight into the patty’s surface, triggering the Maillard reaction in seconds. Keep the patty dry, press it thin on the pre‑heated grate, and let the heat melt intramuscular fat for juiciness. After a quick sear, move the burger to the cooler side to finish cooking without drying out. If you follow these steps, you’ll uncover even more tricks for mastering the perfect burger.
Why a Hot Sear Gives Your Charcoal Grill Burger a Perfect Crust
When you crank the grill to 400‑450 °F, the Maillard reaction ignites, turning the patty’s surface into a deep, caramelized crust. You must keep the meat dry; any surface moisture dilutes amino acids and sugars, slowing the reaction. Pat a patty on a pre‑heated cast‑iron or grill grate, press it thin, and let the heat evaporate remaining water instantly. This creates a concentrated reactant layer that browns in seconds. Simultaneously, the high temperature melts intramuscular fat, allowing fat rendering optimization that juices the interior while the exterior stays crisp. Using a digital meat thermometer helps you monitor the internal temperature to ensure your burger reaches the perfect doneness while maintaining that juicy center. Mastering time‑temp balancing guarantees the crust forms without overcooking the middle, delivering a perfect, flavorful bite every time. The Maillard reaction is crucial for achieving the perfect sear on a burger.
Two‑Zone Charcoal Grill Setup for a Strong Maillard Sear
A strong Maillard crust needs a dedicated hot zone, so set up your charcoal grill with two distinct temperature areas. Fill a chimney halfway with 45 unlit briquettes, light 12‑15 until they turn white, then dump them on one side of the grill. Rake the lit coals into a one‑third‑wide block to create a direct‑heat zone that reaches 450‑550°F. Bank the remaining charcoal on the opposite side, leaving a cooler indirect zone at 250‑350°F. Open the bottom vents fully and position the top vents over the cool side to channel smoke and direct heat. The hot zone delivers radiant heat transfer for a sear, while the grill’s metal conducts the heat into the patty, forming a deep crust. After a brief sear, move burgers to the indirect side to finish cooking without flare‑ups. Using a meat thermometer ensures your burgers reach the safe internal temperature while maintaining the juiciness achieved through proper heat management. Ensure that the airflow is balanced to keep the temperature stable throughout the cook. The indirect zone also helps prevent excessive heat buildup on the meat, preserving juiciness.

Precision Two-Zone Cooking System for Kettle Grills: Transforms your kettle grill into a professional two-zone cooker — direct high-heat searing on one side and indirect low-and-slow smoking on the other. Perfect for steaks, brisket, pork butt, ribs, chicken, and more.

2-in-1 Combo Design: With the charcoal grill and 2-burner gas grill positioned side by side, this grill combines the capabilities of gas grill and charcoal grill, particularly suited for those who desire the versatility of both gas and charcoal cooking.
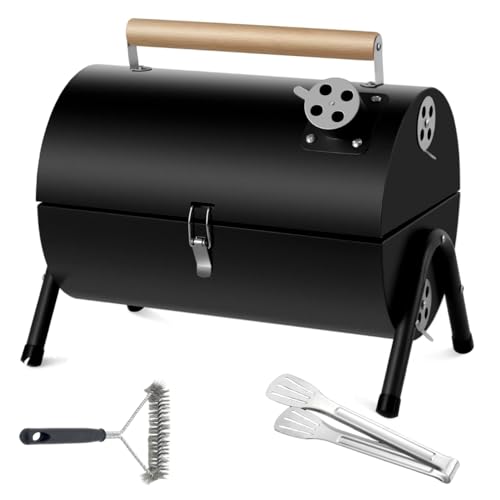
SUPER WORTH CONSTRUCTION: Portable Charcoal Grill is adopt upgraded powder spraying technology, Reduce the risk of rusting, cracking, and peeling while withstanding high grilling temperatures reaches 750-800, Extra thick steel provides sturdy construction without deformation, Last for a long time use, Bring you a reassuring bbq time
Direct vs. Indirect Heat on a Charcoal Grill: What It Means for Juiciness?
Because direct heat sears the exterior in seconds, it can lock in flavor but also risks drying thin burgers if you linger too long; indirect heat, by contrast, cooks more slowly and evenly, preserving internal moisture while still allowing a modest crust. When you place a patty over hot coals, the radiant flame delivers an ideal searing technique that creates Maillard browning and grill marks, but the intense temperature can evaporate juices from a ¾‑inch burger in under three minutes. Shifting the burger to a cooler zone creates a uniform temperature distribution, letting convection finish the cook without over‑drying. Use a two‑zone setup to start by searing direct for two minutes, then move indirect to maintain moisture, achieve even doneness, and retain juiciness. After cooking, allow the burger to rest for a few minutes to let juices redistribute before serving. Direct heat is especially effective for creating golden‑brown color on the exterior.

Gas and charcoal combination grill with additional side burner for ultimate cooking versatility - Dual fuel grills, sometimes called combo grills or dual-function grills or multifuel grills, are a newer style of grill that combines the best of charcoal grilling along with the convenience of a gas grill in one

Celebrate charcoal grill, charcoal grilling, live fire cooking, charcoal griller, backyard grilling, two-zone crew, fire management, vents open, direct indirect, chimney loaded, coals ready, and heat control culture.

Celebrate charcoal grill, charcoal grilling, live fire cooking, charcoal griller, backyard grilling, two-zone crew, fire management, vents open, direct indirect, chimney loaded, coals ready, and heat control culture.
Common Charcoal Grill Sear Mistakes (and How to Fix Them)
Three common searing mistakes can ruin a charcoal‑grilled burger, but each has a simple fix: don’t press the patty, manage flare‑ups, and avoid uneven heat. First, keep the spatula off the burger during the initial 3‑4 minutes; pressing squeezes out juices and leaves the patty dry. Let it sear undisturbed for a crisp crust. Second, control flare‑ups by trimming excess fat and moving the burger to an indirect zone as soon as flames lick the surface; rotate the grate instead of the patty to keep the grill’s even cooking temperature. Third, prevent uneven searing by arranging a two‑zone setup with hot and cool areas, then swap burgers between zones until each side reaches the same doneness. Maintain an adequate fuel supply and preheat the grill to 450‑500°F for consistent performance. Before cooking, ensure proper airflow by fully opening your grill vents to maintain steady heat throughout the sear. Charcoal provides higher peak temperatures that enable a rapid sear and a flavorful crust.
Charcoal Grill Meat Thermometer Guide for Perfect Doneness
When you master a thermometer, you eliminate guesswork and lock in perfect doneness every time you fire up the charcoal grill. Choose an instant‑read model for quick 0.5‑4‑second readings and a 4.3‑inch probe that reaches the thickest part of the meat. Insert the probe away from bone, centering it in the bulk of the patty or steak—this guarantees probe placement that reflects true internal temperature. For multi‑probe or wireless setups, monitor both meat and grill ambient temps, keeping the lid closed after insertion to avoid heat loss. Look for thermometers with a temperature range wide enough to handle both low smoking temperatures and high searing heat. Calibrate regularly to maintain probe accuracy within 1‑2 °F. Track target temps—125 °F for rare beef, 135 °F medium‑rare, 145 °F medium, 165 °F poultry—to achieve consistent, safe doneness. Investing in a high‑quality thermometer prevents undercooking and reduces food waste.

【Fast & Accurate】Our meat thermometer digital delivers accurate readings within ±1°F in just 1–2 seconds, with a wide temperature range of -58°F to 572°F (-50°C to 300°C). No more waiting over the heat - know your food's exact temperature instantly.

UPGRADED PROBE FOR FASTER, MORE STABLE READINGS - This meat thermometer features a precision-upgraded probe with higher sensitivity and enhanced thermal conductivity, delivering more accurate and stable readings in just 0.5 seconds. Unlike standard probes, the upgraded design transfers heat faster from first contact, giving you a more reliable and consistent temperature measurement every time—no more guessing, only perfect meals!

More Accurate, More Professional: With a National Institute of Standards and Technology (NIST) certification for its ±0.5℉ accuracy, this meat thermometer is a game-changer cooking tool for BBQs, roasts, candy, and everyday meals, ensuring your food is cooked safely and deliciously every time.
Adding Cheese on a Charcoal Grill: Timing the Final Heat Transfer
How do you perfect the final heat transfer when adding cheese to a charcoal grill? Place a cheese block on the indirect side of the grill once the meat reaches its target temperature. Keep the grill temperature below 90 °F by closing dampers three‑quarters and adding a few wood chips for cold smoke. Smoke the cheese for 1–2 hours, flipping halfway to guarantee even smoke exposure and uniform conduction. For high‑melting cheeses like Gouda, a 1‑minute sear on each side over medium‑high heat creates a lightly charred rind while preserving creamy interior textures. Brush the cheese with oil before the brief melt to enhance heat transfer and prevent sticking. Finish by topping the burger and letting the cheese melt for 30 seconds, preserving the desired texture. Smoked cheese has a longer shelf life than non-smoked cheese due to the curing process, which also adds a subtle, smoky depth to the overall flavor profile. For optimal results, store any leftover smoked cheese in an airtight container to maintain its quality and prevent it from drying out.
Frequently Asked Questions About Charcoal Grill Burger Conduction
After mastering cheese placement, the next step is understanding how conduction shapes your burger’s crust. Conduction occurs when the patty contacts the hot grates, transferring heat directly and creating the sear you want. Keep the grill at the optimum charcoal temperature—around 375‑400 °F—so the grates are hot enough for a crisp bottom without burning. You’ll sear each side for 2‑3 minutes, then flip once when juices pool. After the sear, make after sear temperature adjustments by moving the burgers to the indirect zone; close the lid and let convection finish cooking to 160 °F. For consistent heat during cooking, keep your ash catcher clean to maintain proper airflow. This two‑zone method balances direct conduction for browning and indirect convection for even doneness, preserving juiciness and flavor. Proper ventilation ensures consistent heat circulation during the convection phase.


