
Preheat your grill to medium‑high (about 450°F) and set up a two‑zone heat layout, keeping one side cooler at 350‑400°F. Slice the onions into ½‑inch rings or 1‑inch wedges, brush both sides with olive oil, and season with salt, pepper, and a pinch of sugar or smoked paprika. Place the pieces directly over the hot zone, turning every few minutes, and move them to the cooler side after 5‑7 minutes to finish caramelizing without burning. Keep the lid closed to stabilize temperature, and you’ll have sweet, tender onions ready for any dish—more tips await if you keep going.
Quick‑Start Overview: Grill Perfect Onions in 5 Steps
Five simple steps will get you perfectly grilled onions every time. First, preheat the grill to medium, about 450°F, for five to ten minutes; if you have a vegetable basket, place it on the grates early to lock in heat. Next, brush both sides of each onion piece with olive oil, then season with salt, pepper, and optional thyme or smoked paprika for complex flavors. Then, arrange the onions widthwise on the grates or in a sealed foil packet, using tongs to avoid handling. Cover and grill for twelve minutes, turning once or twice, until they soften, char in spots, and develop a caramelized texture. Like other vegetables, onions benefit from medium-high heat temperatures that create both tenderness and char for optimal flavor. Finally, transfer to a plate, drizzle with balsamic or sherry vinegar, and serve while warm, preserving the depth of flavor.
Slice Onions for Even Grilling: Rings, Wedges, or Halves
If you want evenly grilled onions, start by choosing the right cut—rings, wedges, or halves—because each shape dictates how heat penetrates and how the pieces hold together on the grill. For rings, aim for half‑inch slice thickness variations; this thickness balances structural integrity with quick caramelization. Peel the outer layers, then slice off the top to create a flat base, ensuring each ring stays intact. When you prefer wedges, cut the onion into 1‑inch wide sections, keeping the root end intact to hold the wedges together, and insert a wooden skewer through the center for stability. Halves work best with three‑quarter‑inch thick slabs that preserve the root while allowing even cooking. Finally, consider onion variety selection: sweet Vidalia or Walla Walla onions caramelize faster, while yellow or red onions need careful temperature control. To prevent mushy texture and achieve optimal results, avoid overcooking your onions while ensuring they are soft and slightly charred. Using olive oil helps achieve a caramelized outside and tender inside.

Our 100% Texas-grown Olive Oil is proudly non-GMO & all-natural, tested & certified as Extra Virgin
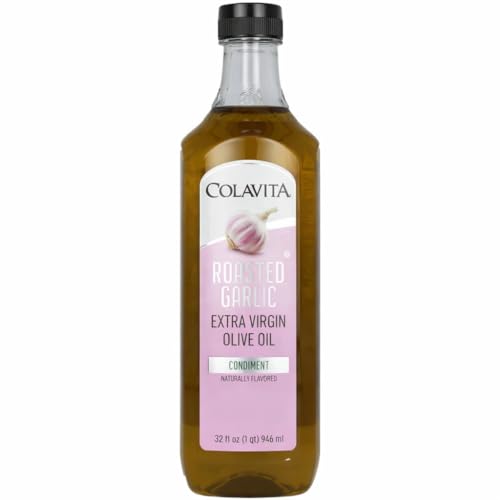
ROASTED GARLIC INFUSION: Cold pressed extra virgin olive oil blended with natural roasted garlic essence for a rich, mellow flavor that enhances everyday cooking.

Season Onions for Maximum Caramelization
Once your onions are sliced and fastened on the grill, season them to coax the deepest caramel flavor. Sprinkle about ½ teaspoon kosher salt per medium onion after the first 15 minutes of medium‑low heat; the salt draws out moisture, which mixes with browned bits and boosts flavor while preserving moisture retention. Follow with roughly 1 teaspoon granulated sugar for every two onions, just enough to accelerate sugars development without overt sweetness. Stir every few minutes during the low‑heat phase, scraping the pan bottom to distribute seasonings evenly and incorporate caramelized residue. If the pan darkens too fast, deglaze lightly with water or wine to halt burning and keep the salt‑sugar blend from scorching. This disciplined timing and gentle stirring guarantee maximum caramelization and a rich, balanced finish. The Maillard reaction also contributes to the complex flavor profile as amino acids and sugars react under heat. Achieving optimal results depends on selecting the right burn time and heat output from your charcoal fuel source to maintain consistent medium‑low temperatures throughout the caramelization process.

TEXAS-MADE: Crafted by BBQ expert Jess Pryles, this activated charcoal rub delivers bold flavor for steak, brisket, and burgers. Proudly made in Texas with premium ingredients for authentic grilling.

Distinctive sweet and spicy blend of brown sugar, bourbon, garlic, onion and salt

Four flavor-packed Grill Mates seasonings together in one set: Spicy Montreal Steak, Mesquite, Smokehouse Maple, and Chipotle & Roasted Garlic
Set Up Your Grill for Ideal Grilled Onion Temperature
A well‑balanced grill setup is essential for achieving the perfect temperature that renders onions golden, tender, and caramelized. First, create distinct grill temperature zones: pile coals on one side of a charcoal grill or set one burner high and the opposite burner low on a gas grill. This two‑zone arrangement lets you place onions on the cooler side, where Controlling grill heat prevents burning. Use a grill thermometer to verify the cool zone stays around 350‑400 °F, then adjust vents or burner knobs for fine‑tuning, Controlling grill heat. Medium heat allows even cooking by providing enough heat to brown and tenderize food without harsh charring. For direct‑heat methods, preheat to 450‑500 °F, then move onions to an indirect spot after the initial sear. Keep the lid closed to stabilize temperature, flip onions every 10‑15 minutes, and monitor for a golden, tender finish.
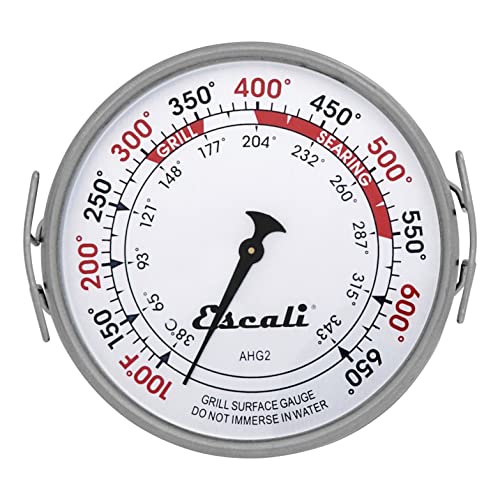
Temperature Range: 100° to 650°F / 38° to 343°C. Dial Diameter: 3.5 inches

TEMPERATURE GAUGE: Place directly on cooking surface for precise and easy use

✅[ Easy Temperature Reading ] - 3 3/16'' Large Dial BBQ Grill Smoker Thermometer with enlarged degree scales and numbers , easy to read even from far away. Perfectly fits for most smokers or grills with a 3/8 inch opening or hole
Grill Onions: Timing, Heat Levels, and Skewer Tips
Grill‑onion success hinges on matching cut size to heat and timing: thin wedges sear in 4‑5 minutes per side on medium heat, while whole or half onions need a 25‑40‑minute two‑zone charcoal run with flips every 10‑15 minutes, and foil‑packet wedges finish in 25‑30 minutes at medium‑high (≈450 °F). Choose ideal marinade options—olive oil, balsamic, and a pinch of smoked paprika—to coat wedges before placing them on skewers; this guarantees even caramelization and prevents sticking. Apply foolproof grilling techniques: pre‑heat the grill, arrange skewers over indirect heat for larger pieces, and rotate every ten minutes to avoid hot spots. For foil packets, shake the bundle halfway through the 25‑30‑minute window to distribute moisture and achieve uniform tenderness. Adding a bit of water during cooking keeps the onions moist and juicy while they caramelize over the extended cooking time. Spread the charcoal in a tightly packed, single layer across half of the grill grate.
How to Tell When Grilled Onions Are Done?
When you watch the onions turn a deep golden‑brown and their edges soften to a tender, almost buttery texture, you know they’re done. You’ll see cooking time indicators in the caramelized hue and occasional char spots, while visual texture changes shift from firm to soft throughout each slice. A translucent sheen replaces the raw white skin, and the scent turns sweet, losing any sharp onion bite. Test with a fork: it should glide in with no resistance, confirming tenderness. If you’re using medium‑high heat, expect 5‑10 minutes per side; a covered grill may stretch to 15‑20 minutes total. For the most accurate results, use a meat thermometer to verify proper cooking temperatures and ensure your grill maintains consistent heat throughout the cooking process. Trust these cues, and your grilled onions will be perfectly ready for any dish. Use sweet onion varieties like Vidalia for the best flavor.
Troubleshoot Common Grilled Onion Problems
One of the most common frustrations with grilled onions is that they fall apart, stick, burn, or stay dry, and each issue stems from a simple preparation or cooking mistake. To keep rings intact, cut half‑inch‑thick slices, leave the husk on, and skewer or toothpick them before grilling. Lightly oil the grates and brush both sides of each piece; a foil‑lined pan or griddle prevents sticking while allowing searing techniques that develop layered flavors. For burn‑prone wedges, use medium heat, cover with a foil pan, and turn only once or twice using tongs, not the skewer. If they dry out, sprinkle a few tablespoons of water and let it evaporate, preserving moisture for caramelization and a juicy, golden finish. Like asparagus, you can use the foil packet method to protect delicate vegetables while allowing them to steam and char. A large onion yields 4‑6 slices that can be grilled evenly.
Serve and Store Grilled Onions for Maximum Flavor
Two simple steps—serve the onions while they’re hot and pair them with a bright finishing touch—will lock in their smoky sweetness and keep every bite juicy. First, use quick serve techniques: transfer the caramelized rings to a warm platter, drizzle aged balsamic, sprinkle fresh herbs, and season with sea salt and cracked pepper. They’ll shine on burgers, steaks with chimichurri, or grilled cheese. If you need to hold them, keep the pan covered with foil for up to 30 minutes to retain heat. For storage, cool the onions, then seal them in an airtight container; they last up to four days in the fridge, giving extended shelf life. Freeze portions in freezer bags for three months, reheating in a buttered skillet with a splash of water to revive juiciness. Like grilled potatoes, onions benefit from indirect heat during initial cooking to ensure even caramelization before finishing over direct heat. The grill pan helps keep the onion discs from slipping through the grates.


