Pick a heavy‑duty cast‑iron grill pan, heat it on medium‑high for 2‑3 minutes, and add a thin coat of oil. Pat the chicken dry, then rub it with a mix of garlic powder, cumin, smoked paprika, sea salt, pepper, and a splash of olive oil (or marinate briefly). Lay the skin‑side down, let it sit undisturbed for 2‑3 minutes, rotate 45° for a cross‑hatch, then flip, baste with butter and herbs, and cook until the thickest part hits 160 °F. Let it rest five minutes to lock in juices, and you’ll uncover even more tips ahead.
Choose the Right Pan for Stovetop Grilled Chicken
A well‑chosen pan makes stovetop‑grilled chicken turn out tender, juicy, and perfectly marked. You’ll want a heavy‑duty cast‑iron grill pan with ridges; its superior heat retention creates a dark, flavorful crust while the natural non‑stick surface, once seasoned, prevents sticking. For a 12‑inch pan, you can fit up to 1.75 lb of boneless thighs without crowding, and the low‑angled sides let you flip pieces easily. Before cooking, perform a pan pretreatment: heat the pan, add a thin oil coat, and wipe excess with a paper towel. The raised ridges on grill pans are specifically designed to allow excess fat to drain away, promoting healthier cooking results. After use, follow a cleaning method that avoids soap—scrape residue, rinse with hot water, and dry promptly to preserve seasoning. This routine guarantees consistent grill marks and effortless release every time. Adding a light coat of oil helps achieve a crisp surface and further enhances flavor.

Cast Iron Grill Pan: This 11-inch square grill pan, a part of Lodge's Chef Collection, is a durable cast iron pan ready to help you experiment in the kitchen like a pro
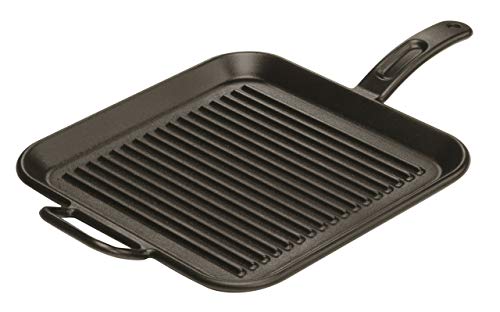
12 INCH CAST IRON GRILL PAN: Seasoned and ready to use, this cast iron grill pan features modern handles and grill ribs to help achieve the perfect sear, all in an essential size ideal for all kitchens.

12 Inch Cast Iron Square Baking Pan: this 12 inch large cast iron square grill pan is pre-seasoned and ready to use, featuring a natural vegetable oil coating; It comes with practical, modern circular handles and low side walls
Season (or Marinate) Stovetop Grilled Chicken for Maximum Flavor
When you coat the chicken with a balanced dry rub or a quick marinate, the flavors penetrate quickly and create a juicy, aromatic crust; you’ll achieve a well balanced seasoning and tender texture. Mix garlic powder, cumin, coriander, smoked paprika, sea salt, pepper, and a splash of olive oil in a small bowl. Sprinkle about ½ teaspoon per side, then toss or bag‑seal the pieces to coat evenly. For a marinate, combine olive oil, lemon juice, cilantro, salt, pepper, garlic powder, red‑pepper flakes, and optional dried herbs; refrigerate 1–4 hours. Pat the chicken dry before seasoning to avoid excess moisture. Apply the rub right before cooking or let it sit up to four hours for deeper flavor without drying the meat. Using an instant-read thermometer ensures your chicken reaches the proper internal temperature for food safety. Grilling and pan searing provide great flavor and moisture.
Pre‑Heat the Grill Pan for a Perfect Sear
If you match the grill pan’s base to the burner and let it warm for 2‑3 minutes on medium, the surface reaches a steady 350‑375°F, eliminating hot spots and ensuring the chicken sears instantly when it hits the pan. Use a proper pan handling technique: place the pan squarely, avoid sliding, and keep the handle steady. Observe readiness by sprinkling a few droplets of water; they should bead and dance for 3‑5 seconds, indicating uniform heat distribution. For cast‑iron pans, extend the pre‑heat to 3‑5 minutes on low‑to‑medium; for nonstick, stay at medium‑low to protect the coating. When oil spreads like silk and a gentle sizzle appears, the pan is ready for the perfect sear. A well-seasoned cast-iron surface will develop a non-stick, dark seasoning layer that improves with each use. Even heat distribution is essential for achieving a consistent crust across the entire surface.

Steakhouse Sear At Home: The Lodge Square Cast Iron Grill Pan delivers high-heat searing and bold grill marks while channeling excess grease away

Double Burner Configuration: The Lodge Double Play Reversible Cast Iron Grill/Griddle covers two burners, offering a generous breakfast grill plate for family breakfasts or meal prep with ease

VERSATILE COOKING PERFORMANCE: Ideal for stovetop, oven, grill, or open flame—perfect for searing, browning, baking, and more.
Sear the First Side Undisturbed for Classic Grill Marks
You’ll hear the satisfying sizzle the moment the chicken hits the pan. Place the dry, lightly oiled breast skin‑side down on the hot cast‑iron grill pan, positioning it on a diagonal for optimal pattern. Keep the pan at medium‑high heat to maximize heat for bold marks, and let the chicken sit undisturbed for 2‑3 minutes. During this time the edges will turn opaque and dark grill marks will begin to form; resist the urge to move the meat even if smoke appears. After the initial sear, rotate the breast 45 degrees to create a cross‑hatch, then let it continue for another minute. This steady, unmoved approach guarantees perfect sear and classic grill marks without excessive movement. For added flavor and browning, consider basting with butter and herbs during the final moments of cooking. The cross‑hatch pattern adds a professional visual appeal.
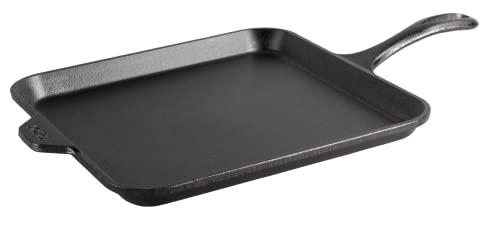
Versatile Square Cast Iron: The Lodge Seasoned Cast Iron Square Griddle Pan is ideal for perfectly cooked pancakes, eggs, and tortillas in any location

【2-in-1 Reversible Grill & Griddle】: Unlock a world of recipes with a single reversible griddle pan. One ribbed side creates perfect sear marks on steaks, chops, fish, chicken, and veggies; flip to the smooth side for pancakes, eggs, bacon, burgers, tortillas, and more. Ideal for indoor stovetop or outdoor BBQ

Pre-Seasoned & Ready to Use: The Lodge Cast Iron Griddle comes naturally pre-seasoned and ready to use for tortillas, pancakes, and more right from the box
Flip, Baste, and Finish Cooking Stovetop Grilled Chicken
After the grill marks set, flip the breast with tongs and start basting. Brush the second side with olive oil or melt butter in the pan, then drizzle lemon juice for brightness. Keep the pan at medium‑high heat for the next five to seven minutes, watching for a golden‑brown crust. If the breast is thick, add a final flip for one minute per side, adjusting the timing to avoid overcooking. Lower the flame slightly if the pan starts to smoke, ensuring proper heat management while the interior reaches the desired doneness. To preserve moisture during cooking, avoid high heat and over-reheating the chicken. Sprinkle fresh cilantro or a squeeze of lime just before removing the chicken to enhance flavor without compromising the crisp exterior. This sequence delivers consistent results and maintains moisture. Dry chicken very well before cooking to promote even browning.
Verify Doneness With a Thermometer (165 °F) Before Resting
A reliable way to guarantee your stovetop‑grilled chicken is safe and juicy is to check its internal temperature with an instant‑read thermometer before you let it rest. First, calibrate thermometer accuracy by testing it in ice water (32 °F) and boiling water (212 °F). Insert the probe into the thickest part of the breast, avoiding bone, and monitor temperature trends as the meat cooks. When the reading reaches 160 °F, remove the chicken; carryover heat will push the internal temperature to the USDA‑mandated 165 °F during a short rest. If you prefer a tighter margin, pull at 155 °F and hold for at least 45 seconds, then verify the temperature remains steady before resting. Letting the chicken rest for a few minutes after cooking helps seal in the juices for optimal flavor and tenderness. This precise check ascertains safety and juiciness. Allow chicken to rest for 5 minutes before slicing.
Rest Stovetop Grilled Chicken to Lock in Juices and Troubleshoot Any Issues
Because the chicken’s juices are still bubbling to the surface when you take it off the heat, you must let it sit before slicing. Transfer the pan to a warm spot, keep the lid loosely tented with foil, and avoid exposing the meat to cold air. This proper rest position lets the temperature rise 5‑10 °F, completing cooking and locking in moisture. Aim for an adequate rest time of five to seven minutes for breasts; larger pieces need a few extra minutes. If the chicken cools too much, reheat briefly in a greased skillet or oven for one to two minutes. Adjust rest duration for thickness, pound to evenness, and brine beforehand to troubleshoot dryness. Using a meat thermometer ensures you’ve reached the safe internal temperature before resting. Slice against the grain after resting for maximum juiciness. Even thickness ensures uniform cooking and prevents dry spots.