Preheat your grill to a steady 425‑450 °F zone, oil the grates, and sear each breast for 4‑5 minutes on direct heat without moving it. Flip once and repeat, adding a 90° rotation after 2 minutes if you want cross‑hatch marks. When the crust turns deep golden, shift the meat to the 350‑400 °F indirect zone and cook 5‑10 minutes until the thickest part hits 155‑160 °F; carry‑over will bring it to a safe 165 °F. Keep going for tips on timing by size and perfect resting.
Ideal Grill Temperature for a Perfect Sear?
How hot should your grill be to get that perfect sear on chicken breast? Aim for a steady 425‑450 °F zone, which corresponds to medium‑high heat. First, preheat the grill for 10‑15 minutes, then brush and lightly oil the grates to safeguard clean, non‑stick surfaces. This preparation guarantees temperature consistency across the cooking area, preventing hot spots that could scorch the meat. When you place the breast on the grates, you’re applying direct heat application, which creates those coveted brown sear marks while locking in juices. Keep the lid slightly open to maintain the target range, and monitor the grill with a handheld thermometer to ensure accurate temperature readings. Consistently holding this temperature will give you an even, flavorful crust without overcooking the interior. Oil the grill grates before cooking to reduce sticking.

Instant Read Food Thermometer | Our instant read thermometer features a temperature probe and advanced, highly accurate technology with 1-2 seconds response time; Instructions, meat temperature chart, comes pre-calibrated for your convenience, and recalibrating feature if needed.
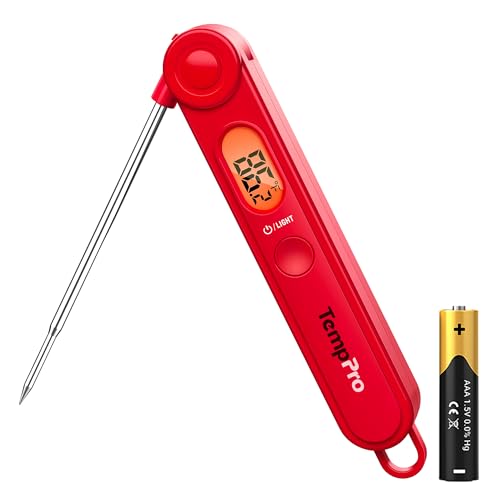
【Easy to Use】Easily release the meat probe at the push of a button, and control the backlight or power with another button. With TempPro, cooking becomes a seamless, stress-free experience

No Guessing, Perfectly Cooked Meat Every Time: Instant-read digital thermometer gives you accurate internal temperature in seconds, so you know exactly when your steak, chicken or burger is done – no cutting, no guessing.
How Long to Sear Each Side on Direct Heat?
Ever wondered how long to keep each side of a chicken breast on the grill? Preheat the grill for 10‑15 minutes, then set a direct heat zone at 400‑425°F. Place a 1/2‑inch thick or flattened breast on the hot zone and sear for 4‑5 minutes without moving it. Follow a simple flipping pattern: turn the breast once at the 4‑5‑minute mark, then cook the opposite side another 4‑5 minutes. Keep the lid closed to maintain steady heat. If you want cross‑hatch marks, rotate the breast 90° after 2 minutes on each side before the final flip. For thicker pieces, extend the total sear time past 9‑10 minutes, still flipping halfway. Use a thermometer to confirm 160°F internal before removing. Pound the breast to an even 1/2‑inch thickness for consistent cooking. After grilling, rest the chicken for 5 to 10 minutes to allow the juices to redistribute for maximum juiciness.
When Should You Move a Grilled Chicken Breast to Indirect Heat?
When you notice the chicken breast developing a deep golden crust and the edges start to brown faster than the interior, it’s time to transfer it to indirect heat. After 8‑10 minutes on direct fire—flipping halfway and watching the first half of the cook time—you’ll see the crust set and the exterior brown too quickly. Move the breast to the cooler side, keeping the grill at a steady 350‑400°F (ideal 375‑400°F) for timing shifts. Cook 5‑7 minutes without flipping, then continue 5‑10 minutes until the thickest part hits 160°F. Use a meat thermometer inserted into the thickest part of the chicken to verify you’ve reached the proper internal temperature of 165°F to 170°F for boneless, skinless chicken breasts. This indirect phase maintains grill temperature, prevents burning, and lets juices redistribute before you rest the meat for a perfect finish. Ensure grill grates are clean and oiled before starting.

TEMPERATURE GAUGE: Place directly on cooking surface for precise and easy use

Large Display: Features a 2 3/8 inches large face for clear visibility; Stem length of 2 7/8 inches enhances accessibility; Enables easy classification of food temperatures in various cooking environments
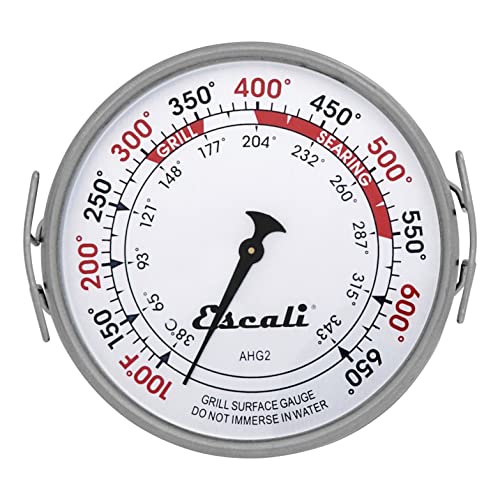
Temperature Range: 100° to 650°F / 38° to 343°C. Dial Diameter: 3.5 inches
Size‑Based Timing for Grilling Chicken Breasts
Once the crust has set and you’ve moved the breast to indirect heat, the next step is to match cooking time to the breast’s size. For medium breasts, aim for 6‑8 minutes per side on a 425‑450°F grill, flipping halfway for a 9‑10‑minute total. Small breasts need only 4‑5 minutes per side, while thin pieces reduce to 4‑5 minutes total, and large breasts extend to 8‑10 minutes per side. Your best tips for achieving even cooking include pounding the meat to uniform thickness and arranging pieces so heat reaches each side equally. Resting the chicken for several minutes after cooking allows juices to redistribute, yielding juicier results. Remember the importance of monitoring temperature; a quick probe check after the first flip lets you adjust time before the final minute, ensuring every bite is perfectly done. Balsamic vinegar adds a subtle tang that enhances flavor without extra effort.

Fast & Accurate: Get precise readings in just 1 second with ±0.9°F accuracy. NSF Certified for trusted food safety, this digital food thermometer features a 4.3 inches food-grade stainless steel meat probe, perfect for grilling, frying, baking, making candy and more

【8X Faster + 4X More Precise】: Upgraded with an industrial-leading professional thermocouple sensor, Themomonster meat thermometer digital with NIST certified ±0.5℉ precision provides you the accurate temperature of your food in just 0.5 Seconds.

FAST & ACCURATE INSTANT READ: Get temperature readings in just 2-3 seconds with ±1°F accuracy. Whether you're grilling steaks, roasting turkey, smoking brisket, or baking bread, this digital meat thermometer helps you monitor food temperature quickly and confidently
What Internal Temperature Means “Done” and How Carry‑Over Cooking Helps?
Typically, you’ll consider a chicken breast “done” when its internal temperature hits 165 °F, the USDA’s safety threshold that instantly kills Salmonella and Campylobacter. In practice, aim for an ideal internal temperature range of 155‑160 °F before you remove the meat; carry‑over cooking will push the center past 165 °F while the exterior cools, preserving juiciness. Insert an instant‑read thermometer into the thickest spot, avoiding bone. As the grill heat dissipates, the outer layers transfer residual heat inward, raising the core by 3‑5 °F. This effect of carry‑over cooking lets you pull the breast a few degrees early, preventing dry, rubbery texture while still meeting safety standards. Rest briefly in a hot box to let the temperature stabilize. If you need to reheat your grilled chicken later, use moisture-retaining methods like an air fryer or oven with added liquid to keep it from drying out. Always measure the thickest part of the chicken for the most accurate reading.
Pre‑Grilling Prep for Grilled Chicken Breasts
Even if you’re short on time, start by patting the breasts dry, trimming any excess fat, and letting them sit at room temperature for no more than two hours; then inspect for quality and flatten each piece to about one‑inch thickness for even cooking. Choose either a brine or a marinade. For brining, dissolve ¼ cup kosher salt in four cups water, submerge the breasts for 30‑60 minutes, then return them to room temperature—this step boosts the success of brine by locking in moisture. If you prefer marinating, combine oil, vinegar, water, and seasonings, place the chicken in a resealable bag, and aim for a marinating duration of 20 minutes to four hours; reserve a quarter‑cup of the mixture for basting. Finally, preheat the grill 10‑15 minutes, oil the grates, and confirm cleanliness before you start searing. Flipping the chicken every 5 to 8 minutes during cooking promotes even heat distribution across the meat. Use an instant‑read thermometer to ensure the chicken reaches the proper internal temperature.
Resting and Finishing Steps for Juicy Chicken?
After your chicken reaches 155 °F on the grill, let it rest for 5‑10 minutes before slicing. Transfer the breasts to a cutting board, then tent them with foil using the foil tent resting method to keep heat in and promote the 5‑7 °F carry‑over rise. Aim for a minimum resting duration of ten minutes if you want maximum juice retention, but five minutes suffices when you’re short on time. During the rest, juices redistribute evenly, preventing a dry slice. Keep the foil loosely draped to avoid condensation pooling on the meat. After the rest, slice against the grain and serve immediately for a moist, flavorful result. Use a digital thermometer in the thickest part to verify the final temperature. Grilling chicken at a high heat of around 450°F ensures a flavorful crust.