Choose a bone‑in, loin‑end rib (10‑12) and dry‑brine it with kosher salt 24 hours ahead, leaving a quarter‑inch fat layer. Mix ¾ tsp salt, ½ tsp pepper, garlic, onion, smoked paprika, thyme or rosemary, and high‑smoke‑point oil into a paste. Place the rib fat‑side up, insert a probe, and smoke at 250 °F over lump charcoal and oak, basting hourly with Worcestershire. Pull at 115‑125 °F, then broil 5 minutes at 500 °F for a crust. Rest 30‑45 minutes, tent with foil, and slice against the grain. Continue for deeper details on temperature control and serving.
Choose the Prime Rib Cut and Salt It 24 Hours Ahead
When you pick a rib roast, start by checking the USDA grade—Prime, Choice, or Select—because only Prime guarantees the abundant marbling that yields the richest flavor and tenderness. Choose the loin‑end (ribs 10‑12) for superior tenderness, and request a bone‑in cut to preserve moisture. Trim any fat thicker than one inch, leaving a quarter‑inch layer for flavor. For the dry brining process, apply kosher salt 24 hours before cooking. Use a high‑volume, 18‑24‑inch spread to guarantee even coverage; the ideal salt application is liberal on all sides, as oversalting is unlikely. This timing allows the salt to penetrate, enhancing moisture retention and seasoning depth while you prepare the grill. Remember to use a reliable meat thermometer during the cooking process to monitor internal temperature and achieve your desired doneness level. The eye is the central, most tender portion of the roast, and keeping it intact helps maintain juiciness.

One bone-in beef chuck flanken style short ribs weighing between 0.25 and 1.25 pounds

Made in the USA, Michigan

One bone-in pork back ribs weighing between 2.25 and 3.5 pounds
Mix a Simple Salt‑and‑Pepper Rub for Prime Rib
After the 24‑hour dry‑brine, the rib is ready for a flavor‑boosting rub. Combine ¾ tsp kosher salt per pound with ½ tsp coarse black pepper in a small bowl; whisk until free of lumps. Add ¼ tsp garlic powder, ¼ tsp onion powder, and a pinch of smoked paprika for depth. If you want flavoring variations, fold in ½ tsp dried thyme or crushed rosemary, adjusting for potency. For a wet version, drizzle 4–5 tbsp high‑smoke‑point oil and stir to a paste that adheres uniformly. Apply the rub evenly to all surfaces, then refrigerate the prepared rib for 30 minutes to let the seasoning penetrate and to maintain food safety. Just as with steaks, proper seasoning is emphasized throughout the cooking process to achieve tender, flavorful results. Store any excess rub airtight in a cool, dark place for future use. The classic rub also includes coarse cracked black pepper for a robust bite.
Position the Prime Rib Fat‑Side Up and Insert the Probe
Place the rib fat‑side up before you slide the probe in, then insert the thermometer into the thickest part of the meat, steering clear of bone. The fat cap renders juices back into the center, bastes the roast, and shields the eye from direct heat, ensuring even temperature rise. Position the probe centrally, away from bone, so probe monitoring yields accurate internal readings without removing the roast. Keep the rib on the indirect zone, maintaining 250°F during the smoke phase, and adjust grill vents as needed. Track the probe to make cooking time adjustments, pulling the meat at 125°F to accommodate carry-over heat, which allows the internal temperature to rise several degrees after removing from the grill. This setup guarantees uniform rendering and precise doneness. Probe placement is essential for reliable temperature monitoring.

Fast & Accurate: Get precise readings in just 1 second with ±0.9°F accuracy. NSF Certified for trusted food safety, this digital food thermometer features a 4.3 inches food-grade stainless steel meat probe, perfect for grilling, frying, baking, making candy and more

Instant Read Food Thermometer | Our instant read thermometer features a temperature probe and advanced, highly accurate technology with 1-2 seconds response time; Instructions, meat temperature chart, comes pre-calibrated for your convenience, and recalibrating feature if needed.

【No More Overcooking, 8X Faster】Ultra-fast 0.5 second instant read meat thermometer delivers accurate temperature instantly, helping you avoid overcooking and achieve perfect doneness every time.
Set Up the Grill for a Two‑Stage Prime Rib Smoke
Position the probe centrally, then turn your attention to the grill’s layout: preheat the smoker to a steady 225‑250 °F with the lid closed for 15 minutes, load a bed of lump charcoal and oak wood in the firebox, and seal the dampers to lock in heat. Next, arrange the firebox so the lump charcoal forms a deep bed and the oak splits sit on top, creating a consistent heat source. Close the lid, then monitor smoke source closely; the oak will produce a thick, steady plume. Adjust air circulation by fine‑tuning the intake and exhaust vents, keeping the temperature within the 225‑250 °F window. Verify that the firebox temperature stabilizes before sliding the prime rib onto the grate, ensuring a uniform low‑temperature smoke before the sear stage. Allow the meat to rest for 15 to 20 minutes after smoking to let the juices redistribute throughout. Mix the dry ingredients with olive oil to create a slurry that will form a flavorful crust slurry on the meat.
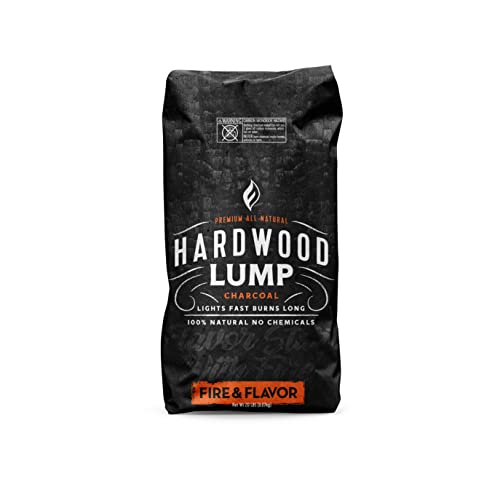
QUALITY LUMP CHARCOAL: Not all fire is created equal. Our premium, hand-picked lump charcoal is kiln-fired and packed in its natural shape for professional-level results on the grill and in the smoker.

8 LB. BAG ALL-NATURAL HARDWOOD LUMP CHARCOAL FOR GRILLING, SMOKING & OUTDOOR BBQ COOKING – Upgrade your grilling experience with Mr. Bar-B-Q Lump Charcoal, made from a premium blend of 100% natural hardwoods for a clean, hot, and flavorful burn. Perfect for charcoal grills, smokers, kamado cookers, and portable BBQ setups, this high-quality lump charcoal delivers rich smoky flavor, consistent heat, and low ash for better performance and easier cleanup. Whether you're firing up a chimney starter, searing over high heat, or slow-smoking your favorite meats, poultry, seafood, or vegetables, this charcoal is the ideal choice for BBQ enthusiasts, grill masters, and outdoor cooks.

ALL NATURAL OAK WOOD CHUNKS: These smoking wood chunks are crafted from 100% oak hardwood without any harsh chemicals. They naturally enhance any meat or seafood dish with a slightly sweet, smoky flavor and imbue your food with a rich color.
Smoke the Prime Rib at 250°F and Manage the Water Pan
If you keep the smoker steady at 250 °F, the prime rib will absorb smoke efficiently while the water pan adds humidity that stabilizes the two‑zone environment. Set the smoker to 250 °F and load oak or cherry wood for balanced smoke flavor intensity. Place the water pan opposite the heat source, fill it with hot water, and check it every 45 minutes. During water pan maintenance, top off any loss to keep the humidity constant; this prevents drying and maintains even temperature throughout the roast. Monitor the internal temperature with a leave‑in probe, aiming for 115‑125 °F before searing. Baste the rib every hour with Worcestershire to enhance bark formation while the pan sustains a moist, uniform cooking zone. The smoke flavor intensifies when the fat cap faces up during cooking. Precise temperature control with consistent monitoring throughout the cooking process ensures the prime rib achieves optimal tenderness and flavor development.
Pull the Prime Rib to Target Temperatures for Desired Doneness
Pull the roast off the heat as soon as its internal thermometer reads the target temperature for your desired doneness, then let it rest while the heat carries it a few degrees higher. You must achieve the ideal internal temperature by inserting an instant‑read probe into the thickest part, avoiding fat and bone. For rare, remove at 110 °F; for medium‑rare, pull at 120 °F; for medium, take it out at 130 °F. Expect a 5‑10 °F rise during the 15‑20‑minute rest, so the final temperature lands within the desired range. Monitoring temperature during cooking is critical—check the probe about 30 minutes before the estimated finish and verify at multiple points to guarantee even doneness. Like the reverse sear method, allowing your prime rib to rest after cooking helps redistribute juices throughout the meat for optimal tenderness and flavor. Cover the roast with foil to retain heat and allow juices to redistribute. Oven temperature can vary by up to 50 °F, so using a thermometer to confirm the oven’s actual heat is essential for consistent results.
Finish the Prime Rib With a 5‑Minute Broiler Crust
Once the roast has rested, preheat the oven to the broil setting and place a cast‑iron skillet—lightly brushed with olive oil—on the middle rack, keeping it far enough from the element to avoid direct flame. Slide the rib into the skillet, exposed, and broil the first side for five minutes. Flip the meat, add thyme sprigs, and broil the opposite side for another five minutes. During the process, monitor broiler temperature and check the crust every two minutes, using time broiling increments to avoid burning. A digital thermometer confirms the exterior is golden brown while the interior stays within target doneness. This controlled 5‑minute blast at 500°F renders fat, creates a crisp crust, and locks in juices. The high heat triggers the Maillard reaction to develop complex flavors on the meat’s surface. It also includes mushrooms that add a rich, earthy flavor to the dish.
Rest, Tent, and Slice the Prime Rib for Perfect Carryover
After the five‑minute broiler crust, transfer the roast to a large plate, tent it loosely with foil, and let it rest for 30–45 minutes. This tenting technique keeps airflow while preserving heat, allowing carryover cooking to raise internal temperature 5‑10°F and to redistribute juices. During the rest, remove the string, discard herb bundles, and, if bone‑in, separate the bone slab with a sharp knife. Position the bones on a serving platter to avoid interference. Then apply the slicing method: use a razor‑sharp carving knife to cut 1/4‑to‑1/3‑inch thick slices, moving against the grain for uniform texture. Thicker slices retain juiciness, while consistent slicing guarantees uniform doneness from edge to center. For optimal results, ensure your carving knife is properly seasoned like cast iron cookware to maintain its edge and cutting performance. Bone‑in prime rib benefits from the bone’s heat‑regulating properties during resting.