
Pick a 1‑to‑1.5‑inch‑thick steak, let it sit at room temperature for 20‑30 minutes (longer for thick or bone‑in cuts), then pat it dry and season both sides with kosher salt and cracked pepper. Heat a cast‑iron skillet until it shimmers, add a high‑smoke‑point oil, and sear the steak for 1‑2 minutes until it sizzles loudly and releases easily; flip and repeat on the other side. Pull the meat at about 115‑120 °F, rest 5‑10 minutes, and you’ll get a perfect crust and juicy interior—more details await if you keep going.
Pan‑Grill a Steak in 5 Simple Steps – Quick Overview
In just five steps you can pan‑grill a steak to perfection. First, pat the steak dry, season it generously, and let it sit at room temperature for 20‑60 minutes; this dry surface jump crust formation. Next, heat a heavy‑bottomed cast‑iron pan over medium‑high to high heat until it’s very hot—about 2‑5 minutes—then add a tablespoon of high‑smoke‑point oil and wait for a light shimmer. Place the steak in the pan, sear the first side undisturbed for 1‑4 minutes, rotating 90° halfway for grill marks, and let it release easily when the crust forms. Flip, baste with butter, garlic, and thyme, and sear the second side for 2‑4 minutes, monitoring pan temperature. For optimal results, bring your steak within 5-10 degrees of your target internal temperature before the final sear to lock in juices and flavor. Finally, remove the steak at 120‑140 °F, rest it loosely covered for 5‑10 minutes, then slice against the grain. Use a meat thermometer to ensure perfect doneness and employ the reverse sear method for best results.
Choose the Right Cut and Thickness for a Pan‑Grilled Steak
Choosing the right cut and thickness is essential for a perfect pan‑grilled steak, because each cut’s fat content, muscle structure, and size dictate how quickly it will develop a crust and stay juicy. Aim for the ideal steak thickness—1 to 1.5 inches (≈2.5 cm)—to balance searing and doneness. Strip, ribeye, and filet mignon all hit this range; strip offers leanness with a fat strap, ribeye supplies rich marbling, and filet mignon delivers buttery tenderness. Sirloin works at the lower end of the range, while T‑bone can be thicker but benefits from a slightly reduced heat exposure on the strip side. After searing, let the steak rest for proper resting time, typically 5 minutes per inch of thickness, to redistribute juices before slicing. For best results, season your steak before cooking to develop a flavorful crust similar to what you achieve with direct heat searing. Grilling provides a smokey flavor that cannot be replicated on a pan.

ORGANIC, GRASS-FED, REGENERATIVE: Our ribeye steaks are USDA Organic, 100% grass-fed & finished, sourced from regenerative farms, verified by Land to Market,100% pasture-raised, free range, humanely raised with no feedlots EVER. Always fresh, never frozen. Non GMO and never contains antibiotics or added growth hormones. Always fresh, never frozen.

USDA Certified Organic Steak: Organic Rancher Beef Ribeye Steak (Boneless) comes from cattle raised on certified organic pastures with lifetime traceability. Free from antibiotics, added hormones, synthetic chemicals, and GMOs

One boneless beef ribeye steak weighing between 0.5 and 1.2 pounds
Temper the Steak: 20‑30 min vs. 60‑120 min for Even Cooking
When you let a steak rest at room temperature for 20‑30 minutes, you raise its core to roughly 80‑90°F, which softens muscle fibers and creates a shallow temperature gradient that prevents the surface from overcooking in a hot pan. Use this short tempering for thin cuts like flank or skirt, or for 1‑inch steaks warmed in a 250°F oven for about 30 minutes. It yields a relaxed texture and a modest uniform internal temperature, allowing a quick, predictable sear.
For thick or bone‑in cuts, extend tempering to 60‑120 minutes, preferably 45 minutes to an hour at room temperature or a low‑heat oven (225‑250°F) until the core reaches 110‑115 °F. This longer period equalizes temperature throughout, producing a truly uniform internal temperature and a more relaxed texture that resists overcooking during the final high‑heat pan finish. Using an internal temperature probe ensures you hit the target 100°F for medium‑rare. Consider that a two-zone fire setup can also help maintain moisture and prevent the gray band of overcooked meat when finishing thick cuts.
Pat Dry and Season a Pan‑Grilled Steak With Salt & Pepper
If you want a deep, caramelized crust, start by patting the steak completely dry; moisture creates steam that blocks the Maillard reaction and leaves a gray, soggy surface. Place the steak on a cutting board, cover it with a stack of paper towels, and press gently to absorb all liquid, then flip and repeat on the other side. Immediately after drying, season both faces with a generous pinch of kosher salt and freshly cracked black pepper, pressing the crystals into the meat so they adhere during searing. Choose an oil with a high smoke point—such as grapeseed or avocado—for the pan, ensuring the fat coats the surface without burning. This oil selection, combined with meticulous moisture management, guarantees a crisp, flavorful crust and ideal sear. Avoid using aluminum foil to line your pan, as it can restrict heat distribution and result in uneven cooking. The experiment showed that a dry surface yields a slightly crisper crust.
Select a Heavy‑Bottomed, Oven‑Safe Skillet
A heavy‑bottomed, oven‑safe skillet is essential for achieving an even sear and finishing a steak in the oven without hot spots or temperature loss. Choose a pan with cast iron construction; its thick mass stores heat, so the surface stays hot when you transfer the steak to the oven. Opt for an uncoated surface to avoid non‑stick limits and to develop a true crust. Verify the manufacturer’s temperature rating—cast iron safely endures up to 600°F, which covers most stovetop‑to‑oven finishes. Check that handles are metal or silicone‑capped, not plastic, and that any lid is tempered glass or metal rated for high heat. Guarantee the pan’s shape is flat and not overly cupped, allowing the steak to contact the surface uniformly. For optimal results, pair your preheated skillet with oils with high smoke points like grapeseed or duck fat to ensure a perfect sear without burning. Use a two‑handed grip when moving the skillet, and protect your hands with oven mitts. Stainless steel pans are also oven‑safe up to 500°F, offering an alternative for those who prefer a lighter weight.

Quality Cast Iron Frying Pan: The Lodge Seasoned Cast Iron Skillet is loved for its great heat retention, incredible durability, and ability to make almost any recipe you dream up

PREMIUM MATERIAL: This Cast iron dutch oven made of high-quality cast iron core, coated with food grade enamel coating; Durable and sturdy structure, the cast iron core achieves even heat distribution, maximizing the preservation of the original nutrition and taste of the food
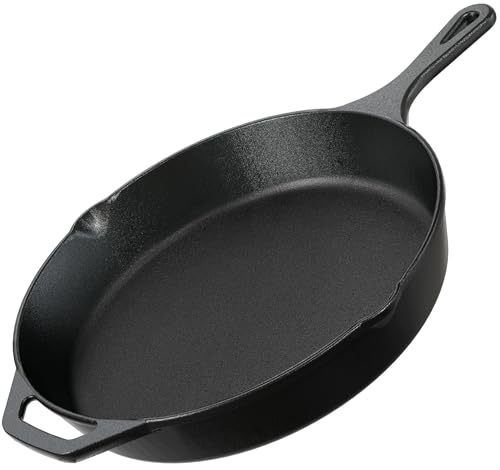
Exceptional Heat Retention: Enjoy perfectly cooked meals with cast iron skillets that provide even heat distribution, ideal for searing, frying, and baking in a 12 inch frying pan.
Preheat the Skillet to a Sizzling Temperature
Heat the skillet until it shimmers and the oil just begins to smoke, signaling a surface temperature of 450‑550 °F. Place the pan on high heat and give it 3‑5 minutes to reach a uniform blaze; cast‑iron or heavy‑bottomed steel spreads heat evenly, eliminating cold spots. Test readiness with a water droplet—listen for an instant sizzle and watch the bead evaporate instantly. For precise control, employ infrared thermometer usage: aim for a reading of 450‑500 °F before adding steak. Also note smoke point audibility; a faint hiss indicates the oil is at its ideal smoking threshold without burning. Avoid rushing the preheat, as insufficient temperature will cause sticking and prevent a proper crust. Choose a steak that is at least 1‑inch thick to ensure a nice sear. Using a meat thermometer will help you achieve your desired level of doneness while pan-searing.
Add a High‑Smoke‑Point Fat (Beef Tallow or Clarified Butter) for a Perfect Crust
Which high‑smoke‑point fat you choose—beef tallow or clarified butter—will dictate the crust’s flavor and stability. Heat the skillet until it shimmers, then add a thin layer of your selected fat. Beef tallow, with a fat smoking point of 400‑420 °F, offers a neutral, beefy backdrop and stays stable through extended cooking. Clarified butter (ghee) pushes the limit to 450‑485 °F, delivering a nutty, caramelized edge while resisting milk‑solid burn. Spread the fat evenly, letting it melt and coat the surface before the steak contacts the pan. This guarantees the crust forms quickly, preventing acrid notes. Remember, the fat’s smoking point governs how long you can sear without degrading flavor, so adjust cooking time considerations accordingly. For those who prefer charcoal grilling, understanding heat output differences can inform your choice of cooking method. Long shelf life makes tallow a convenient pantry staple for frequent high‑heat cooking.

Light Buttery Flavor That Elevates Every Meal: Algae Cooking Club Chef-Grade Algae Oil enhances every dish with subtle richness. Its neutral profile makes it ideal for searing, baking, and dressings, transforming everyday meals into gourmet experiences.

Light Buttery Flavor That Elevates Every Meal: Algae Cooking Club Chef-Grade Algae Oil enhances every dish with subtle richness. Its neutral profile makes it ideal for searing, baking, and dressings, transforming everyday meals into gourmet experiences.

Light Buttery Flavor That Elevates Every Meal: Algae Cooking Club Chef-Grade Algae Oil enhances every dish with subtle richness. Its neutral profile makes it ideal for searing, baking, and dressings, transforming everyday meals into gourmet experiences.
Sear the First Side: 1‑2 min of Loud Sizzle & Caramelization
When the pan hits its smoking point, place the steak and listen for a loud sizzle—this tells you the surface is hot enough to trigger the Maillard reaction. Keep the steak undisturbed for a loud sizzle duration of 1‑2 minutes; the heat will drive crust color development and deep caramelization. As the sizzle sustains, the exterior turns golden‑brown, sealing juices and forming a flavorful crust. If the sizzle fades before the minute mark, remove the steak, reheat the pan, and start again; a steady sizzle guarantees proper sear. After the allotted time, the steak should release easily, indicating the crust has set. Flip only when this first‑side sear is complete. Using a meat thermometer for accuracy ensures you can precisely monitor when the internal temperature reaches your target doneness. For a 1‑2″ thick steak, aim for an internal temperature of medium‑rare about 5 °F below your target doneness before removing it from the pan.
Flip and Sear the Other Side for Even Browning
Typically, you’ll flip the steak once the first side releases cleanly—about 1‑2 minutes of steady sizzle—then immediately sear the opposite side for the same duration, ensuring both faces develop an even golden‑brown crust while the interior stays uniformly cooked. To achieve consistent browning, maintain rapid temperature management; keep the pan screaming hot and avoid letting steam linger. If you prefer the frequent‑flipping method, turn the steak every 20‑30 seconds, letting each brief contact evaporate surface moisture before the next flip. This continuous motion redistributes juices, prevents a gray over‑cooked band, and preserves internal moisture. Watch the crust form, and when it reaches a deep caramel hue, stop flipping and let the steak rest briefly before serving. Using a thermometer to check that the steak reaches an internal temperature between 130 and 135 degrees Fahrenheit will ensure you achieve the perfect medium-rare doneness. The Just Keep Flipping technique offers a more skill‑building alternative to the basic reverse sear.
Check Doneness (120 °F) & Rest the Steak 5‑10 min
After the crust has formed, check the steak’s doneness with an instant‑read thermometer inserted into the thickest part, avoiding bone or fat. For a rare finish at 120 °F, pull the meat at 115‑120 °F, because thin cuts will climb 3‑5 °F and thick cuts 5‑10 °F during carryover. Insert the probe from the side for a precise reading; color is unreliable. Once removed, let the steak rest for 5‑10 minutes. This resting duration lets juices redistribute and the internal temperature settle at the target 120 °F without overcooking. Thicker pieces may need the full ten minutes, while thinner ones are fine after five. Monitor the clock and resist the urge to cut early; the final doneness depends on this controlled resting period. A digital instant‑read thermometer is the most reliable tool to achieve precise temperature control.


