Pick a charcoal or gas grill and preheat it to 500‑550 °F. Scrub live oysters, keep their liquor, and oil the grates. Place unshucked shells cupped‑side down with sturdy tongs, close the lid, and grill 8‑10 minutes until they pop. Twist a knife at the hinge, shuck, add a dab of compound butter, then flip for a quick 1‑minute sear. For shucked oysters, arrange them upright, grill 3‑4 minutes, flip if desired, and finish with your favorite topping before serving on rock salt and lemon. Continue and and you’ll uncover topping variations and troubleshooting tips.
Pick the Best Grill and Tools for Grilled Oysters
When you choose a grill for oysters, match the heat source to the shell’s delicate texture: a charcoal grill, pre‑heated until the coals are ash‑covered, delivers a smoky, even 400 °F (200 °C) bed that opens shells without tearing them, while a gas grill with lightly oiled grates offers quick, controllable medium‑direct heat that prevents overcooking. First, clean grates thoroughly; a metal brush removes residue, then oil lightly to avoid sticking. Next, selecting oyster size matters—3‑4‑inch shells sit stably on bars, while smaller ones may fall through. Use a sturdy grill tongs and a heat‑proof glove for placement. For shucked oysters, lay heavy‑duty foil on the grates, meat side up, ensuring even exposure to the direct heat source, which is essential for achieving optimal cooking results. This setup maximizes flavor while preserving shell integrity. Pacific oysters are the most common variety and are prized for their briny, sweet flavor.
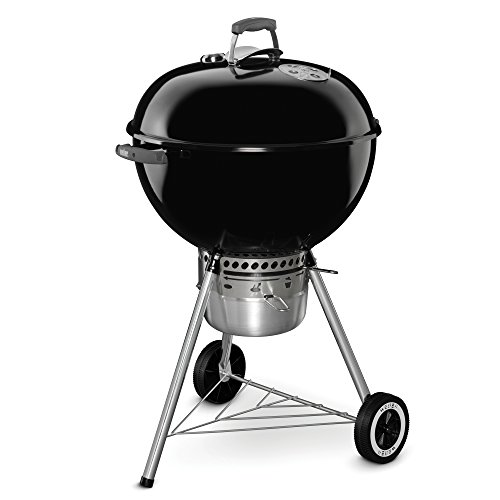
This premium Weber kettle grill has space to hold up to 13 burgers made with a Weber burger press; The durable-plated steel cooking grate, crafted from premium steel, offers a resilient surface that stands up to the demands of frequent grilling

Lightweight & Portability, lightweight charcoal grill for outdoor is 16 "L x 10.6" W x 14.9 "H, can be carried anywhere in the trunk of the car, equipped with a secure lid lock for easy lifting and walking, ideal mini grill for outdoor camping, picnics, beaches, patio, courtyards, RV trips, barbecue party

This Weber kettle grill has space to hold up to 13 burgers made with a Weber burger press; The durable-plated steel cooking grate, crafted from premium steel, offers a resilient surface that stands up to the demands of frequent grilling
Prep Your Oysters for Grilled Oysters – 10‑Minute Steps
After setting up the grill, move straight to preparing the oysters so they hit the heat at peak freshness. First, choose live oysters that close when tapped; discard any with cracked or open shells. Keep Shells Intact while you scrub each shell with a stiff brush, then rinse under cold water to eliminate grit. Pat them dry with a clean towel—don’t soak, because you must Retain Natural Liquor. While the grill preheats, soften a stick of butter, blend in chopped parsley, garlic, and lemon juice, then chill the compound butter. Portion two teaspoons per oyster. When you’re ready, shuck each oyster cupped‑side down, sever the adductor, and leave the meat in its bottom shell, preserving all liquor for the grill. For optimal cooking results and to maintain your grill’s performance, ensure your grill grates are clean using routine light cleaning after each use. The grill should be preheated to high heat for optimal cooking.
Grill Unshucked Oysters First: The One‑Minute “Flip‑Then‑Shuck” Method
If you want perfectly cooked oysters in under a minute, start by placing the live, unshucked shells cupped‑side down on a pre‑heated grill at 500‑550 °F; close the lid and let the heat force the shells to separate. After 8–10 minutes, most oysters will have opened; any that remain closed are still pliable for post‑grill shucking. Using a towel‑protected hand, twist the knife at the hinge, torque the adductor muscle, and shimmy the shell apart—no need for a traditional shucking knife. This rapid “flip‑then‑shuck” step aligns with advanced shellfish preparation methods, preserving moisture while the high heat creates a subtle smoky note. Apply flavor enhancement techniques—garlic butter, herbs, or a splash of lemon—just before the final flip to lock in aroma without overcooking. Grilling oysters can also be done with the lid closed for 8‑10 minutes to ensure even cooking. Proper heat distribution is critical when grilling oysters to achieve consistent results across multiple shells on your grill surface.
Grill Shucked Oysters Directly on the Grates – Timing Tips
A handful of shucked oysters, still nestled in their cupped shells, can be seared directly on the grill’s hottest zone for just five to seven minutes, letting the liquid around the meat bubble and aromatics the flavor. First, preheat the grill to 500‑700°F and confirm the zone is truly hot using a probe; this is the core of controlling grill temperature. Arrange the oysters cupped side down, upright, on the grates so the shells act as miniature steam chambers, retaining oyster liquor. Watch for vigorous bubbling at the edges—this usually appears around the three‑minute mark. When the liquid bubbles and the meat begins to firm, flip if desired or add toppings, then finish another one to two minutes. Remove promptly to prevent over‑cooking and preserve the briny essence. Before grilling, use a heat-resistant sponge brush to scrub away any debris from the shells without risk of bristles contaminating your food. Use a stiff brush to scrub the shells before grilling.

★Upgraded ONE-PIECE DESIGN & STAINLESS STEEL CORE TECHNOLOGY - Owing to ONE-PIECE design, the silicone bristles will not break or shed in your food, unlike other bristle brushes. No bacteria will be stuck in the silicone basting brush and keep your food safe. The handle built with internal steel core results in a solid durability to our basting oil brush, it is also long enough to get a firm grip, never break and rust.

GRILLBADGER NON-METAL GRILL BRUSH FOR SAFER COOKING: GRILLBADGER offers a BBQ grill brush with non-metal bristles, making it the safest choice for outdoor grill cleaning. Protect your family from the risk of ingesting metal bristles with this premium BBQ brush, designed for safer grilling. Enjoy peace of mind while using a non-toxic, durable grill cleaner brush that eliminates the dangers associated with traditional metal brushes.

NYLON BRISTLE GRILL BRUSH: Designed for cleaning cooled grill grates, the durable nylon bristles help scrub away residue after cooking, making this brush a practical tool for routine grill maintenance at home or outdoors.
What Are the Top 5 Topping Ideas for Grilled Oysters?
When you grill oysters, the topping you choose can elevate the briny bite into a nuanced flavor experience, and five standout options each bring a distinct texture and palate profile. First, blend unsalted butter with Creole seasoning, Pecorino Romano, parsley, and lemon zest for a Creole butter and cheese topping that adds spice and richness. Second, melt butter, stir in garlic, parsley, Parmesan, and equal parts cayenne, ancho chili, and red‑pepper flakes for a Spicy butter sauce that delivers layered heat. Third, combine butter, Parmesan, sautéed shallots, garlic, thyme, and lemon juice for a Parmesan garlic butter that balances umami and acidity. Fourth, mix Cajun seasoning, garlic, and chile into butter for a bold Cajun compound butter. Fifth, fold chopped kimchi into softened butter for a fermented kimchi butter that imparts tangy umami. These creative topping presentations answer what are the top 5 topping ideas for grilled oysters? and guarantee each bite showcases a precise, texturally distinct profile. To achieve the best results with your oyster toppings, proper resting of the oyster after cooking with butter basting helps ensure optimal flavor absorption. Grilling oysters on a hot grill can be an alternative to traditional shucking.

Buttery, Creole-seasoned marinade for everyday use

One 13 fl oz. Orville Redenbacher's Movie Theater Butter Flavored Topping Oil

One 2.4 oz. container of Orville Redenbacher's Movie Theater Butter Flavored Popcorn Seasoning
Serve Grilled Oysters on Rock Salt or Seaweed With Lemon Wedges
Rock salt or seaweed beds give grilled oysters a stable, heat‑distributing foundation while adding visual drama, and lemon wedges deliver the bright acidity that cuts through rich toppings. You’ll pour two cups of rock salt into a shallow platter, letting it settle into an even layer that cradles each shell. If you prefer a marine look, spread a thin sheet of seaweed instead; it retains liquor and mimics the ocean. Nestle the hot oysters directly onto the bed, then arrange lemon wedges for easy squeezing. For garnishing suggestions, sprinkle micro‑herbs or toasted breadcrumbs around the perimeter. Prioritize transport safety by allowing shells to cool on the salt before moving the tray, preventing spills and preserving flavor integrity. Adding a pinch of kosher salt enhances the natural brine of the oysters. Selecting a grill grate with proper heat distribution ensures even cooking and prevents hot spots that can overcook delicate oyster meat.
Troubleshoot Common Issues and Keep Grilled Oysters From Overcooking
Grilling oysters perfectly hinges on controlling heat and timing; clean grates, a preheated 400 °F zone, and a two‑zone setup let you sear without burning, while a quick temperature check at 145 °F secures the meat stays juicy and safe. First, scrub the grill grates and oil them lightly; lingering debris creates hot spots that scorch delicate meat. For cast iron grates, consider repeating the oil application and heating steps several times before use to build a durable protective coating. Use a direct‑heat zone for searing, then shift to indirect heat to finish, keeping the internal temperature within Ideal grilling temperatures. Monitor with a probe, pulling the tray at 145 °F. Prior to grill, chill oysters using Proper oyster chilling methods—store at ≤41 °F, rinse cold, and keep them on ice until you’re ready. Avoid flipping more than once, and stop cooking as soon as shells open or edges curl, preventing overcooking while eliminating Vibrio risk. Season lightly to preserve natural flavor.