
First, unplug the grill and let it cool to room temperature; then remove the grates, drip tray, and hopper, storing each on its hook. Vacuum the hopper opening and firepot to pull out sawdust and ash, checking the auger for cracks or corrosion. Spray the grates with an all‑natural degreaser, soak, scrape, rinse, dry, and coat with high‑heat oil before reinstalling. Scrape and degrease the drip tray and heat baffle, inspect for rust or warping, and reassemble from bottom to top. Follow these steps and you’ll find a detailed routine for maintaining prime performance.
Unplug and Cool Your Traeger Grill Before Cleaning
Safety comes first: always power down and unplug your Traeger before you begin any cleaning. After the last cook, press the power‑off button, then pull the cord from the outlet. Inspect the cord for damage, and keep it clear of heat sources. Next, respect the cooling process—allow the grill to reach room temperature. Use a non‑contact thermometer or touch test on the grates, heat baffle, and drip tray to verify temperature stability. Only when all surfaces feel uniformly cool may you proceed. Remove the grates, drip tray, and heat baffle, storing each on its designated hook. Dispose of spent foil liners, and check the grease bucket for residue. For optimal results, ensure your temperature sensors are functioning properly to maintain accurate heat readings during future cooking sessions. Document the completed cooldown before moving to the next cleaning phase. Regular maintenance helps prevent temperature fluctuations and ensures consistent cooking performance.
Vacuum the Hopper & Auger Tube on Your Traeger
Now that the grill is cool and unplugged, focus on removing residual sawdust and debris from the hopper and auger tube. Place a vacuum hose at the hopper opening and draw out all loose particles, then guide the nozzle into the auger entrance to extract buildup along the tube. Pause to inspect auger tightness; any wobble indicates loose bolts or worn bearings. While the vacuum runs, visually assess auger condition, noting cracks, corrosion, or excess powder clinging to the screw flights. After suction stops, perform a quick tactile check for remaining debris by feeling the auger’s interior with a clean finger. Confirm the hopper interior is spotless before proceeding to the next cleaning phase. Also, verify the tightness of the hopper lid to ensure a proper seal during operation. Use all-natural degreasers on any stubborn residue to protect your grill’s internal components.
Scrape & Clean Traeger Grill Grates Inside & Out
Because the grill must be completely cool before you begin, first remove the grates and set them on a stable surface; this gives you full access to both the top and bottom sides and lets you protect the temperature probe while you work. Spray the top with an all‑natural degreaser, let it soak 60 seconds, then scrape with a hardwood scraper. Wipe with a heavy‑duty paper towel. Flip the grates carefully, repeat the spray‑soak‑scrape cycle on the underside, and use a nylon brush for porcelain grate care. Rinse both sides with warm water, dry thoroughly, and inspect for debris. Apply a thin coat of high‑heat oil for protection, then reinstall. Use stainless steel cleaning techniques only on steel components to avoid damaging porcelain. Regular cleaning prevents flare‑ups and ensures consistent heat distribution. Maintaining clean grates helps avoid buildup of food residue and grease that can compromise your cooking results.

Ideal for updating the exterior of barbeque grills, wood-burning stoves, radiators, engines or other metal items

Rutland High Temperature Silicone is a great solution to your sealant and adhesive needs
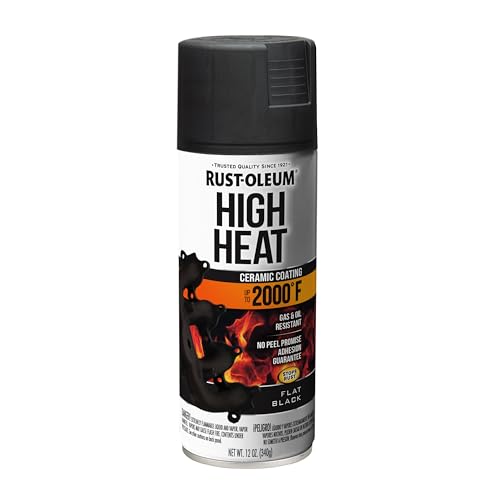
Ideal for use on automotive parts and surfaces subject to intermittent high heat up to 2000°F
Deep‑Clean Traeger Drip Tray & Heat Baffle
After cleaning the grates, turn your attention to the drip tray and heat baffle, the components that capture drippings and distribute heat. Remove the tray while the grill is cool, discard the old foil, and set it aside. Scrape stuck food with a stiff non‑metallic tool, then apply a non‑chemical degreaser and wipe with a non‑abrasive pad. Pour a little water from the top to confirm the grease chute flows, and paper‑towel the trough for minor residue. Next, brush off the upper heat shield, remove the lower shield with a screwdriver, and assess the baffle for soot. Scrape edges, brush corners, and check for warping or rust. Consider using a thermometer probe to verify consistent heat distribution after reassembly. Reinstall tabs, verify tightness, and line the tray with fresh foil to clean heat deflector and sanitize drip tray before reassembly. Regular cleaning helps maintain optimal performance and prolongs the grill’s lifespan.

Perfect match - Measuring 31.75 x 15.5 inches, these disposable aluminum drip tray liners are designed specifically for Traeger Pro 34 Series. They serve as the perfect replacement for the original BAC410 tray liners.

Disposable drip tray liners specially designed for your Traeger grill. Note: Using foil or alternate liners is not advised.

Perfect Fit for Traeger grills—this 22-inch × 15.5-inch grill pan liner is essential for most models, including the Pro 575, Pro 22, and Elite 22.
Vacuum Ash and Sawdust From the Firepot and Interior Walls
If the firepot and interior walls still hold ash and sawdust, you’ll need to remove them before the next cooking cycle. First, guarantee the grill is completely cool, unplug it, and wear protective gear. Remove the grates, drip tray, and heat baffle to expose the firepot. Position a shop vacuum hose just above the firepot opening, then engage the clear‑auger function to pull ash and sawdust from the auger tube. Vacuum the firepot interior, then slide the hose into the chamber to capture residual particles on the walls. For stubborn debris, scrape gently with a brush or tongs, then re‑vacuum to collect dislodged material. Consider using natural cleaning agents like baking soda for extra stubborn residues that resist basic vacuuming. This thorough fire pit cleaning supports pellet odor reduction and prepares the grill for maximum performance. Regular cleaning helps maintain optimal grill operation.

This fire burn pot fits Traeger and most Pit-boss pellet grills (not all).

Suitable for most traeger pit boss camp chef z grill pellet grill burn pot.

Degrease the Chimney, Creosote, and Interior Surfaces
Before you tackle the chimney, creosote, and interior surfaces, make sure the grill is completely cool, unplugged, and all loose debris has been vacuumed away. Remove the chimney cap, then spray the interior with Traeger Grill Cleaner or an all‑natural degreaser. Apply a nylon brush or heavy‑duty paper towel, rotating the chimney to cover every wall for thorough chimney degreasing strategies. Inspect for creosote, soak the cap and interior in degreaser, and scrub with the same brush—avoid wire brushes. After a few minutes soak, wipe all surfaces with tongs‑held paper towels, ensuring no residue remains. Finally, spray interior walls with degreaser, let it sit, then wipe with a cleaning cloth. Allow every component to dry fully before reassembly to prevent rust. Frequent wiping of interior and exterior surfaces helps maintain optimal performance. Investing in regular maintenance and using a weather-resistant protective cover when your grill is not in use will further extend your Traeger’s lifespan and keep it performing at its best.
Wipe the Exterior With Soapy Water and Inspect for Damage
When you finish degreasing the chimney and interior, turn your attention to the grill’s exterior. Mix a few drops of dish soap with warm water, add a splash of vinegar, and stir until sudsy. Spray the solution evenly across all sides, allowing it to soak for two to three minutes. Use heavy‑duty paper towels or a soft cloth to wipe from top to bottom, applying low pressure to avoid chipping the protective layer. As you wipe, inspect exterior coating for cracks, peeling, or discoloration. Check bolts, seams, and legs for tightness and rust. For rust spots that appear during inspection, apply a protective layer of cooking oil to prevent further oxidation and corrosion. Verify that no moisture is trapped in joints, and guarantee the surface is dry to protect against weather exposure. This method maintains integrity without aggressive tools. Remember to avoid wire brushes when cleaning the exterior.
Reassemble the Grill From Bottom to Top Efficiently
After the interior is dry, start reassembling the grill from the base upward, securing each component before moving to the next. Follow the reassembly sequence that mirrors the bottom to top disassembly: first place the firepot, align the gasket, then insert the heat deflector. Clip the drip tray into its slots, guaranteeing the latch clicks securely. Slide the grill grates back on, verifying they sit level on the support rails. Reattach the side walls, tightening the 7/16 inch bolts to the manufacturer’s torque specification. Finally, mount the lid, ascertain the hinge pivots smoothly, and lock the latch. Double‑check all connections, confirm no tools remain inside, and test the digital temperature controls to ensure the grill operates correctly.
Schedule a Simple Cleaning Routine to Extend Grill Life
A simple, tiered cleaning schedule keeps your Traeger running smoothly and prolongs its lifespan. Follow a daily‑after‑cook routine: replace the drip‑tray liner, check the grease drain and bucket, scrape grates if food contacted them, wipe spills instantly, and remove excess food from warm grates. Every 2‑3 cooks, vacuum ash from the firepot, deep‑clean the interior, empty the grease tray after 5‑10 cooks, scrape creosote from the backsplash and lid, and shop‑vac the firepot. Monthly, vacuum the barrel and firepot, deep‑clean grates after 5‑10 cooks, scrub the grease drain quarterly, and replace foil on the drip tray every three weeks. Seasonal tasks include exterior wipes, deep‑cleaning grates and drip pan, and annual full‑system cleaning, which should include temperature probe cleaning to ensure accurate temperature readings during your cooks. This regimen safeguards maintaining temperature calibration and monitoring food quality. Seasonal mold checks during winter storage help prevent future growth.
Troubleshoot Common Cleaning Issues and When to Call Support
Ever notice your Traeger spitting smoke or refusing to light despite a thorough clean? First, evaluate combustion byproduct quality: if smoke is thick, check the heat baffle, drip pan orientation, and ash buildup under the fire pot. Conduct periodic component inspections of the auger, pellet dust, and internal seals. Guarantee the fire pot is completely ash‑free, the auger tube is clear, and the hopper is vacuumed and dry. Verify the heat baffle sits correctly over the fire pot and the drip pan’s longer flange directs condensate to the grease bucket. If ignition still fails after cleaning the fire pot and auger, or if the temperature probe, thermocouple, or RTD shows damage, moisture, or mold, contact support. Grease governor or EZ Clean tray malfunctions after deep cleaning also merit a service call. Regularly check the drip tray for grease buildup to prevent flare‑ups.


