First clean the grates by burning off residue, then scrub with a water‑vinegar spray and a grill brush; for stubborn grease, apply a baking‑soda paste and scrub again. Choose an oil with a smoke point of at least 400 °F—grapeseed, canola, or peanut work best—and coat the hot grates with a thin, even film using a brush or a mist from 6–8 in. away. Heat the grill to 400‑450 °F and keep it there 15‑20 minutes; you’ll see light blue smoke and a smooth, non‑sticky surface. Let the grates cool naturally, then lightly re‑oil after each use to maintain the seasoning, and you’ll uncover more tips ahead.
Clean the Grates Thoroughly Before Seasoning
Before you season your grill grates, clean them thoroughly. Start with a burn‑off: close the lid, set burners to max for 10‑15 minutes, then let the grill cool to 250‑300 °F. Spray a mixture of equal parts water and white vinegar, let it sit a few minutes, and scrub with a grill brush using back‑to‑front strokes. For stubborn grease, apply a baking‑soda paste, wait 15‑20 minutes, then scrub with a brass‑bristle brush. If residue persists, soak the grates in hot, sudsy water for 15‑20 minutes, and rinse. Throughout, use gentle cleaners—vinegar, baking soda, mild dish soap—to avoid contaminating food. This thorough cleaning removes particles, prevents hardening, and prepares the surface for an even, lasting seasoning. For optimal results, consider removing and soaking grill grates in soapy water to loosen grime before the final scrubbing step. Regular maintenance ensures the grill remains safe and extends its lifespan.
Select an Oil With a Smoke Point ≥ 400 °F (E.G., Grapeseed, Canola, Peanut)
Choosing an oil with a smoke point of at least 400 °F is essential for a durable, non‑sticky seasoning, and you’ll want varieties such as grapeseed, canola, or peanut that stay stable at those temperatures. Pick a high‑saturation oil that resists breakdown at 400‑500 °F; canola offers even coverage, grapeseed prevents sticky residues, and peanut bonds strongly without rapid degradation. Store the oil in a cool, dark place to preserve its smoke point—optimal oil storage reduces oxidation and prolongs usability. Before each seasoning session, perform frequent grate cleaning to remove debris that could cause uneven polymerization. Avoid low‑smoke oils like olive or flaxseed, as they burn and leave residue. By selecting the right oil and maintaining clean, well‑stored supplies, you guarantee a consistent, long‑lasting protective layer on your grill grates. Seasoning also helps prevent rust from forming on the grates. For optimal results, apply oil right before cooking as well as after each use to maintain the protective layer.

Graza Frizzle Oil Made from 100% Olives: A neutral-flavored, high heat cooking oil made from 100% peak harvest olives. With a smoke point of up to 450 degrees, Frizzle is your high-heat kitchen hero. 1 bottle/750ml.

Graza Frizzle Oil Spray Made from 100% Olives: A neutral-flavored, high heat cooking oil made from 100% peak harvest olives. With a smoke point of up to 450 degrees, Frizzle is your high-heat kitchen hero. 1 can/5 oz.

Light Buttery Flavor That Elevates Every Meal: Algae Cooking Club Chef-Grade Algae Oil enhances every dish with subtle richness. Its neutral profile makes it ideal for searing, baking, and dressings, transforming everyday meals into gourmet experiences.
Apply a Thin Oil Layer to Season Grill Grates Using Brush or Spray
If you apply the oil as a thin, even film, you’ll prevent pooling, flare‑ups, and sticky residue while guaranteeing the metal bonds properly. First, cool the grill and wipe a small amount of high‑heat oil onto a paper towel. Use a brush technique: hold the grill brush at a 45° angle, rub the oil in circular motions across the tops, bottoms, and gaps of each grate, covering every rail and bar. Verify the film is barely visible; excess will cause smoke later. Alternatively, a spray application works just as well—hold the can 6–8 in. away and mist the grates until a fine veil coats the surface. Wear heat‑resistant gloves, repeat 2–3 times for layered buildup, and avoid over‑coating. For cast iron grates, this seasoning cycle is especially critical due to their porous nature. This creates a durable, non‑stick foundation before heating. Properly seasoned grates also prevent rust by protecting the metal from moisture.

Weber Grill Spray has a non-flammable formula that’s safe to spray directly onto a hot grill or open flame.

HIGH HEAT SPRAY PAINT: Protective enamel retains its color and finish on metal surfaces exposed to intermittent heat up to 1200°F.

The information below is per-pack only
Heat Grill to 400‑450 °F to Season Grates Properly
The key to a solid seasoning is heating the grill to a steady 400‑450 °F before the oil hits the grates. Close the lid and ignite the burners or charcoal, letting the fire reach the target range while the metal absorbs heat. This pre‑heat creates ideal heat retention and temperature consistency across the cooking surface, preventing cold spots that would cause patchy polymerization. Allow the grates to sit for a few minutes; the warm metal evaporates any residual moisture, ensuring the oil bonds uniformly. Once the temperature stabilizes, you’ll see the surface darken slightly, confirming that the oil is entering the polymerization phase. Maintain this range until you apply the oil layer. Before seasoning your grates, ensure you’ve completed thorough cleaning of the grill grates and interior to remove any debris or residue. Regular seasoning prevents rust and sticking, extending the life of the grates.
Keep Grill at 400‑450 °F for 15‑20 Minutes to Set the First Coat
Now that the grill is pre‑heated to a stable 400‑450 °F, pour a thin, even layer of high‑smoke‑point oil onto the grates and close the lid. Maintain that heat for the ideal temperature duration of 15‑20 minutes. The closed lid traps heat, causing the oil to bond uniformly and the metal pores to open, which creates a durable first coat. Watch the smoke; it signals effective smoke management and that the oil is reaching its smoke point without flare‑ups. The key to successful seasoning is applying thin layers evenly rather than thick coatings, to avoid uneven seasoning and chipping. After the period, the grates will darken and the oil will have baked into a protective film. Turn off the heat, let the grill cool, and you’ll have a non‑stick surface ready for the next seasoning cycle. Repeat the seasoning process 2‑3 times before the first cook to ensure optimal performance.
Repeat Seasoning Oil‑and‑Heat Cycle 2‑3 Times for Durability
Two to three repetitions of the oil‑and‑heat cycle turn a thin film into a rugged, non‑stick coating. First, preheat the grill to the optimum temperature range of 350‑400 °F. Apply the ideal oil quantity—just enough to coat every surface without pooling, using a high‑smoke‑point oil like canola or grapeseed. Spread the oil evenly, covering the tops, bottoms, and gaps between grates. Heat for 30‑60 minutes, letting the oil polymerize and bond to the metal. Let the grill cool, then repeat the oil‑and‑heat cycle two more times. Each repetition adds a new layer, strengthening the barrier against rust, grease, and sticking, and extending the grate’s lifespan. Stainless steel grids develop a protective patina after a few uses, which helps prevent corrosion. To further extend your grill’s durability, consider covering the grill when not in use to protect the chromium oxide layer that provides corrosion resistance.
Check Seasoning Completion: Visual and Tactile Cues
A well‑seasoned grill grate reveals its readiness through distinct visual and tactile signals. First, inspect the color: the shiny gray should have shifted to an even coloring that covers the entire surface, without dark or dark spots. A solid blackened patina indicates the oil has bonded uniformly, resembling a cast‑iron skillet after about six uses. Next, watch the smoke: thin, light‑blue wisps after fifteen minutes at high heat confirm proper oil polymerization, while thick white plumes suggest incomplete seasoning. Finally, test the texture. Run a fingertip or a brush across the rails; a slick, rock‑like textured surface should glide smoothly, and a light tug with a fingernail should not flake. These cues together verify that your seasoning is complete. The one‑time initial firing process also helps to burn off any residual manufacturing oils before seasoning. For severe buildup or stubborn residue, consider using oven cleaner prior to the seasoning process to ensure a clean foundation for oil bonding.
Cool Grates Before Cooking to Preserve Seasoning
Once you’ve confirmed the seasoning is complete, let the grates cool naturally before you start cooking. Turn off the grill and avoid any forced cooling; this protects the freshly formed protective layer. Allow the metal to reach room temperature, typically 10‑15 minutes, to achieve ideal cooldown duration. During this period the oil layer completes carbonization, sealing pores and creating a rust‑repelling barrier. You’ll know the grates are ready when they feel cool to the touch and show no lingering heat. This natural pause prevents thermal shock, preserves the non‑stick coating, and guarantees complete carbonization of the seasoning. To further protect your grates, make sure to clean the interior regularly using appropriate methods to prevent grease buildup that can compromise seasoning. Follow these steps each time to maintain a durable, high‑performance cooking surface. Properly seasoning the grill grate also helps prevent rust by forming a protective barrier.
Lightly Oil Warm Grates After Each Use to Keep Seasoning Fresh
Why should you oil your grates while they’re still warm? Warm surfaces let high‑smoke‑point oil spread instantly, sealing the seasoning layer you just built. First, put on heat‑resistant gloves and dip a silicone brush or mister in canola, avocado, or rice bran oil. Lightly coat both sides of the grate, then wipe with an oiled rag to remove excess. This creates a protective barrier that prevents rust and preserves non‑stick properties, cutting future cleaning considerations. Keep the grill in a dry storage method; the oil film guards against moisture that could cause corrosion. Consistent post‑cook oiling reduces the need for intensive deep cleaning, and the quick wipe‑down fits naturally into your routine. Follow these steps after every session to maintain seasoning freshness. Regular quick wipe‑down after each use helps maintain the seasoning and reduces the frequency of deep cleaning.

Light Buttery Flavor That Elevates Every Meal: Algae Cooking Club Chef-Grade Algae Oil enhances every dish with subtle richness. Its neutral profile makes it ideal for searing, baking, and dressings, transforming everyday meals into gourmet experiences.

Healthy High Heat Oil: Expeller-pressed from fresh avocados and protected in our iconic light-blocking tin, this smooth, neutral oil preserves freshness and flavor. Fire up the grill, sear the perfect steak, or master a golden, crispy fry — all without losing the natural taste of your ingredients. With a high smoke point and everyday versatility, Sear & Sizzle should be every kitchen’s secret weapon.
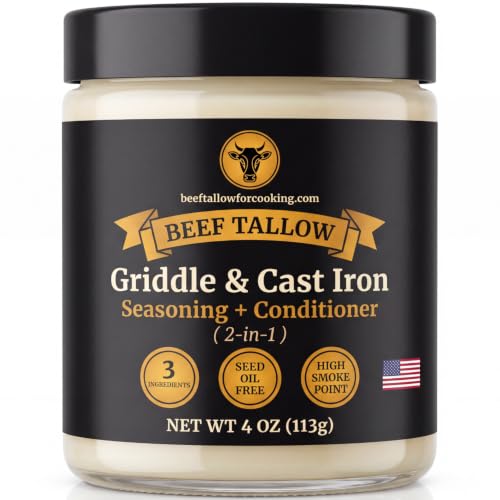
THE SEED OIL FREE FORMULA — Golden Render is the world's first seed oil free, tallow-based griddle seasoning & cast iron conditioner. While others use soy, shortening, grapeseed, sunflower or canola, we use just 3 clean ingredients: beef tallow, avocado oil & beeswax.
Fix Rust, Sticky Residue, and Flare‑Ups
Usually, you’ll tackle rust, sticky residue, and flare‑ups together because they all stem from inadequate cleaning and seasoning; start by scrubbing the grates with a sturdy brush, soak them in warm soapy water, rinse thoroughly, and dry completely before any oil application. Next, eliminate rust by repeating the scrub‑soak‑dry cycle, then apply a thin, even coat of high‑smoke‑point oil (canola or grapeseed) and preheat to 400‑450 °F for 15‑40 minutes; repeat 2‑3 times to build a durable layer that preserves patina and enhances flavor. For sticky residue, avoid low‑smoke oils, guarantee no pooling, and re‑heat the coated grates to bond the oil. To prevent flare‑ups, oil lightly, coat bottoms and gaps uniformly, and preheat with the lid closed, reinforcing a protective barrier that minimizes grease ignition. For deep maintenance, consider soaking grates in a mixture of household cleaning agents like vinegar and baking soda to remove stubborn buildup. Cast iron grates are virtually indestructible.