Set your gas grill to a steady 300‑325 °F indirect zone by turning on the outer burners low‑medium and leaving the middle burner off. Trim the baby‑back ribs, pat them dry, spread a thin mustard coat, then press a generous dry rub into the meat. Place the ribs bone‑side down over the unlit burner, add a water pan for moisture, and close the lid. Spritz with apple juice every 30 minutes, cook until the internal temperature hits 195‑200 °F, then brush with sauce, caramelize on direct heat for a few minutes, and let rest before slicing. Continue for you’ll uncover the perfect smoke‑bomb technique and foil‑wrap timing.
Why 250‑275 °F Is the Sweet Spot for Baby Back Ribs
Why does 250‑275 °F work so well for baby back ribs? At this range collagen and fat render efficiently, giving you a tender bite without drying out. Connective tissue breakdown accelerates above 225 °F, so the ribs reach the critical internal 190‑195 °F where full rendering occurs. Cooking at 250 °F typically finishes a rack in 3.5‑5 hours; a 4‑hour target lets you check doneness around 3.75 hours. Raising the temp to 275 °F speeds the breakdown, shaving an hour off the process while still preserving moisture. The forgiving 250‑275 °F window accommodates minor pit fluctuations, preventing toughness from under‑rendering. Use a two‑stage method—naked then wrapped—to maximize flavor and guarantee the connective tissue fully dissolves, delivering consistently juicy, fall‑off‑the‑bone results. Resting ribs after cooking allows juices to redistribute and improves the final texture. Use 2‑3 oz of wood throughout the cook to enhance smoke flavor without opening the smoker.
Select Ideal Grill Temperature on a Gas Grill
Now that you’ve seen why 250‑275 °F renders collagen perfectly, set your gas grill to a steady 300‑325 °F for the next phase. Use a three‑burner configuration: turn the outer burners to medium‑low and leave the middle burner off. This creates indirect heat while keeping the grill within the target range. Place an oven thermometer next to the ribs and monitor oven temperature continuously; adjust the burners if the reading drifts. A wood‑chip pouch on the hot side adds smoke without raising the grill temperature. To maintain moisture throughout the cooking process, consider spritzing the ribs periodically with apple juice and vinegar. Keep the heat consistent for the full two‑hour cook, resisting the urge to open the lid frequently. This disciplined setting guarantees tender, evenly cooked baby back ribs. Monitor temperature with an external thermometer to ensure it stays within the desired range.
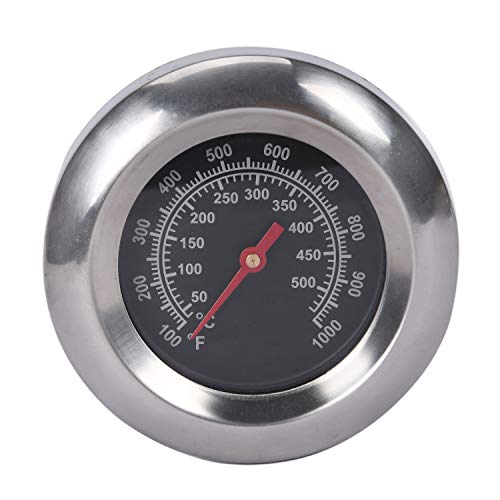
Wide temperature range: 100 F-1000 F/ 50 ℃- 500 ℃(Accurate Readings). Dimensions: 3" face, 2" stem, M10 nut (0.39" strew), Please check the dimensions of your grill before you order
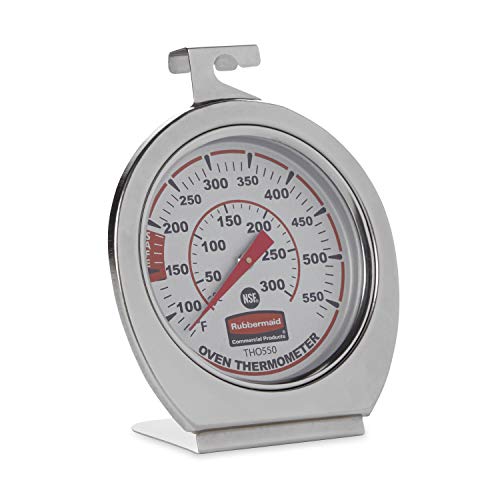
FOOD SAFETY: Thermometer displays true oven temperature instantly to ensure safe food preparation

EASY READING: you can see the actual temperature that your oven is registering with the digital LCD display, then make adjustments to ensure that you cook or roast at the proper temperature.
Set Up Indirect Heat for Baby Back Ribs
A solid indirect‑heat setup begins by preheating the grill with all burners on high for 15 minutes, then turning off the burner directly under where the ribs will sit while dropping the outer burners to medium‑low. Open the lid, let the propane flow, and light each burner left to right. Close the lid, brush the grates clean, and wait until the grill reaches 500‑550°F. Position the baby‑back ribs bone‑side down over the unlit burner, using a roasting rack or foil pan if needed. Add water to the drip pan to keep the environment moist. Keep the lid closed for oven‑like even heating and uniform browning. Monitor the thermometer, adjust side burners, and rotate the ribs periodically to maintain consistent temperature while cooking low and slow until the meat reaches the ideal tender range of 195°F to 200°F.
Build a Smoke Bomb for Consistent Hickory Flavor
After setting up indirect heat, you’ll need a reliable way to infuse hickory flavor into the ribs, and a homemade smoke bomb does exactly that. Soak half a cup of hickory chips in apple juice for two hours, then drain until they’re damp, not wet. Fold two sheets of heavy‑duty foil in half, place the chips inside, and roll the ends tightly to seal. Poke one to three holes in the top for smoke escape and for smoke density control. Position the pouch or a small foil‑lined pan directly over a lit burner, then slide it under the cooking grate near the indirect zone. Keep the grill at 250‑275 °F, close the lid, and add another bomb after the first hour to maintain smoke intensity flavor throughout the cook. Different hickory species contribute unique smoke qualities that can enhance your ribs’ flavor profile. Use Killer Hogs The BBQ Rub for an extra layer of flavor before wrapping.



PREMIUM WOOD CHIPS: Made from all-natural wood that burns cleanly and evenly, these wood chips can be used on top of charcoal and in smoker boxes to deliver professional-level, mouth-watering results.
Trim, Dry, and Season Baby Back Ribs With Mustard & Rub
Trim the ribs cleanly, pat them dry, then coat the meat side with a thin layer of mustard before applying your rub. Remove dangling fat and the membrane, following bone contours and cutting away the small end bone to keep the shape rectangular. Pat the bone side first, then flip and dry the meaty side for even seasoning adhesion. Spread yellow mustard evenly; it acts as a binder without overpowering flavor. Press a generous dry rub into the meat, covering all edges, while lightly seasoning the bone side. Let the ribs rest 30‑60 minutes, or refrigerate overnight using proper storage technique to maintain texture. The resting period allows the seasonings to adhere properly and helps render fat while developing deeper flavor. Observe food safety precautions: keep ribs chilled until ready, avoid rinsing, and handle with clean hands. Gloves are worn during the process to maintain hygiene.

An exquisite flavor

Mouthwatering seasoning best paired with prime rib.

CONVENIENT SEASONING: This bold blend of ingredients includes mustard seed, molasses, and hickory smoke for cooking up “love and happiness” at the grill.
Cook Low‑and‑Slow: Rotate, Lid‑Manage, and Monitor Heat
When the grill steadies at 250‑275 °F, set the ribs bone‑side down over the indirect zone, close the lid, and let the heat work uniformly; you’ll maintain even temperature and control smoke production. Keep the lid sealed throughout the low‑and‑slow phase; open it only to check or rotate. Every 45‑60 minutes, glance at the leave‑in thermometer, then shift the rack a few inches to avoid hot spots and to preserve uniform exposure. If one side appears hotter, swap the ribs to the cooler side. Baste lightly as you rotate, preserving moisture without flooding the grill. For best results, consider using hardwood pellets or other quality fuel sources to enhance flavor during the cooking process. Consistently monitoring the grill’s internal temperature guarantees the ribs stay in the 250‑275 °F window until they reach the target doneness. Use a reliable leave‑in thermometer to ensure the cooking grate temperature stays within the desired range.
Wrap Ribs in Foil With Apple Juice – Cook to 190‑202 °F
Seal the ribs in a double‑layer foil boat, then pour eight ounces of apple juice over the meat before folding the packet tight. The application of apple juice injects moisture and a subtle fruit note while preserving the rub’s flavor. Place the foil‑wrapped rack back on the grill at 300 °F and let it cook for 1 to 1.5 hours. Monitor the internal temperature target with a probe; you’ll pull the ribs once they reach 190‑202 °F. This range guarantees collagen breakdown, which breaks down connective tissues and yields tender, juicy meat. Avoid over‑filling the packet to prevent excess steam. When the target is hit, remove the foil and let the ribs rest briefly before the final finish. Trim excess fat before sealing to enhance the texture.
Brush Sauce, Caramelize, and Add Optional Char
Now that the ribs are tender, brush on a generous layer of your favorite barbecue sauce, then move them to direct heat for three to five minutes per side, watching closely so the glaze caramelizes without burning, and finish with a quick char over the flame for that coveted crispy, smoky crust. Apply a uniform sauce layer while the ribs are still hot, ensuring the coating spreads evenly. Keep the grill on low to medium while you flip, allowing the sauce to thicken and achieve even caramelization. After the first side, baste again, cover for five minutes, then repeat on the opposite side. For optional char, position the ribs directly over the flame for a brief burst, watching the surface turn a deep, caramelized brown. This controlled sear locks in flavor and creates a crisp, smoky exterior. Maintain a steady 300°F throughout the cooking process to ensure consistent tenderness. Using a dry rub seasoning before applying sauce will enhance the depth of flavor and complement the caramelized glaze beautifully.
Rest, Slice, and Troubleshoot Common Rib Issues
After the glaze has caramelized, let the ribs rest for about ten minutes before slicing. During the rest, internal temperature should drop to a safe, manageable level, allowing juices to redistribute and preventing juice loss. Perform important temperature checks between the bones; a probe placed in the thickest section will confirm you’re within the 195‑203°F gelatin range for tenderness. Slice against the grain, using a sharp knife to keep meat intact and avoid tearing. If ribs are tough, verify you maintained a consistent grill temperature of 300°F or lower; uneven heat or a low propane tank causes hot spots and overcooking. For dry, lean baby backs, keep the final internal temperature below 200°F and consider a light sauce basting. Adjust rib placement on the grates to even out hot zones and eliminate common cooking issues. Consider using indirect heat cooking to ensure even tenderness throughout the ribs. Use the foil to retain moisture during the steaming phase.