Preheat your oven to 425°F, line a sheet pan with foil and parchment, and set a stainless‑steel wire rack on top. Form ½‑inch patties, press a thumb‑made well in the center, and chill them an hour. Season both sides with 2 tsp kosher salt, 1–1.5 tsp pepper, and a pinch of garlic, onion flakes, and paprika per pound. Place patties seasoned‑side‑down on the rack, bake 12‑15 minutes for a caramelized crust, then flip, add cheese if you like, and bake another 2‑3 minutes. Let the burgers rest three minutes before serving, and you’ll uncover more tips ahead.
Select the Ideal Oven Temperature for Oven‑Baked Burgers
Ever wonder which oven temperature gives your burgers that perfect caramelized crust without drying them out? You’ll find the ideal oven temperature sits between 400°F and 425°F. Preheat to 425°F on a cooling rack for even airflow, then bake 12‑15 minutes for a medium‑well finish, or 15‑18 minutes for a fully cooked 160°F interior. If you prefer a sheet‑pan method, set the oven to 400°F and expect 12‑15 minutes for fresh patties, extending to 20‑25 minutes for frozen ones. Lower the heat to 375°F when you need a gentler bake; plan 20‑25 minutes to hit 160°F, especially for quarter‑pound patties. Adjust cook time based on patty thickness, frozen status, and whether you use a rack, then rest five minutes before serving. For best results, use an instant-read thermometer to verify your burgers have reached the proper internal temperature. Use ground beef that is 85/15 or 90/10 for the best flavor and juiciness.

𝟏,【𝐏𝐑𝐄𝐌𝐈𝐔𝐌 𝐐𝐔𝐀𝐋𝐈𝐓𝐘】The cooling rack is composed entirely of stainless steel without any harmful coatings. To meet your baking needs, we have chosen for you the substantial material on the market: food-grade stainless steel.

QUALITY STAINLESS STEEL CONSTRUCTION: Made from food grade stainless steel instead of metal plating or coating, the grill is stronger, more durable, less likely to rust, warp or bend and safer.

【Healthy Material】 The baking sheet with wire rack are made of high quality stainless steel without any chemical coating, wouldn't create chemicals at high-temperature baking, great replacement to aluminum pan, rust free and healthy for your daily use.
Form Oven‑Baked Burger Patties That Stay Juicy
How can you shape oven‑baked burger patties that stay juicy from start to finish? Begin by handling the ground beef gently; sprinkle salt, pepper, and your favorite seasonings, then fold them in with a light touch. Avoid over‑mixing, which crushes the meat texture and leaches moisture. Divide the mixture into equal portions and press each into a ½‑inch‑thick patty, using a lid or a plastic‑wrapped mold slightly larger than the bun. Establish a thumb‑made well about an inch across into the center; this depression guarantees even heat flow and keeps juices from escaping. For an extra moisture boost, consider placing an ice cube in the center of each patty, which melts slowly during cooking to release additional moisture into the meat. Chill the patties for at least an hour—cold meat holds its shape and retains moisture. Finally, set the patties on a wire rack inside a baking sheet; the rack promotes air circulation and proper temperature regulation, letting excess fat drip away while the heat surrounds each side. This method locks in juiciness and delivers a perfect texture. Bake the burgers at 375°F for 20‑25 minutes until they reach an internal temperature of 160°F.
Pick the Best Cooking Method: Bake or Broil?
Which method wins for your kitchen? If you crave a hands‑off process that lets you bake other dishes while the patties bake, set the oven to 375‑400 °F, line a sheet with parchment, and let the heat work evenly for 15‑20 minutes. Baking delivers juicy results, lets you cook multiple burgers at once, and dramatically reduces cleanup required. Ability to cook multiple hamburgers at once makes it ideal for entertaining and batch‑cooking sliders.
If you prefer a quick, charred crust that mimics an outdoor grill, switch to the broil setting. The intense top heat sears thinner patties in minutes, giving a smoky, crispy exterior. You’ll need to watch closely to avoid burning, but the rapid cook helps you reach your target internal temperature of 160°F for food safety and desired doneness. Choose baking for batch convenience and minimal mess, or broiling for a fast, grill‑like finish.
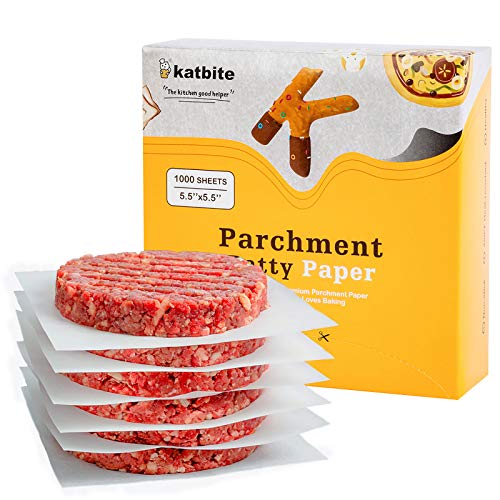
PREMIUM PARCHMENT SQUARES - 1000pcs burger patty paper 5.5x5.5 inches made with FSC-certified wood pulp, thicker 40gsm paper than commonly used 28gsm or 35gsm hamburger wax paper sheets. The parchment paper squares are thicker and tear-resistant, so it can be used to separate the frozen patties about 3 times.
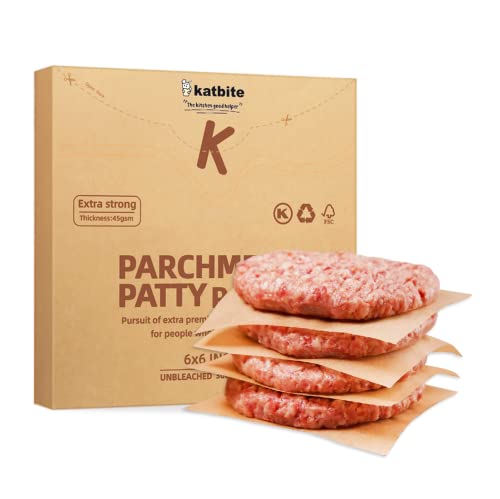
Perfect Size: 6x6 inches of 300 count patty paper geometry sheets,which is about 15x15cm,it's not only perfect for making and separating burgers, but also fits for preventing patties from stick together.It's great for retaining your moisture and flavor.

SET OF 3 BAKING SHEETS: GoodCook’s Nonstick Cookie Sheet Set comes with a small 13” x 9”, medium 15” x 10” and large 17” x 11” baking sheet to provide the perfect options for any of your baking needs.
Arrange Baking Sheet and Rack for Good Airflow
Set the sheet pan aside, line it with foil and parchment, then slip a stainless‑steel wire rack onto the pan so hot air can circulate beneath each patty. Place the rack so it sits evenly, avoiding any warps that could trap grease. Arrange eight quarter‑pound patties on the rack, spacing them at least an inch apart to let airflow glide around every side. The foil‑lined pan catches drippings, while the rack lifts the meat, preventing it from steaming in its own fat. This configuration lets you achieve uniform browning and maximizes heat circulation, mimicking a convection environment without a fan. Keep the onions spread under the patties for flavor, and you’ll enjoy crisp, evenly cooked burgers every time. Use a digital meat thermometer to verify your burgers reach the proper internal temperature for your desired doneness level. Shred the onion before spreading it under the patties.

HEAVY DUTY STAINLESS STEEL STURDY DESIGN: Set of 2 cooling racks for half sheet baking pans are food-safe, professional grade 304 (18/8) stainless steel with strong, heavy duty wire grids, small holes, smooth no-snag edges, and a full 1 inch height resulting in greater all around airflow for even cooking, cooling and roasting every time
![Wildone Baking Sheet & Rack Set [2 Sheets + 2 Racks], Stainless Steel Cookie Pan with Cooling Rack, Size 16 x 12 x 1 Inch, Non Toxic & Heavy Duty & Easy Clean](https://m.media-amazon.com/images/I/4149WYoQCqL._SL500_.jpg)
Perfect Bundle: Including 2pcs baking sheet 16 x 12 x 1 inch and 2pcs cooling rack 15.35 x 11 x 0.67 inch, fits most regular oven and toaster oven. Our baking sheet pan and cooling rack are designed to work perfectly together and superbly apart
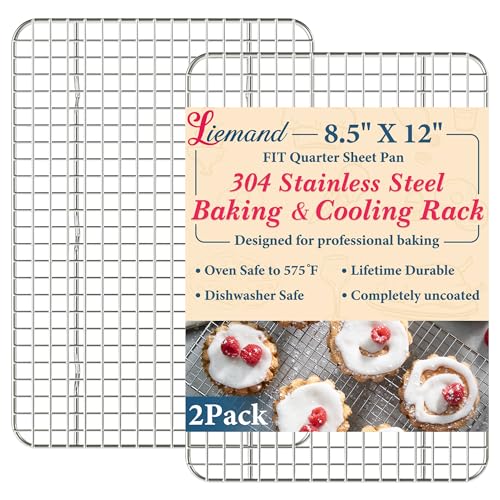
TRUSTWORTHY MATERIALS: Our wire cooling rack is made entirely of food-grade 304 stainless steel, with narrow mesh, smooth edges, and uniquely designed vertical support rods, making our racks more heavy-duty and more stable
Season Oven‑Baked Burgers Properly Before Cooking
Season your burgers just before they hit the heat, letting the flavors meld while the meat stays tender. For four patties, aim for ideal seasoning ratios: about two teaspoons of kosher salt, one to one‑and‑half teaspoons of freshly ground black pepper, and a half‑teaspoon of granulated garlic, onion flakes, and paprika per pound of beef. Mix the blend into the meat with clean hands, avoiding over‑working, then form the patties. Apply the first layer of seasoning on one side, place the spice‑covered side down on the rack, and season the top. If you’re using frozen patties, bake them ten minutes first, then sprinkle the blend and flip. This seasoning application method guarantees every bite is flavorful and juicy. For oven‑baked burgers, use a meat thermometer to ensure the internal temperature reaches safe levels. Preheat the oven to 375 °F before starting.
Add Cheese to Oven‑Baked Burgers at the Right Moment
Now that your patties are perfectly seasoned and reaching 160°F, it’s time to introduce the cheese. Place a slice of American or cheddar on each patty and adjust the oven settings for a quick melt. If you’re at 375°F, keep the burgers in for the last 1‑2 minutes; the cheese will soften and turn glossy without overcooking the meat. For a hotter finish, crank the oven to 425°F and let the cheese sit just 1 minute after you add it, achieving a buttery sheen. Dairy‑free varieties need a slightly earlier slot—about 2 minutes before the timer ends—because they melt slower. To ensure food safety, always cook your burgers until they reach the internal temperature of 160°F. This precise cheese melt timing guarantees every bite stays juicy, while the brief oven settings adjustments lock in flavor and texture. Preheat the oven to 400°F before starting the bake.
Toast Buns for Oven‑Baked Burgers Without Burning
If you preheat the oven to 375 °F and place the buns cut‑side up on a middle rack, the gentle, consistent heat will brown the interiors evenly without scorching the edges. Lightly brush each cut surface with butter, then spread the buns evenly in a single layer, ensuring the arrangement of buns on racks leaves a small gap between each piece. This spacing prevents heat shadowing and maintains airflow. Set a timer for two minutes, then check for a golden‑brown hue; remove the first batch promptly. Allow a short pause—time between toasting batches—so the oven temperature stabilizes before loading the next set. Rotate the trays halfway through for uniform browning, and keep the door opening to a minimum to preserve heat consistency. Proper preheating ensures your oven reaches the optimal temperature needed for safe and consistent results. The even heat distribution ensures consistent browning across all buns.
Check Internal Temperature of Oven‑Baked Burgers and Rest
A reliable way to guarantee safe, juicy burgers is to check their internal temperature with a digital instant‑read thermometer before you pull them from the oven. Insert the probe into the thickest part, avoiding bone or fat, and read a single spot for each patty. Aim for 160°F to meet USDA safety, or 145°F–155°F if you want medium‑rare to medium‑well, which lets you correctly judge doneness without sacrificing flavor. When the reading hits your target, remove the burgers and let them rest on a warm plate for three minutes. Resting lets juices redistribute, keeps the interior at a safe 140°F or higher, and prevents overcooking while preserving a tender, moist bite. Like grilling steaks at higher temperatures, using internal temperature as your primary guide ensures better results than relying on time alone. Cooking to the proper internal temperature is essential for food safety.
Fix Common Oven‑Grill Problems Fast
One of the quickest ways to keep your oven‑grill performing flawlessly is to tackle the most common culprits—dirty grates, insufficient preheat, pressing patties, excessive handling, and uneven heat—before you even fire it up. Scrub the grates with a stiff brush, wipe them down, then lightly oil to prevent sticking and eliminate old flavors. Preheat the oven to a high temperature for at least ten minutes; this creates the Maillard crust and stops steam‑cooking. Resist the urge to press patties—flip once and let juices stay inside. Form loose balls and handle them minimally, avoiding over‑mixing. Adjust oven racks efficiently to position burgers away from direct flame, and keep a pan of water on a lower shelf to control smoke and odors, ensuring even heat and a clean kitchen. Use a digital infrared thermometer to accurately monitor the grill temperature and avoid cooking at the wrong temperature. Different gas burner heat outputs will require adjustments to your cooking time and distance from the flame to achieve optimal burger doneness.