Pick firm, cylindrical carrots like Scarlet Nantes, scrub and dry them, then slice lengthwise into ½‑¾‑inch pieces (blanch thick slices 6‑7 minutes if you like). Toss with olive oil, salt, pepper, and a soy‑honey glaze. Heat a gas grill to medium‑high (≈400°F) or set up a two‑zone charcoal grill with 450°F direct heat and a cooler indirect side. Sear the carrots cut‑side down over direct heat for 1‑2 minutes, flipping every minute to get deep grill marks, then move them to indirect heat and close the lid, cooking 12‑15 minutes until fork‑tender. Finish by basting with remaining glaze and adding fresh herbs or butter for extra richness; the next steps will show you how to perfect flavor and texture.
Grilling Carrots: Step‑by‑Step Guide
Precision begins with a properly heated grill, so set your gas grill to medium‑high (≈400 °F) or, for charcoal, create a two‑zone setup with a 450 °F direct zone and a cooler indirect area. Brush the grates with oil, then toss halved carrots in three tablespoons olive oil, one tablespoon honey, garlic powder, salt, and pepper. Marinate briefly in soy sauce for fifteen minutes to boost flavor pairing. Place carrots cut‑side down on the direct heat, rotating every few minutes for eight to ten minutes until deep char marks appear. Move them to indirect heat, cooking an additional five to ten minutes until fork‑tender, allowing a crisp exterior and tender interior for texture contrast. Finish by brushing a light glaze if desired. For best results, slice carrots in half to speed up cooking. Like asparagus, carrots are ready when they achieve a vibrant color with a slight char for added flavor.
Choose the Right Carrots for Even Grilling
Grilling carrots efficiently starts with selecting a variety that holds its shape and moisture under high heat. You’ll want ideal carrot varieties that stay firm, like Scarlet Nantes, whose cylindrical shape and smooth, nearly coreless texture resist drying out. Danvers offers broad‑shouldered roots that tolerate heat and heavy soil, reducing common carrot defects such as cracking or splitting. For warm climates, Shin Kuroda‘s plump, moisture‑rich roots keep sweetness intact while avoiding moisture loss. If space is limited, Parisian Heirloom‘s round, compact roots cook evenly without flaring. Avoid overly long, thin carrots that can become limp, and steer clear of varieties prone to fibrous cores, which cause uneven browning and texture inconsistencies. Some carrot varieties perform best in early spring and are ideal for early‑season grilling. Like grilled sweet potatoes, properly selected carrots develop dark brown grill marks that enhance their natural sweetness and create a smoky flavor profile.

CARROT LOVERS SEED PACK: Add vibrant crunch to your garden with this 5-pack of colorful carrots! From sweet Little Finger and classic Nantes to the striking Dragon and Solar Yellow, these carrots are perfect for snacking, roasting, and salads.


Prep Carrots: Wash, Peel, Slice, and Optional Blanch
Before you even think about heat, give the carrots a thorough rinse under cold water, scrub them gently with a brush if they’re organic, and pat them dry so the oil sticks and steaming is avoided. Then peel with a vegetable peeler, pulling long downward strokes from stem to tip for a smooth, uniform surface; leave thin skins on baby carrots to preserve nutrients. Slice large carrots lengthwise, then quarter them to ½‑¾ inch thickness, ensuring every piece shares the same dimension for even grill marks. If any piece exceeds one inch in diameter, slice it; otherwise keep it whole. For thick slices, blanch 6‑7 minutes in salted water, shock in ice, and drain—this ideal prepping method speeds tenderness while preserving color. Consistent size and dry surfaces boost prep & presentation, preventing burning and guaranteeing uniform doneness. Use similar size carrots for best results. To further enhance flavor and texture, consider marinating vegetables in a flavorful mixture before grilling, which will add depth to your carrots’ taste profile.
Season & Marinate: Olive Oil, Salt, Pepper, and Soy‑Honey Glaze
If you’ve already prepped the carrots, toss them with a thin drizzle of olive oil, a pinch of salt, and freshly ground pepper, then coat them in a quick soy‑honey glaze—whisk soy sauce, honey, and optional butter or extra oil together until smooth, and brush the mixture over the carrots just before they hit the grill, letting the heat caramelize the glaze while the oil keeps the surface moist and the seasoning balanced. For perfect glaze application, whisk the wet ingredients in a bowl to guarantee even distribution, then use a silicone brush to layer the glaze uniformly. The glaze flavor profile blends umami from soy, sweetness from honey, and richness from butter or oil. Adjust honey for desired sweetness, add garlic powder or ginger for depth, and finish with a final basting pass as the carrots reach fork‑tenderness. This method locks in moisture, creates a sticky coating, and delivers consistent caramelization across the grill surface. Like asparagus, carrots benefit from single layer cooking to ensure even heat distribution. Boil or steam the carrots first for tender texture.
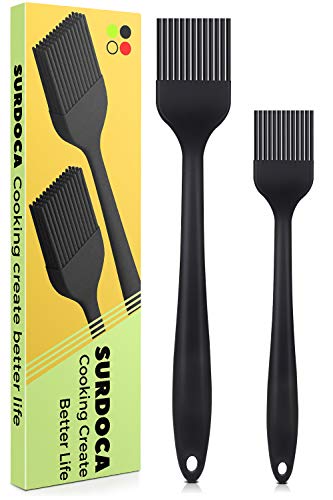
100% BPA FREE & FOOD GRADE SILCIONE : This silicone basting brush made of 100% BPA FREE food grade silicone. All bristles of this basting brush set are BPA-free material which are safe and good for your health. whole basting brush body covered by soft silicone material which can offer you perfect using feeling. At the same time, this basting brushes kitchen silicone is non-staining and won't pick up food particles (unlike wooden basting brush).

[ FOOD GRADE MATERIALS ]: This Silicone Basting Brush Set BPA Free,Non-toxic, lead free Odourless. With Stainless Steel core inside non slip handle! 100% made of premium Food Grade silicone, unlike other bristle brushes, the silicone bristles will not break or shed in your food, more healthy.

🧹🧹🧹VERSATILE DESIGN: Carrot-shaped silicone basting brush perfect for applying oils, marinades, glazes, and butter in cooking, baking, and grilling tasks
Set Up Your Grill for Two‑Zone Cooking
After coating the carrots with the soy‑honey glaze, set your grill for two‑zone cooking so the glaze can caramelize over direct heat while the carrots finish tender on the cooler side. Light a chimney starter, fill it halfway with ~45 briquettes, and let them ash over. Dump all hot coals onto one half of a charcoal grill, creating a scorching direct zone (450‑550°F) and an indirect zone (250‑350°F). Place a disposable foil pan on the cool side to catch drips and maintain moisture retention. Open bottom vents fully and position top vents over the indirect side to channel airflow, establishing a stable temperature gradient. Keeping your grill lid closed where possible will stabilize the temperature and prevent fluctuations during cooking. Use an oven thermometer to verify zones, then preheat with the lid closed for ten minutes. This setup guarantees uniform cooking and ideal caramelization. The cool zone should be maintained at a lower temperature to prevent burning.

【Master Two-Zone & Indirect Cooking】 Designed in a perfect half-moon shape, this charcoal basket fits snugly against the side of your kettle grill. It instantly creates a dedicated "Hot Zone" for searing and a "Cool Zone" for slow roasting or keeping food warm. This setup is essential for cooking ribs, whole chickens, or pork butts without burning, giving you restaurant-quality results.
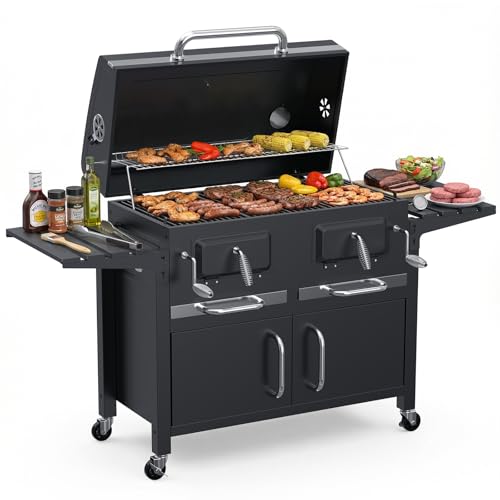
EXTRA LARGE CAPACITY FOR BACKYARD FEASTS: Feeding a crowd of 15+ has never been easier. This oversized charcoal grill features a heavy-duty main cooking grate and an elevated warming rack, providing a sprawling surface for steaks, burgers, and ribs. Whether you are looking for charcoal grills on clearance or a premium barbecue grill, our station delivers the space of a professional outside grill.

Extra-Large Capacity: Featuring 780 sq.in. total grilling space (500 sq.in. primary grilling area + 280 sq.in. warming area), this charcoal BBQ grill lets you cook multiple foods at the same time. Enjoy less waiting, fewer batches, and more flavorful grilled dishes
Master Direct Heat: Char Carrots Cut‑Side Down for Caramelization
Grill the carrots cut‑side down over the hot direct zone, letting the olive‑oil‑kissed surface sear for 1–2 minutes before rotating to develop a deep, caramelized stripe. Keep the grill at 450‑500 °F and maintain a consistent dome reading; this temperature range verifies rapid Maillard reaction without overcooking. Toss each carrot in just enough olive oil—about 2 Tbsp per 2 lb—to prevent sticking while allowing the skin to crisp. Flip every 1–2 minutes, using tongs to keep the cut side in contact with the flame long enough to control char levels but short enough to avoid burning. After 3–5 minutes, you’ll see tiger‑stripe marks; continue rotating until the interior reaches fork‑tenderness. For even cooking throughout, consider parcooking the carrots by microwaving or blanching them before grilling to ensure the centers become tender without the outsides burning. This method allows you to achieve ideal texture and precise caramelization. Glaze can be applied after the carrots are fork‑tender, ensuring the sugars caramelize without burning.
Transition to Indirect Heat: Finish Without Burning
Three to five minutes of direct heat give the carrot ends a quick, caramelized char; then slide the spears to the cooler side of the grill and let them finish cooking for another 12‑15 minutes under indirect heat, keeping the lid closed to maintain a steady 450 °F dome. You’ll monitor a timed temperature, ensuring the zone stays near 450 °F while the lid traps heat. Flip the carrots every 2–3 minutes on direct heat to achieve balanced browning before the transfer. Once on the indirect side, keep the lid sealed and resist the urge to open; the ambient heat will gently bring the interior to 195 °F for tender‑crisp texture. Check fork tenderness after 14 minutes, then remove promptly to avoid over‑cooking. For a grill, use a two‑zone setup to control direct and indirect heat.
Foil‑Pack Carrots for Tender Indirect Cooking
A foil‑pack creates a sealed, steam‑rich environment that cooks carrots evenly without the risk of flare‑ups. You start by washing, peeling, and slicing carrots into ¼‑inch diagonal coins, then toss them with olive oil, kosher salt, black pepper, minced garlic, and a splash of tangy marinades. Add fresh herbs—rosemary or parsley—and a pat of butter for richness. Lay a double‑layer foil sheet on the grill, center the seasoned carrots, and fold the edges tightly, ensuring no overlap. Place the packet over the indirect zone of a 375‑450°F grill, close the lid, and cook 20‑25 minutes, stirring once at the 10‑minute mark. This foil‑wrapping technique retains moisture and infuses smoky flavors while simplifying cleanup. Finish by sprinkling roasted nut toppings for crunch and a final burst of flavor. Grilling carrots in foil enhances their natural sweetness while keeping the dish inexpensive and easy to clean up.
Glaze Grilled Carrots at the End
After sealing the carrots in a foil pack and cooking them to a fork‑tender bite, you’ll want to finish with a glossy, flavor‑intense coating. Heat a saucepan, melt 2 Tbsp butter, then stir in ¼ cup brown sugar, 2 tsp honey, a pinch of kosher salt, and optional cinnamon until the mixture thickens and bubbles. Remove from heat, let it cool just enough to stay fluid, and whisk in grated garlic, chili flakes, and lime juice for brightness. Place the carrots on a pre‑heated 450 °F grill, brush one side with the hot glaze, and grill 1‑2 minutes. Flip, spoon glaze the other side, and continue to reapply glaze every 5 minutes until the surface caramelizes and the carrots remain tender. Serve immediately, optionally drizzling any remaining glaze. Peeling the carrots before grilling helps them cook faster and allows the glaze to adhere better. Like eggplant, achieving the ideal texture depends on balancing moisture and heat control to prevent the carrots from becoming mushy while ensuring they reach peak tenderness.
Serve Grilled Carrots Hot and Store Leftovers
Keep the carrots hot by moving them to a cooler part of the grill—away from direct flame—once they’re glazed, and serve them immediately while they stay at 140 °F or above. Use the glaze application technique to coat each piece evenly, then transfer them to an insulated tray; this maintains temperature without over‑cooking. According to food safety laws, hot foods must remain at or above 140 °F, so limit exposure to the danger zone to two hours, or one hour if ambient temperature exceeds 90 °F. If you need to transport, wrap the carrots in a foil‑lined container and keep a thermometer on hand. For leftovers, refrigerate within two hours (one hour in hot weather), store in an airtight container, and keep the fridge at 40 °F or lower. Like cooked chicken, leftover grilled carrots can be safely stored in the refrigerator for several days when kept at the proper temperature. Discard any portion that falls below safe limits. Keep meat, poultry, and seafood cool until ready for use.


