Start by drawing a centered oval bowl on a low horizon line and set a single vanishing point to give it one‑point perspective. Extend orthogonal lines from the oval’s edges toward the vanishing point, then add vertical guides to shape the bowl’s depth. Sketch a narrow rectangular lid handle with a curved C‑shaped outline, and place small side handles on each side. Build cylindrical pillars and angled leg extensions, then draw the grate grid, charcoal pieces, wheels, and stabilizing braces. Shade form and cast shadows, add steam, smoke, and food, and finish with cross‑hatching for texture; the next steps will deepen your technique.
Sketch the Basic Oval Bowl and Perspective Lines for a Realistic Grill
When you set the horizon line in the middle of the page, you instantly establish the viewer’s eye level, anchoring the grill’s oval bowl in a realistic, eye‑level perspective. First, draw a true oval centered on the horizon, using light construction lines to keep bowl proportions accurate. Place a single vanishing point on the horizon for one‑point perspective, then extend orthogonal line variations from the oval’s corners toward that point. These lines should be straight, evenly spaced, and converge neatly, forming a grid that hints at depth. Next, scale the bowl by drawing vertical guides from the top and bottom of the oval to the horizon, ensuring the height matches the intended distance. Finally, refine the sketch with darker outlines for the bowl edge and lighter strokes for the orthogonal lines, creating a clear, proportional framework ready for further detail. Understanding how medium heat temperature ranges apply to different grill types will help you draw grills with accurate proportions for their intended cooking purposes. Incorporate a two‑point perspective grid to enhance depth accuracy.

Add the Grill Grate Grid and Charcoal Details to Enhance Realism
Now that the bowl’s perspective is locked, you can layer the grill’s grate over it. Begin by drawing thin, evenly spaced lines that converge toward the vanishing point, forming a subtle lattice that mimics metal bars. Use a light hand for the distant rows, then deepen the foreground lines to create depth. Apply grate reflection effects by adding a faint, glossy sheen where light hits the edges; a short, sharp highlight on each bar suggests steel. Next, sketch charcoal pieces as irregular, rounded blobs nestled between the bars. Employ charcoal lighting techniques: darken the underside of each lump, then lift a soft, warm glow on the top surfaces to convey heat and ember glow. To enhance authenticity, depict the radiant heat these embers emit by adding a subtle halo effect around glowing areas. Finish with a slight smudge around the edges for a realistic, smoky atmosphere. Ensure the grill depth is measured in at least three places and rounded down to the nearest quarter inch.

Cooking Grid Lifter fits most heavy - Duty cast iron grate. Can be used on gas and charcoal grills, easily and safely lift your cooking grids off your Grill. Keeps the digits from catching fire. No more heat-resistant gloves.
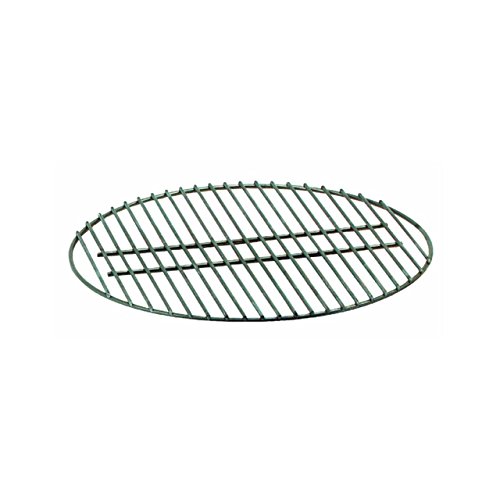
The lower grate in a charcoal grill creates a space between the vents and the coals allowing air to get to the coals

Fits 14-Inch Smokey Joe/Smokey Joe Silver And Gold And Tuck-N-Carry Grills
Draw the Lid Handle and Side Handles With Depth for a Realistic Grill
A few thin strokes will give the lid’s handle its three‑dimensional presence, so start by drawing a narrow rectangle centered on the oval lid, then extend two short lines outward to meet the lid’s top edge and add three tiny circles in front for mechanical detail. Sketch a subtle curved line beneath the rectangle to suggest a recessed base, then encircle the lid with a C‑shaped outline that follows its contour, adding a half‑circle on top for volume. Lightly trace parallel inner curves to thicken the lid handle details, then erase excess lines for clean edges. Symmetry practice helps ensure the side handles are evenly spaced. For side handle symmetry, place a small horizontal rectangle on each side of the lid, mirroring them perfectly. Draw cylindrical forms with curved lines, extending outward, down, and back in, then add a parallel inner shape for thickness. Keep both handles equidistant from the lid’s separation line and align them at mid‑height for balanced realism. Understanding how grill handles are designed with functional depth can enhance your drawing’s authenticity by incorporating realistic mechanical details that reflect actual grill construction.

SUPER HEAVY DUTY, bbq grill tools are made from 2.0mm thick solid stainless steel, Sturdy one-piece design with decent thickness will not bend or break, Durable to serve you well from season to season

Exclusive Griddle Cooking Set - Complete griddle set for various cooking uses comes with 2 spatulas, flipper, scraper, chopper, cleaning brush,, 2 bottles.

Commercial Restaurant Grade Turner: Built for daily use in restaurants, diners, food trucks, catering kitchens, and home cooking setups
Build the Grill’s Pillars and Leg Extensions
If you want the grill to stand solid and believable, start by sketching its pillars as simple cylinders that recede in perspective; draw a narrow vertical ellipse for the top, then pull two parallel lines down, tapering slightly to suggest weight, and finish each pillar with a matching ellipse at the base. When drawing pillars, keep the horizon line low so the cylinders appear sturdy; use light construction lines to map the axis, then darken the outer contour. Next, rendering leg extensions: extend short, angled rectangles from the bottom of each pillar, angling them outward for balance. Add a subtle curve where the leg meets the ground, then shade the underside to convey depth. Finally, erase excess lines, reinforce the base ellipses, and apply consistent hatching to unify the structure. Using quality grilling tools helps ensure your grill remains structurally sound and functional for years to come. Bar grille core types such as AG10, AG20, and AG40 provide varying bar thicknesses and spacing for different design needs.
Draw Wheels and Add Stabilizing Curves to Prevent Tipping
When you sketch the wheels, start with light circular outlines at the base of each leg, then refine them into solid rims with hubcaps and spokes. Guarantee wheel positioning is symmetric under the grill frame, spacing the pairs evenly for realistic perspective. Next, draw subtle curved braces from each axle upward to the leg midpoints, tapering the thickness so the curves are broader at the base and narrow toward the top. These anti tipping mechanisms act like interlocking ridges, visually counterbalancing the bowl’s weight. Add wedge‑shaped shims beneath opposite high‑side wheels and chock each side with tapered curves to block rolling. Finally, verify alignment from an aerial view, confirming the stabilizing curves mirror each other perfectly. Check level using a small level to ensure the grill sits evenly on the ground. For a stable foundation, consider placing your grill on non-combustible materials like cinder blocks that provide proper support without fire hazards.
Shade the Bowl, Handles, and Legs for Depth
With the stabilizing curves and wheels firmly in place, you can now bring depth to the grill by shading its bowl, handles, and legs. Start by locating the darkest rim and bottom edges of the bowl; lay a soft hatching layer of 30‑40 % gray to suggest metal texture. Fade upward with graduated shading techniques, letting mid‑tones melt into lighter curves, then add crisp highlights for metallic shine effects. For the handles, draw a darker outer outline, then a slightly smaller inner shape; shade from the light‑facing top to the shadowed underside, using a tone a shade darker than the bowl to keep the palette varied. Legs receive the heaviest tones at their outward bases and joints; apply progressive darkening toward the ends, then sprinkle subtle highlights to echo the grill’s overall metallic sheen. Before drawing, studying actual grill maintenance helps you understand the metal texture and construction that makes realistic shading possible. Family gatherings often inspire kids to try drawing the grill themselves.
Add Realistic Shadows to the Grill Drawing
The grill’s three‑dimensional presence comes alive once you layer its shadows: start by mapping the form shadow that clings to the bowl’s curves, then sketch the cast shadow that stretches across the ground, and finally add the subtle occlusion shadow where the legs meet the surface. First, draw a light linear lay‑in to outline the bowl, then fill the form shadow with a mid‑tone value, darkening toward the edges and preserving a faint reflective light within shadow. Next, position the cast shadow according to your light source, sharpening its cast shadow edges while blending a soft penumbra for realism. Finally, deepen the occlusion shadow under the legs with the darkest value, ensuring the shift remains smooth and the overall contrast feels punchy and lifelike. Reflected light adds a gentle glow to the core shadow, enhancing depth. To achieve a durable and polished appearance in your grill drawing, apply specialized shading techniques along the grain direction, similar to how specialized stainless steel cleaners are applied to preserve the metal’s finish and prevent discoloration.
Illustrate Steam, Smoke, and Food Items on the Cooking Surface
If you layer steam, smoke, and food together, the grill comes alive: draw soft, curving steam lines that rise from the hot grates, morph their base from a light gray to a translucent white, and stack multiple wave shapes with fading opacity for depth. Next, sketch irregular, billowing smoke with jagged edges, thick at the source and wispy outward, blending darker grays into lighter tones for atmospheric smoke effects. Position steaks, burgers, and sausages centered on the grate, aligning bottoms with the metal lines, and add corn or peppers along the edges. Use meticulous food styling: render sear marks, glistening highlights, and subtle char lines, while drawing juices dripping between grates. To achieve realistic smoke effects in your illustration, consider how different wood chip varieties produce distinct smoke characteristics and color intensities. Balance steam density with smoke volume to keep the scene dynamic yet uncluttered. Include a smoke wave illustration from the available set to enhance realism.
Add Final Hatching and Texture for a Polished, Realistic Grill Illustration
Adding the final hatching and texture brings the grill illustration to a polished, realistic finish; you’ll layer thin, curved contour lines over the metal grates to echo their cylindrical shape, then cross‑hatch the shadows beneath the food with denser, intersecting strokes that deepen the values. Next, add gradated hatching to shift from bright highlights on the grill’s rim to deeper tones in the recessed slots, spacing lines wider as they move away from the light source. Incorporate final textures by varying pressure: light, short strokes suggest sleek steel, while heavier, longer marks hint at rust‑speckled edges. For authentic detail, consider how high-temperature oils protect and season real grill grates, informing your rendering of well-maintained surfaces versus corroded areas. Cross‑contour lines follow the form of each grate, reinforcing volume. Finish by smoothing transitions, ensuring each layer blends seamlessly for a cohesive, realistic appearance. Practice consistent pressure to control value density.


