
Grab a few sheets of newspaper, crumple them in the grill’s center, and nest an oil‑soaked towel or a small wood block at a slight angle underneath; light the paper from beneath and let the natural draft pull fresh air through the gaps. As the flame spreads, arrange the coals in a criss‑cross pyramid so each piece leans on two others, creating a self‑sustaining fire that reaches ash‑covered heat in 10‑15 minutes. Then push the hot coals to one side for a direct zone and leave the opposite side empty for indirect cooking, and you’ll be ready to sear or roast while the grill stays steady. Continue and you’ll uncover how to troubleshoot common issues and keep the temperature consistent throughout your cook.
Pick the Fastest Chimney‑Free Lighting Technique (Newspaper, Oil‑Soaked Towels, or Electric Coil)
Looking for the quickest way to light a charcoal grill without a chimney? You grab a few loosely crumpled newspaper sheets, tuck them under a pyramid‑shaped stack, and watch heat rise. Within 15‑20 minutes the coals glow, and the flame stability stays steady because the paper burns evenly, while smoke mitigation benefits from the open airflow. If you need even faster, soak a couple of towels in vegetable oil, place them amid the coals, and ignite. The oil fuels a rapid, clean burn, reaching grill‑ready heat in 10‑15 minutes with minimal smoke. An electric coil offers a hands‑off option, heating to red‑hot and igniting coals in under 30 minutes, but it lags behind the towel method in speed while still providing good flame stability and low smoke output. Ensure the charcoal is dry and spaced to allow optimal airflow. Once your coals are lit, preheating the grill with opened vents will ensure even cooking temperature across your cooking surface.
Prepare Fuel for Chimney‑Free Charcoal Lighting
When you gather your fuel, start by prepping a recycled‑can chimney: cut off the bottom, punch a few airflow holes, rinse it clean, and set it on the grill grate. You crumple newspaper sheets, or pine cones if you prefer a natural scent, and tuck them into the can’s base. Then you pour a modest handful of charcoal briquettes or lump coal, spreading them evenly to avoid fuel distribution challenges that can leave cold spots. Nestle a compressed wood block at a slight angle, letting its smoldering edges kiss the coals. Light the paper or pine cones from below; the flame climbs quickly, igniting the wood block and then the surrounding charcoal. Keep an eye on the level—over fueling grill can smother the burn, so you stop once the heat is steady and the coals glow uniformly. Maintaining consistent airflow through your recycled-can chimney ensures even heat distribution and prevents temperature fluctuations during the lighting process. Add a few pieces of charcoal initially and let them catch fire before adding more.
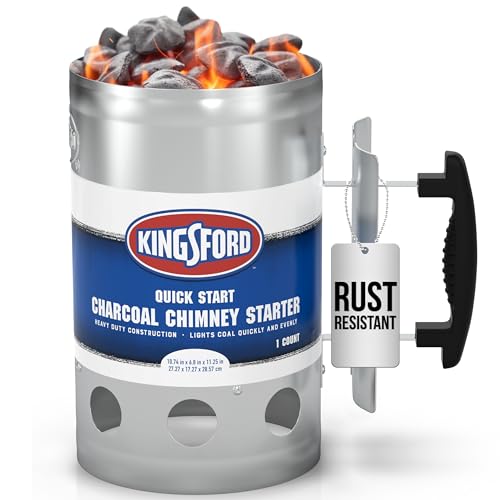
FAST CHARCOAL LIGHTER PULLS STEADY AIRFLOW FOR EVEN IGNITION: Helps get briquettes lit quickly and more evenly by pulling steady airflow through the chimney, reducing time from lighting to cooking for grills, smokers, and kettles.

High Quality - The charcoal starter is made of premium stainless steel,rust-resistant and heat-resistant, more durable.
RAPID IGNITION TECHNOLOGY ensures your charcoal is glowing and ready for cooking in just 15 minutes, significantly reducing the time you spend waiting for your grill to reach the optimal temperature.
Build a Chimney‑Free Charcoal Pyramid for Quick Ignition
A three‑layer pyramid of charcoal ignites faster because each piece contacts several neighbors, creating a self‑sustaining flame path. You start by arranging a small circle of coals at the grill’s center, leaving a narrow gap at the bottom for a lighter. Then you build the first layer in a loose criss‑cross pattern, ensuring each piece leans on two others. Add a second layer the same way, followed by a third, forming a compact pyramid that promotes efficient fuel placement. The open base lets a flame rise, while the criss‑cross design pulls air through, delivering even heat distribution across the grill. As the fire spreads upward, the pyramid acts like a mini‑chimney, igniting all coals without extra tools. This efficient airflow maximizes convection and radiation to reach all coals simultaneously. Pyramid stacking creates more contact between coals for faster ignition.

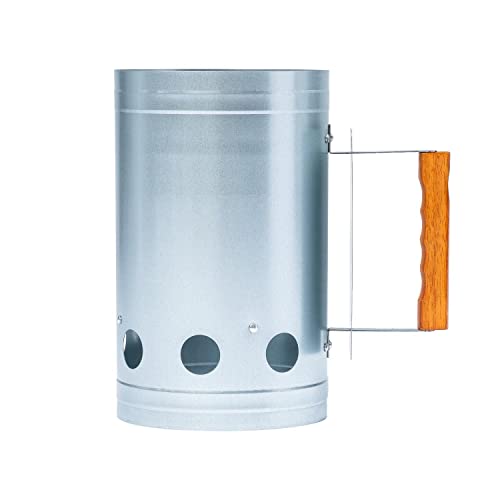
MATERIAL: Heavy duty stainless steel

Ideal for Gravity Series grills and other charcoal products
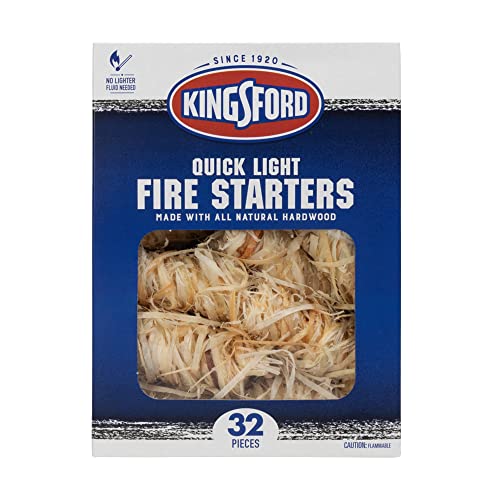
FAST AND RELIABLE FIRE STARTING WITHOUT LIGHTER FLUID NEEDED: Fire starter rolls help light charcoal or firewood quickly without lighter fluid, supporting reliable starts for grilling or outdoor fires with less time spent building ignition.
Light the Fire Safely and Achieve Ash‑Covered Coals in 10‑15 Minutes
The pyramid you just built creates a natural draft, so the next step is getting that draft to ignite the coals without chemicals. You crumple a few sheets of newspaper in the center, nest a wood‑block starter at a slight angle, and light the paper from underneath the grates with a long match. As the flame licks the paper, the draft pulls fresh air through the gaps, delivering even air distribution across the charcoal dome. The paper burns cleanly, the block releases steady heat, and the coals begin to glow, turning white‑ash within ten to fifteen minutes. No stirring is needed; the ash‑covered surface signals the fire is fully ignited and ready for cooking. Proper airflow throughout the cook ensures consistent temperature control for optimal results. This method also allows you to reach higher maximum temperatures of up to 1200°F for searing.
Set Direct vs. Indirect Heat Zones on Your Grill
Typically you’ll arrange the coals on one side of the grill, leaving the opposite side empty to create two distinct temperature zones. You’ll notice the direct zone glows hotter, the grates radiating 500‑600 °F, perfect for searing steaks and vegetables with a crisp, differing char intensity. Across the empty side, the indirect zone stays cooler, the heat circling the food by convection and smoke, delivering a gentle roast and subtle smoke concentration variation. Place a thermometer in each area to gauge the gap; add or shift coals if the direct side spikes. Use the indirect side for larger cuts, ribs, or whole chickens, letting them cook evenly without burning. To extend your grilling session, consider adding unlit briquettes adjacent to your lit coals for prolonged fuel duration. This two‑zone setup lets you switch between rapid sear and slow roast on the same grill. Mastering the 2‑zone method also helps maintain consistent temperature control across the grill.
Fix Common Chimney‑Free Lighting Issues?
Many grill owners stumble over the same lighting hiccups when they skip the chimney. You’ll notice newspaper fizzling out if it’s too compacted or damp; spread a thin, dry layer and tuck it loosely under the coal to invite consistent airflow. When using oil‑soaked paper towels, drizzle just enough oil to coat without drenching—excess oil creates flare‑ups, while too little burns out before the charcoal catches. Position a flat wood block at a slight angle, ensuring it doesn’t tip, and keep a gap around it so air can circulate and produce even burn patterns. If you rely on an electric starter, plug it into a safe outlet, avoid extension cords that limit placement, and let the element heat a broader area before removing it. Finally, a propane torch should sweep across the charcoal base, not a single spot, to spark a uniform ignition. Using paper towels instead of lighter fluid reduces flare‑ups and keeps the grill cleaner. After your charcoal has caught and burned down to the proper temperature, you’ll want to maintain a clean cooking surface by using natural abrasives like baking soda to remove buildup from previous grilling sessions.
Maintain Consistent Heat During Cooking
Keeping your grill at a steady temperature is a dance of airflow, fuel placement, and moisture control, and mastering each element lets you sear, smoke, or slow‑cook without surprise temperature swings. You start by opening the bottom vents just enough to feed oxygen, then partially lift the top vents to let heat escape without choking the fire. As the coals settle, push them to one side, creating a high‑heat zone for searing and a cooler, indirect side for slow cooking. Slip a water pan between the coals; its evaporating moisture caps the temperature at a gentle boil, keeping the air steady when you flip the lid. When the heat dips, add a small batch of pre‑lit charcoal, placing cold pieces near the existing fire so they catch gradually. By adjusting fuel composition and fine‑tuning vents, you maximize heat stability throughout the cook. Remember that closing vents completely will extinguish your coals, so always maintain proper airflow to keep your fire burning during cooking. The snake method lets you maintain a low, steady heat for long, slow cooks.