You load wood pellets into a hopper, which feeds them by a motor‑driven auger into a fire pot. The auger delivers measured handfuls while a hot‑rod igniter lights the first batch, and PID‑controlled fans push oxygen to keep the fire clean and the temperature steady. Sensors monitor chamber heat, adjusting fan speed and pellet feed in real time. If you keep going, you’ll uncover the detailed startup sequence and troubleshooting tips.
Does a Pellet Grill Need a Hopper, and How Does It Store Fuel?
If you want consistent temperature control, a pellet grill must have a hopper, because the hopper feeds pellets automatically to the fire pot via an auger. The hopper’s capacity typically ranges from 5 lb to 20 lb, allowing 10–20 hours of continuous cooking without manual refilling. You’ll notice semi‑transparent designs that let you monitor levels, and clean‑out features that empty leftovers after each session. For pellet storage methods, use airtight plastic containers, 5‑gallon buckets, or galvanized bins with sealable lids; these prevent moisture ingress and keep pellets dry. Pellet moisture prevention also means storing bins in cool, dry places away from humidity, heat sources, and direct sunlight. Starting on low or smoke mode ensures optimal ignition and helps you get the most out of your stored fuel. Empty the hopper after each cook to avoid rot and maintain ideal fuel quality. The Fuel Storage Bag included with the grill provides an extra 33.99‑dollar solution for keeping extra pellets organized and protected.

Keeps Pellets Dry and Fresh for Optimal Performance – The Traeger Stay Dry Pellet Bin is designed to keep your wood pellets dry and fresh for consistent grilling performance.
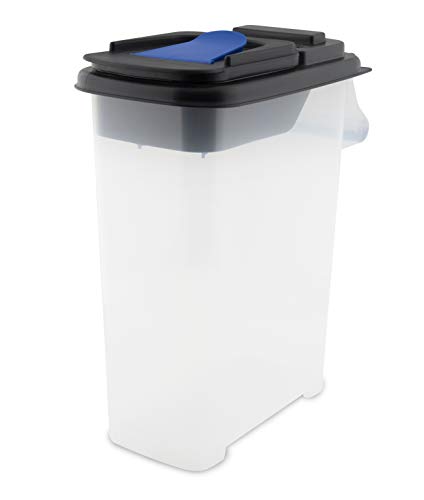
Store your pellet fuel the right way with a pellet fuel storage bin, designed to hold exactly one 20 lbs. bag of Broil King pellet fuel

EASY PELLET TRANSFER: The smoker accessories for pellet grill make it simple to swap pellet flavors, transfer leftover pellets to pellet storage container, and easily empty the hopper after each cook, helping to prevent auger clogs.
How Does the Auger Move Pellets From Hopper to Fire Pot?
When the grill’s controller detects a temperature dip, it triggers the electric motor to spin the corkscrew‑shaped auger at roughly two revolutions per minute, pushing a measured handful of pellets from the hopper’s bottom into the fire pot. The motor, coupled through a reduction gearbox, runs in short bursts rather than continuously, allowing auger speed variation that matches real‑time heat demand. Each rotation’s blade delivers a precise pellet quantity, ensuring pellet loading consistency across the cooking cycle. The controller monitors the RTD probe, pauses the auger for about 90 seconds in high mode, then re‑engages to maintain the set temperature. A shear pin protects the motor from jams, while the auger’s bottom‑positioned location guarantees a steady, uninterrupted fuel flow. The fan circulates air to keep the fire pot evenly heated. Using the prime function speeds up initial pellet delivery to ensure proper ignition when starting the grill.

🔥【Compatible Smoker Grills】- The upgraded auger motor replacement for all Traeger, Pit Boss(EXCEPT PTG) and Camp Chef, Oklahoma Joe, Cuisinart WoodCreek and Cabelas Pellet Grills. Such as: Traeger 070, 075, Texas Elite Series, Pro 22, Pro 34, Lil Tex Elite Series, pit boss pro series 850, 820, pit boss austin xl, oklahoma joe rider dlx smokers, etc

✅ WIDE COMPATIBILITY (PLUG & PLAY): Engineered to be compatible with most Traeger, Pit Boss, Camp Chef, Oklahoma Joe’s, Z Grills, Cuisinart WoodCreek and Cabelas pellet grills and smokers that use a standard AC auger motor. Includes models such as Traeger 070, 075, Texas Elite, Pro 22/34, Lil Tex Elite, Pit Boss Pro 820/850, Austin XL, Oklahoma Joe Rider DLX and more.

【Wide Compatibility】: The universal auger drive motor replacement is suitable for all Traeger, Pit Boss (except PTG) and Camp Chef, Oklahoma Joe, Cuisinart WoodCreek and Cabelas pellet grills. Suitable for Camp Chef smoker grills. Including but not limited to Traeger 070, 075, Texas Elite Series, Pro 22, Pro 34, Lil Tex Elite Series.
What Role Does the Igniter Play in Starting the Pellet Fire?
The igniter, a hot‑rod element seated inside the fire pot, ignites the first batch of pellets the moment the auger drops them, heating rapidly to red‑hot temperatures that produce a brief smoke plume before the combustion flame establishes. You’ll notice it sits directly against the pellets, accessible by lifting the fire pot at a 45‑degree angle and loosening the set screw. When power comes on, the igniter runs for 2‑4 minutes, reaching combustion temperature, then shuts off as the flame steadies. Igniter reliability hinges on consistent heating and proper placement; a misaligned rod can stall ignition. Igniter component lifespan varies by material—silicon nitride lasts longer than standard metal tubes, but all units degrade after repeated thermal cycles, so schedule replacement before performance drops. To maintain safety during maintenance, always turn off the gas supply before accessing internal components. The igniter is crucial for ignition because it provides the initial heat needed to start the pellet fire.

REPLACE ORIGINAL IGNITION RODS - Igniter rod compatible with most Pit Boss 340, 440, Classic, Austin XL, Sportsman 1100, Pro Series II 1150PS2 Grill models(Except PTG/ LOCKHART), Camp Chef and Oklahoma Joes Rider DLX Wood Pellet Grills models.

🔥【Compatible with Pit Boss Smokers】 The igniter is specifically designed to be compatible with all pit boss and camp chef pellet grills. Replacement hot rod ignitor kit ensuring a perfect fit for your pitboss grill or camp chef grill- Perfect replacement for your old Pit Boss igniter, camp chef igniter/ignitor

Compatible: Compatible with all Pit Boss grill models (except PTG), Camp Chef wood pellet grill and Oklahoma Joes Rider DLX pellet grill models
How Do Fans and Airflow in a Pellet Grill Create Consistent Heat and Smoke?
Igniter heat ignites the first pellet batch, but it’s the continuous fan system that transforms that spark into steady heat and smoke. The combustion fan forces oxygen across the burning pellets, keeping the fire clean and the blue‑gray smoke thin. Your grill’s controller reads the interior temperature, then tweaks fan speed to match the set point, delivering exhaustive temperature regulation. Faster airflow raises heat; slower flow lowers it, while the deflector panel redirects the pressurized air upward and around the chamber, creating a convection oven‑like environment. This pattern suspends ash, distributes heat evenly, and sustains the smoke generating capabilities. Two heavy‑duty intake fans synchronize with the auger, maintaining consistent fire intensity and eliminating temperature spikes throughout the cook. The PID controller continuously adjusts fan speed and pellet feed for rock‑steady temperatures. This advanced temperature control system allows pellet grills to accommodate a wide range of cooking styles from low-and-slow smoking to high-heat searing.
What Is the Startup Sequence of a Pellet Grill?
Even before the grill powers up, you must guarantee a stable, dry outlet, verify the display is blank or “OFF,” and confirm the hopper holds enough pellets. Plug the cord into a protected outlet, flip the power switch ON, and guarantee the hopper is full. Press the prime button, hold the power selector at “0” then “1,” unplug and replug to reset the controller, then initiate the 150‑second priming countdown. The auger feeds a limited pellet load into the firepot while the fan spins. Hold the button until you hear pellets drop and smoke appear, confirming ignition. The automatic cycle advances 0‑1‑2‑3, preheating to 150 °F. Close the lid, set the target temperature, and allow the grill to reach it. Depending on your Traeger model, you may use either an open-lid or closed-lid startup method to establish the flame before reaching your desired cooking temperature. This precise routine delivers startup consistency and startup repeatability. Proper setup prevents airflow issues and helps the ignition cycle run smoothly.
Which Sensors and Controllers Actually Keep the Grill at the Right Temp?
A pellet grill stays at the right temperature because a high‑precision RTD sensor feeds real‑time chamber data to a PID‑based controller that continuously adjusts the auger and fan. You’ll find a 7‑inch stainless RTD inside the cooking chamber, delivering ±1°F accuracy across 150‑500°F. The PID algorithm compares the current reading to your set point, then modulates pellet feed and airflow to keep swings within 5‑10°F above 250°F and 10‑15°F below 225°F. Temperature calibration settings let you fine‑tune both the grill sensor and any food probes, ensuring consistency after sensor drift. Wireless probe integration supports up to six external probes, including ambient and food probes, transmitting data to the controller for real‑time adjustments. Wi‑Fi‑enabled controllers like FireBoard Drive let you monitor and tweak these parameters remotely, preserving precise temperature control throughout cooking. The system also includes a food probe for direct temperature monitoring of the meat. When selecting a pellet grill, comparing temperature control capabilities across models ensures you choose equipment that maintains the accuracy needed for consistent smoking results.
How Does the Grill Maintain Temperature While Cooking?
When you set a target temperature, the grill’s PID controller continuously reads the RTD sensor and instantly tweaks both the auger feed and the fan speed to guarantee the chamber within a narrow band. The controller calculates proportional, integral, and derivative values each second, anticipating wind, lid openings, and pellet burn‑rate changes. If the temperature dips, it shortens the off‑cycle, sending more pellets via the auger; if it spikes, it lengthens the off‑cycle and throttles the fan. Continuous fan circulation acts as a convection oven, spreading heat evenly and boosting heat exchanger effectiveness. Precise thermocouple calibration verifies the sensor’s reading matches actual chamber temperature, allowing the PID loop to maintain steady heat for hours without overshoot. The PID controller also senses external influences such as ambient temperature and wind, adapting its output to keep the grill stable. Regular grill maintenance ensures all internal components function properly to support consistent temperature control.
Why Is a Drip Tray Important for Clean Combustion in a Pellet Grill?
Grease buildup can turn a pellet grill’s combustion chamber into a fire‑hazard, so a drip tray is essential for clean burning. By catching flammable oils before they reach the fire box, the tray prevents flash‑ups that would otherwise scorch the heat deflector and create uneven ash layers. A water‑filled tray adds thermal mass, capping its temperature at 212 °F and forming cooler zones that stabilize the grill’s environment, which in turn supports consistent temperature control. The water also vaporizes into steam, promoting even heat distribution across the cooking chamber. Heavy‑duty, angled designs direct drippings away from the combustion area, preserving internal components, reducing smoke, and extending the grill’s lifespan. For optimal maintenance, you can use natural ingredients like baking soda and vinegar to clean the drip tray and remove stubborn grease deposits. The Pellapro tray is angled to guide grease into a collection area, preventing accumulation near the fire pot.
What Are Common Troubleshooting Steps for Temperature Fluctuations?
Since the drip tray keeps the fire box clean, the next step is to address the temperature swings that often follow. First, verify that your pellets are fresh, premium hardwood; old or low‑quality pellets generate excess ash that fouls sensors and starves the fire of oxygen. When selecting pellets, consider factors like moisture content and ash production to ensure optimal performance. Next, perform consistent airflow adjustments: clear any food or pans that block the 1‑inch clearance, guarantee the foil on the drip tray is snug, and replace damaged baffles. Then, conduct regular thermocouple inspections, checking for loose connections or corrosion. Finally, avoid frequent lid openings or rapid set‑point changes, let the grill preheat fully, and follow the manufacturer’s startup sequence to stabilize the burn. Larger fluctuations occur at lower temperatures and when using Super Smoke.