
You’ll need roughly 30 minutes per pound at 225 °F, so a 14‑lb turkey takes about 7 hours, then add a 30‑minute buffer for temperature drift, altitude, or smoker quirks. Keep the smoker steady by opening the top vent halfway and the bottom vent a quarter, using a cold‑water pan for heat buffering. Monitor breast and thigh with dual probes, pulling the bird when the breast hits 157 °F and thigh 175‑180 °F. If you want the full method, the next steps will show you how to finish it perfectly.
How Long Does a 14‑lb Turkey Take at 225 °F?
A 14‑lb turkey at 225 °F typically needs about 30 minutes per pound, so you’re looking at roughly seven hours of smoking, with a practical range of six to eight hours once you factor in temperature drift and altitude. You’ll track turkey weight variations by timing each pound, but remember the 30‑minute baseline; a slight over‑ or under‑weight shifts the window by a few minutes. Maintain proper smoker maintenance: preheat, stabilize, and log the temperature every 15 minutes, correcting any drift before it compounds. At 225 °F, the breast should hit 160 °F, the thigh 165‑175 °F; the lowest probe reading dictates doneness. Consider brining your turkey for up to 48 hours before smoking to enhance moisture retention and flavor. Add a 15‑minute rest, then slice. This methodical approach guarantees consistent results without guesswork. Spatchcocking helps achieve even cooking and crispier skin.
How to Calculate 225 °F Time‑Per‑Pound for Any Turkey Size
Ever wonder how to turn any turkey’s weight into a reliable 225 °F smoking schedule? Start with a turkey weight estimation, then multiply by the standard time‑per‑pound: 30 minutes at 225 °F. For a 12‑lb bird, that’s 360 minutes (6 hours). Add the mandated 30‑minute buffer for variability, yielding 6 hours 30 minutes. Keep the turkey temperature range between 225 °F and the upper limit of 250 °F; if you drift toward 250 °F, reduce the multiplier to 25 minutes per pound and still add the buffer. Larger birds may finish early, so monitor internal temperature—aim for 140 °F before cranking to 400 °F for crisping. Resting the turkey for 10 to 15 minutes after smoking allows juices to redistribute, ensuring moist meat. This methodical calculation guarantees consistent results across any turkey size. Use a remote meat thermometer to ensure accurate temperature readings throughout the cook.
Why 225 °F Is the Sweet Spot for Smoke Flavor
You’ll find that 225 °F sits right at the intersection of smoke absorption and gentle cooking, making it the perfect temperature for a turkey that’s both flavorful and juicy. At this heat, smoke adheres without rapid evaporation, giving the meat the ideal smoking attributes you crave. The low, steady temperature extends exposure, allowing optimal smoke infusion across the entire surface while the turkey’s thermal gradient stays minimal, preventing overcooking. You’ll notice that the breast reaches a safe 157 °F without drying, and the whole bird hits 165 °F evenly, preserving moisture. Offset smokers amplify the effect, delivering a pronounced, layered flavor that higher temps can’t match. This precise balance yields a richly smoked turkey in a controlled, methodical fashion. Smoking at 225°F typically requires about 30 minutes per pound, which aligns well with the extended smoke exposure needed for deep flavor. Using medium-smoking woods like pecan or hickory will enhance the flavor profile while maintaining the ideal balance at this lower temperature.
How to Keep Your Smoker Steady at 225 °F
When you set up the smoker, start with the top vent at least half‑open and the bottom intake about a quarter open, then fine‑tune the airflow as the temperature climbs. First, run a dry‑run to establish smoke chamber calibration; note the temperature lag between vent and grate. Light one‑fifth of a chimney starter, ignite three points, and keep the lid open until the coals catch. Add a cold‑water pan to buffer heat spikes, then close the dome. As the temperature nudges above 225 °F, close the bottom vent incrementally until it dips, then open slightly to stabilize. Adjust for wind by nudging the top vent, and monitor coals to prevent dying out. This systematic airflow optimization keeps the smoker steady. Even heat is achieved by spreading the charcoal out in a ring around the firebox edge. Utilizing lid thermometers or digital probes provides precise monitoring to ensure your target temperature remains consistent throughout the cooking process.

Fits Almost Any Grill with Easy Installation – Choose the Universal version for nearly all grills and smokers (Not for BGE), including Kamado Joe, other Kamado ceramic grills, Weber Kettle, Weber Smokey Mountain, Bronco, and offset smokers; select the BGE version for Big Green Egg or Primo XL Oval grills. Easily replace your existing dial gauge. Upgrade your grills or smokers with the ProTemp S1, turning your traditional grill or smoker into a high-tech cooking machine.

BBQ High/Low Temperature Alarm: This smoker thermometer will flash and beep to notify you if your grill's temperature ever exceeds your desired range, and when to add more fuel. HI/LOW temp range alarm is specifically designed for usage with smokers, grills and BBQs
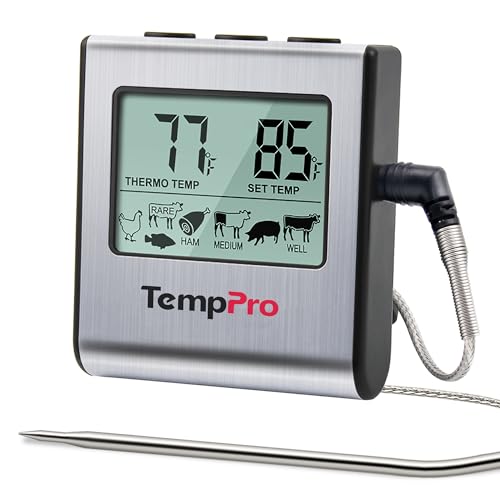
Cook mode with USDA preset temperature settings: TempPro cooking thermometer ideal for meat, oven, smoker or stove top; Programmable alert with preset temperatures for specific foods recommended by USDA; All of the preset temps can be reset to your desired tastes
Monitoring 225 °F Turkey Internal Temperatures – Breast vs. Thigh
Keep an eye on each piece’s thermometer and you’ll see the breast hit safe levels well before the thigh, so you can pull it out early and let the thigh finish the job. Use a dual‑probe setup, inserting one probe into the thickest part of the breast and the other into the innermost thigh. Maintain probe placement consistency each time you check; this guarantees errant readings caused by uneven temperature gradients are eliminated. Set the breast alarm at 157 °F—carryover will push it past the 165 °F safe mark—while the thigh remains on the smoker until it reaches 175‑180 °F. Record the readings at five‑minute intervals, noting the gap between breast and thigh. This methodical tracking confirms you stop overcooking the breast and achieve perfectly tender thigh meat. Brining the outermost parts helps protect them from overcooking. Using indirect heat ensures even cooking throughout the bird and prevents hot spots from causing uneven temperature distribution between the breast and thigh.

【Easier to Use】Equipped with 2 meat probes, this BBQ thermometer for grill allows you to monitor separate meats or the grill temperature simultaneously, a real comfort in grilling several pork loins for large groups with different tastes

【Dual Safe Probes for Multi-Use】Vuwwey meat thermometer probe is great for meat, liquids, oil frying, baking, candy making, kitchen & outdoors. The wired probe is ideal for monitoring air fryers, ovens, grills, BBQ, smokers. It's your hands-free assistant: set the alarm, stick it on, and step away from the heat

【Dual Precision Probe Monitoring】Vuwwey meat thermometer comes with two 40-inch high-precision, instant read probes with an accuracy of ±2℉ between 14℉ and 572℉ while enabling simultaneous monitoring of different meats or ensuring perfectly even cooking temperatures throughout your food
When to Add a 30‑Minute Buffer to Your Cook Time
Why add a 30‑minute buffer to your 225 °F turkey schedule? You add it because turkey size, wood type, and ambient conditions can shift a “steady smoker performance” curve by several minutes. Plan the base time as 30 minutes per pound, then tack on the buffer before you even light the coals. This guarantees “even cooking times” even if the thermometer drifts or the bird finishes early. If the turkey hits 165 °F ahead of schedule, wrap it in foil and towels; the buffer keeps it warm while you finish side dishes. Larger birds (14‑15 lb) benefit most, as their 7‑hour smokes leave room for temperature wiggle. The buffer also protects against over‑cooking when brining or room‑temperature birds cook faster. Maintaining a steady smoker temperature between 220–250°F ensures consistent results throughout the smoking process. Dry‑brining helps retain moisture, making the buffer even more effective for juicy results.
How to Rest a 225 °F Turkey for Juicy, Even Meat
After giving your turkey a 30‑minute buffer to absorb any timing quirks, the next step is to let it rest so the juices can redistribute. Place the bird on a rack inside a pan, then tent it loosely with foil to preserve skin crispness without steaming. Aim for a rest of 20‑30 minutes; this range optimizes rest duration, allowing fibers to relax and juices to settle evenly. During this window the internal temperature will rise 5‑10 °F, so you’re evaluating rest temperature effects while keeping the meat safely above 165 °F. Use a reliable probe thermometer to verify the turkey has reached the proper temperature before carving. Avoid tight wrapping, which risks overcooking and soft skin. After the juices stabilize, carve confidently, knowing the turkey will be juicy and uniformly moist. The smoker cooks at 225‑250°F for about 30‑35 minutes per pound.
How to Get Crispy Skin Again After Resting
If you want the skin to regain its crunch after the rest, start by removing any surface moisture and then give it a brief, high‑heat blast. Pat the turkey dry with paper towels, then set it on a wire rack over a sheet and refrigerate for one to two hours, employing post‑rest air‑drying techniques that keep airflow unrestricted and avoid any covering that could trap steam. After the dry period, brush a thin veil of neutral oil or melted butter, then preheat your oven to 450‑500 °F and apply high‑heat crisping methods for ten to fifteen minutes, rotating halfway for evenness. Use a convection fan or broiler if available, and monitor closely to achieve a golden, crackly surface without burning. Ensure the turkey is cooked at a minimum temperature of 325°F to prevent leathery skin. For best results, complement this crisping technique with the herb-infused butter preparation used during the initial smoking phase to enhance both flavor and texture.
Fix Common 225 °F Smoking Mistakes
Ever wondered why your 225 °F turkey ends up dry, over‑smoked, or unevenly cooked? Stop over‑exposing the bird; limit the low‑heat phase to four hours, then raise to 275‑350 °F for a quick crust. Pull the breast at 155 °F, letting carry‑over bring it to a safe 165 °F, and let thighs climb to 175 °F. Skip stuffing—an empty cavity lets smoke circulate, fostering proper smoke ring development and ensuring even internal cook. Preheat the smoker to a stable 225 °F with indirect heat, and add a 30‑minute buffer for altitude or size variations. When the skin looks soggy, finish with a brief high‑heat blast, then rest unveiled to avoid steam‑sapped crispness. After smoking, allow the turkey to rest for 10-15 minutes before carving to retain juices. This methodical tweak eliminates dryness, over‑smoking, and unevenness. Spatchcocking also helps the turkey cook evenly and the the skin to crisp.
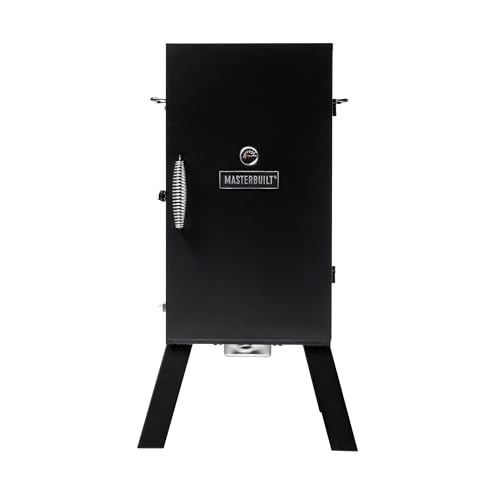
ANALOG CONTROLS - Set your desired smoking temperature using the analog dial for seamless smoking experience up to temperatures of 275°F

Perfect Fit for Masterbuilt 1050: Ustom-designed for Masterbuilt Gravity Series 1050 MB20041220 Digital Charcoal Grill & Smoker. Please verify your model before ordering for a secure fit

DIGITAL CONTROLS - Set your desired smoking temperature and cooking time on the digital control panel for seamless smoking experience up to temperatures of 275°F


