
You’ll smoke baby‑back ribs for about 5 hours and St. Louis‑style ribs for 5½‑6 hours at a steady 225‑275 °F, using the 3‑2‑1 method: three hours unwrapped with frequent spritzes, two hours wrapped in foil with butter and honey, then one hour unwrapped with sauce. Aim for an internal temperature of 200‑210 °F, a flexible bend, and exposed bones for perfect flavor. Keep the membrane off so the rub adheres fully, and you’ll see the ideal bark develop. The next steps will guide you through fine‑tuning texture and seasoning.
Select Your Rib Cut and Remove the Membrane for Smoking
Start by picking the rib cut that matches your time and flavor goals, then strip away the membrane to let smoke and seasoning work their magic. Your rib selection should consider lean baby backs for quick, tender results, or St. Louis‑style ribs for richer meat and competition‑grade presentation. Lay the ribs bone‑side up, locate the thin silver skin, and use a sharp knife to pry a corner. Grip the edge with a paper towel and pull steadily; the membrane should separate cleanly. Trim any stray bone shards, cartilage, or excess fat that could hinder even smoke penetration. These membrane removal techniques guarantee the rub adheres fully, fostering a uniform bark and ideal tenderness throughout the smoking process. For St. Louis-style ribs, plan for a total smoking duration of 4 1/2 to 6 hours to achieve perfect tenderness. Hickory is a classic wood choice that imparts a deep, savory flavor to ribs.
Set the Smoker Temperature to 225‑275 °F for Optimal Collagen Breakdown
If you keep the smoker between 225 °F and 275 °F, the collagen in the ribs will melt into gelatin without forcing the muscle fibers to contract, giving you tender, juicy meat and a well‑formed bark. This ideal temperature profile aligns with a collagen structure investigation that shows gelatin formation begins at 160 °F and completes near 200 °F internal, while muscle fibers stay relaxed. Maintain a steady 230 °F ambient to keep smoke light and avoid aggressive fiber contraction. Monitor the stall at 150‑170 °F, then let the ribs linger in the 160‑205 °F zone for several hours until an internal probe slides without resistance. The result is balanced fat rendering, moisture retention, and a robust bark. Low‑temperature cooking is essential for proper collagen conversion. Using wood chips for smoke flavor, such as hickory, apple, or walnut, will enhance the complexity of your final product.
Apply the 3‑2‑1 Method to Spare Ribs
Keeping the smoker steady at 225‑275 °F sets the stage for the 3‑2‑1 method, which builds on that ideal collagen breakdown to deliver tender, juicy spare ribs. Begin with a three‑hour unwrapped phase, placing ribs bone‑side down on the grates and using a deliberate smoker wood selection—cherry, apple, pecan, or hickory—to achieve the desired smoke flavor intensity. Spritz with apple cider vinegar and water at the 1.5‑hour mark, then repeat every 30 minutes until the internal temperature reaches 165 °F.
Next, wrap the ribs tightly in heavy‑duty foil, adding butter and honey to the bony side, and continue smoking for two hours at 225‑240 °F. The goal is to achieve a flavorful bark while maintaining the meat’s tenderness during this critical wrapping phase.
Finally, unwrap, coat with sauce, and smoke for one more hour until the internal temperature hits 200 °F and the glaze sets. Rest the ribs 10‑15 minutes before slicing.
Slow cooking ensures the meat stays moist and flavorful throughout the process.
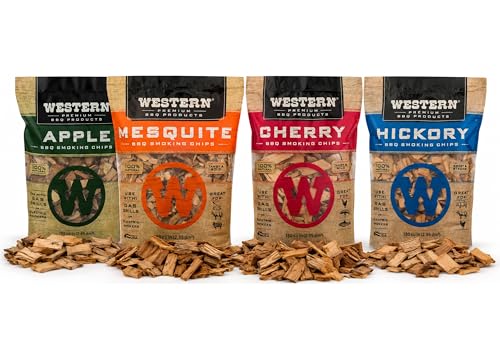
Western BBQ Smoking Wood Chips Variety Pack Bundle (4)- Apple, Mesquite, Hickory, and Cherry Flavors (Original Version)

Hickory wood chunks

Variety 6 Pack of Smoking Chips
Adjust Cooking Time for Baby Back and St. Louis‑Style Ribs
How long should you smoke baby back versus St. Louis‑style ribs? At 225 °F, baby backs need about five hours; St. Louis cuts require 30‑60 minutes more because of extra thickness and fat. Begin with a solid rub application technique—coat each rib evenly, letting the spice layer sit while the grill preheats. Smoke the baby backs unwrapped for two hours, then wrap in foil for another two hours before a final unwrapped hour to set bark. For St. Louis ribs, follow the same phases but add an extra 30‑45 minutes in each stage, pushing total time to 5.5‑6 hours. If you raise the cooking temperature to 250 °F, reduce overall time to roughly four hours for baby backs, adjusting the wrap and bark phases proportionally. Always aim for an internal temperature of 205‑210 °F before resting. Fruit wood is best for smoking baby back ribs. Consider finishing your ribs with barbecue sauce applied during the final stages to caramelize and add depth of flavor.

Subtle Sweet flavor
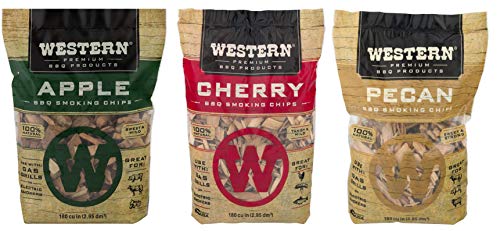
Variety 3 Western Premium BBQ Smoking Chips (Flavors: Apple, Cherry, Pecan), 180 Cubic Inches per bag

Mesquite wood chips
Spritz, Wrap, and Sauce the Ribs for Bark and Glaze
Moisturize, wrap, and sauce the ribs in a disciplined rhythm to forge a perfect bark and glossy glaze. Begin spritzing once the internal temperature hits 150 °F; use a spray bottle of equal parts ketchup, mustard, Worcestershire, maple syrup, and apple cider vinegar, or plain apple juice for a simpler profile. Maintain a strict spray frequency—every thirty minutes—while the first hour smokes, then flip and repeat on the opposite side. This moisture management preserves bark texture and enhances smoke adhesion. When the ribs reach 190‑200 °F, wrap them tightly in foil to lock in juices and accelerate tenderness. After unwrapping, coat the surface with your chosen BBQ sauce, then return to the smoker for thirty minutes to set a glossy glaze. Season the ribs evenly with salt and pepper before smoking.
Check Rib Doneness Using Temperature, Bend, and Bone Tests
After you finish the spritz‑wrap‑sauce cycle, it’s time to confirm the ribs are truly ready. Begin with multi probe temperature testing: insert a thermometer into the thickest meat, avoiding bone, and aim for 200–210 °F. Expect variation across the rack, so check at least three spots; a consistent reading near 200 °F signals ideal collagen breakdown. Next, perform the bend test—lift the slab; it should flex easily and begin to pull apart. Finally, conduct a visual cue assessment: the bones should peek from the meat, and the surface should display a cherry hue and glossy glaze. If the ribs bend, the temperature is right, and bone exposure is evident, you’ve achieved perfect doneness. Temperature is the most reliable indicator of rib doneness. For baby back ribs specifically, plan for 4–5 hours at 225–250°F to reach optimal results.
Rest the Ribs for 30 Minutes to Lock in Juices
Once the ribs leave the smoker, let them rest for about 30 minutes; this pause enables temperature adjustment and tightening prevention while the fibers relax. Wrap the racks loosely in foil or place them on a warm plate, then keep them in an insulated container. During the rest, the contracted muscle fibers re‑absorb the expelled juices, ensuring even moisture distribution and locking in flavor. The carry‑over heat raises internal temperature just enough to finish the cooking process without over‑cooking. For best results, maintain temperatures around 225–250°F during the resting period by keeping the ribs in a warm environment. Avoid extending the rest beyond 30 minutes, as prolonged cooling can cause the proteins to tighten and the meat to dry out. When you finally slice, the ribs will be tender, juicy, and uniformly seasoned. Resting allows the meat to reabsorb juices that were expelled during cooking.
Fix Common Rib Timing and Texture Issues
While the 30‑minute rest locks in juices, the real challenge lies in preventing the timing and texture pitfalls that can ruin a rack. First, keep heat at a medium, indirect level; high heat dries ribs, burns sugar rubs, and leaves the interior rubbery. Raise the temperature only for the final five to ten minutes to achieve a crisp bark without overcooking. Remove the membrane before smoking; this lets smoke and seasoning penetrate, and placing the rack bone‑side down avoids juice pooling. Choose light‑smoke woods—apple, cherry, or pecan—for proper selection; heavy woods like elm or spruce mask pork’s natural sweetness. For optimal results, ensure your wood chips maintain the proper moisture levels to achieve consistent burn characteristics and smoke production. Finally, apply sauce at the end, just before the last brief heat surge, to prevent caramelized sugars from turning bitter. Use a bend test or thermometer to gauge doneness and avoid overcooking. Select lighter fruitwood chips for a balanced flavor profile.


