Smoke your country‑style ribs at 225‑250 °F for about four hours, keeping the probe in the thickest part until the internal temperature hits 165 °F. Then crank the heat to 250‑275 °F and cook another two to three hours, wrapping them if you want extra moisture, until they reach a tender 185‑200 °F. Finish with a quick glaze at 275 °F for 15‑20 minutes, and you’ll have juicy, flavorful ribs—plus tips on perfect smoke and sauce if you keep going.
Choose the Right Wood and Temperature Combo for Country‑Style Ribs
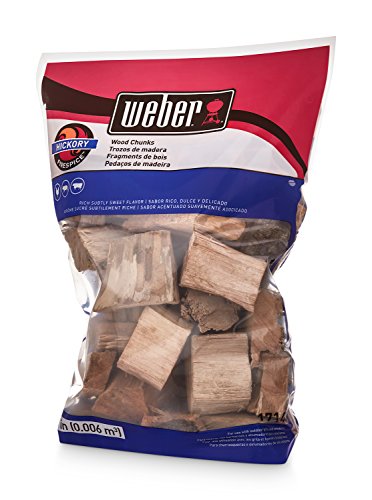
A good wood‑and‑temperature combo is the foundation of great country‑style ribs. You’ll want a temperature around 225‑250 °F, low enough to let the meat stay tender while the wood burns steadily. For ideal flavor pairings, start with a 2:1 blend of a stronger wood—hickory or oak—and a milder fruit wood such as cherry or pecan. Hickory‑cherry gives a sweet‑savory bite, while oak‑pecan offers a mellow, nutty backdrop. Keep the fire steady; a consistent smoke stream prevents bitterness and guarantees even color. Avoid softwoods and overly bitter woods like mesquite. By balancing heat and wood, you maintain smoke consistency and let the ribs develop that deep, rich crust without overcooking. Fruit woods are milder and add a subtle sweetness that complements the stronger hardwoods. For the best results, ensure your charcoal maintains steady heat output, as consistent burn time allows you to manage temperature precisely throughout the smoking process.

MATERIALS: Made from 100% natural seasoned hardwood with no unwanted byproducts, our wood chips burn cleanly and evenly.

3-FLAVOR VARIETY PACK: Includes Apple (sweet & mild), Hickory (bold & smoky), and Cherry (subtle & fruity) wood chips for ultimate grilling versatility
Set the Smoker and Place the Digital Probe for Country‑Style Ribs
Now that you’ve nailed the wood‑and‑temperature combo, fire up the smoker and get it humming at 225 °F before the ribs hit the grates. Preheat until the built‑in gauge steadies, then open the vents just enough to keep the temperature from drifting. Lay the ribs bone‑side down in a single layer, spacing them for airflow. For probe placement tips, slide the digital probe horizontally into the thickest part of the meat, keeping the tip clear of bone and centered midway through the rib. Secure the probe so it won’t shift, and set a timer for 30‑minute checks. Follow temperature monitoring recommendations by watching the readout every half hour, adjusting vents if the dial wavers, and ensuring a steady blue smoke before you begin the long cook. After your ribs reach the target internal temperature, rest the meat wrapped in foil inside a cooler to help retain juiciness. Pork butt has fat marbling that benefits from the low‑and‑slow method.

Bluetooth Monitor Remotely: Govee Bluetooth meat thermometer lets you check the temperature of your grill, smoker, or oven from your phone. With this smart BBQ thermometer, you can multitask while grilling.

BBQ HI/LOW temp range alarm: Set your desired food temp and HI/LOW temp range for your grill or smoker to know when to add more fuel smoker thermometer will flash and beep to remind you if the temperature ever goes out your set range; HI/LOW temp range alarm is specifically designed for usage with smokers, grills and BBQs

Longer Range 650 ft: The built-in best-in-class Bluetooth chip empowers this Bluetooth thermometer a longer range of up to 650 ft, a stronger signal and more stable connection to the smart App; so you'll never lost contact with your food no matter where in your house or yard
Smoke the Ribs for 4 Hours at 225‑250°F Until the Internal Temp Reaches 165°F
Four hours of steady smoke at 225‑250 °F will bring the ribs to a perfect 165 °F internal temperature, the sweet spot where the meat is tender yet still holds its structure. Keep the smoker at this range to let the smoke flavor intensity build slowly, allowing the rub to caramelize without burning. Position the ribs one inch apart so the heat circulates evenly, and insert a digital probe into the thickest part for accurate monitoring. Every hour, spritz with apple juice to maintain internal moisture control, preventing the surface from drying out. Around the three‑hour mark, check the probe; if the temperature nears 160 °F, you’re almost there. When the reading hits 165 °F, the ribs are ready for the next phase. Using a probe thermometer is highly recommended to monitor doneness effectively throughout the smoking process. The blade end of the pork loin meets the shoulder, giving country‑style ribs their characteristic tenderness.

【Fast & Accurate】Our meat thermometer digital delivers accurate readings within ±1°F in just 1–2 seconds, with a wide temperature range of -58°F to 572°F (-50°C to 300°C). No more waiting over the heat - know your food's exact temperature instantly.

Completely Waterproof: IPX6 waterproof rating means you can wash this cooking thermometer under running water without fear. This food thermometer for cooking ensures cleanup is ultra-fast

FAST & ACCURATE INSTANT READ: Get temperature readings in just 2-3 seconds with ±1°F accuracy. Whether you're grilling steaks, roasting turkey, smoking brisket, or baking bread, this digital meat thermometer helps you monitor food temperature quickly and confidently
Raise the Temperature to 250‑275°F and Cook Another 2 Hours to Reach 185‑200°F
Once the ribs hit 165 °F, crank the smoker up to a steady 250‑275 °F and keep them covered for the next two hours. The higher heat drives the collagen breakdown while the cover traps moisture, letting the meat inch toward the preferred final temperature. Insert a monitored internal probe; you’ll see the reading climb into the 185‑200 °F window, the sweet spot for pull‑apart tenderness. During this phase, brush on a generous layer of BBQ sauce, letting it soak in as the ribs bake exposed for the final hour. Watch the mahogany crust deepen, then let the meat rest five minutes so juices redistribute before you slice. Like smoking other cuts, proper resting time allows the juices to redistribute throughout the meat for optimal texture. This precise timing guarantees melt‑in‑your‑mouth texture without overcooking. Country‑style ribs are actually thick strips cut from pork shoulder, not true rib bones.
Wrap the Ribs and Braise at 250‑275°F for 2‑3 Hours to Lock in Moisture
If you want the ribs to stay juicy while they finish cooking, wrap them tightly in foil or a Dutch‑oven lid and braise them at a steady 250‑275 °F for two to three hours. Choose a method that seals steam—cover the Dutch oven with its lid or crimp foil over the pan—so the braising temperature creates a humid pocket. Add a splash of stock or wine so the liquid rises halfway up the ribs, then set the oven to 250 °F for a three‑hour bake. The tight cover traps steam, delivering moisture locking benefits that keep the meat tender and succulent. Check after two hours; if the meat isn’t fork‑tender, let it continue until the juices are thick and the texture falls apart. Country‑style ribs are naturally leaner than traditional BBQ ribs, making the braising step essential for maintaining juiciness. Braising at these temperatures breaks down connective tissues more efficiently than lower smoking temperatures, ensuring tender results in a shorter timeframe.
Apply a Sweet‑Spicy Glaze and Finish at 275°F for 15‑20 Minutes
After the ribs have spent a few hours locked in moisture, pull them from the oven, expose, and brush on a generous layer of your sweet‑spicy glaze. Set the smoker to 275°F and let the glaze caramelize for 15‑20 minutes, turning once to coat both sides evenly. While the heat works its magic, the jalapeno jelly and hickory‑flavored BBQ sauce meld, creating a glossy, sticky finish that hints at pineapple, molasses, and a touch of chili powder. Keep the lid closed to trap steam, then remove the ribs and let them rest before serving. Resting allows the juices to redistribute, ensuring every bite stays tender and the glaze stays perfectly set. For optimal results, aim for an internal temperature of around 195-203°F to achieve the desired tenderness level. The first day of school was emotionally difficult for the person.
Test Doneness: Probe‑Tender at 200°F or Juicy at 142‑144°F
Precision matters when you test rib doneness, and a reliable instant‑read thermometer will be your best ally. Insert the probe into the thickest part, steering clear of bone, and watch the needle. If it reads 142‑144°F, you’ve hit the USDA safe zone; let the ribs rest three minutes under foil to lock in a juicy mouthfeel. For a fork‑pull experience, push the internal temperature to 200°F. At that heat, collagen converts to gelatin, delivering a tender texture that melts off the bone. Take two readings in different spots to avoid false bone contact, then allow a 10‑minute rest so juices redistribute. For best results, use heavy smoking wood to enhance the flavor profile of your ribs. Choose the endpoint that matches your palate—juicy and safe, or melt‑in‑your‑mouth tender. The ribs are budget‑friendly and contain more meat than regular pork ribs.
Troubleshoot Common Rib Issues: Dry Meat, Uneven Smoke, Timing Tweaks
One of the most frustrating moments in a smoke session is pulling out ribs that are dry, unevenly smoked, or simply mistimed. To fix dry meat, keep the smoker steady at 225‑275 °F, wrap the ribs in foil at 160‑165 °F with apple juice, butter, or honey, and baste every 30 minutes. Rest them 10‑15 minutes to let juices redistribute—these meat moisture remedies preserve tenderness. For uneven smoke, lay ribs directly on the grate for the first 2‑4 hours, rotate them halfway, and avoid overcrowding; choose mesquite‑cherry or hickory for thin, clean smoke exposure techniques. Timing tweaks depend on thickness: extend low‑temp smoke to 4 hours at 225 °F for thick cuts, or shorten the initial phase to 60‑90 minutes at 300 °F for quicker color. Probe at the 3‑hour mark and adjust before the final braise. Remember to remove the membrane removal before seasoning to ensure better smoke penetration and tenderness. Also, remember that pork shoulder provides a meatier, bone‑free cut that benefits from the low‑and‑slow method.