
Set your grill up with a hot zone (≈500‑600°F) and a cooler side (≈300‑325°F). Sear the bone‑in breast skin‑side down on the hot side for 4‑5 minutes, flipping every minute to avoid flare‑ups. Then move it to the indirect side, keep the lid closed, and cook 18‑20 minutes, rotating every 5‑7 minutes, until the thickest part hits 165‑170°F. Pull it at 155‑160°F for carry‑over cooking, let it rest five minutes, and you’ll get juicy, perfectly cooked chicken. Continue for tips on timing adjustments and flavor tricks.
Set Up a Two‑Zone Grill for Bone‑In Chicken Breasts
Set up a two‑zone grill by heating one side high and the other low, then you’ll have a hot direct‑heat zone for searing and a cooler indirect zone for finishing the bone‑in chicken breasts. Use a gas grill with at least two burners; crank one burner to high (500‑600 °F) and set the other to medium‑low. If you prefer charcoal, pile coals on one side until they’re hot, leaving the opposite side empty for indirect heat. Preheat for 15 minutes, then close the lid to maintain temperature control and maximize convection flow across the cooking surface. Arrange the chicken skin side down on the cooler side, keeping the lid closed to preserve heat. This setup lets you sear quickly and finish evenly without overcooking. Use a meat thermometer to verify the chicken has reached a safe internal temperature before removing it from the grill. The skin and bones help keep the chicken moist and flavorful.


Celebrate charcoal grill, charcoal grilling, live fire cooking, charcoal griller, backyard grilling, two-zone crew, fire management, vents open, direct indirect, chimney loaded, coals ready, and heat control culture.

Celebrate charcoal grill, charcoal grilling, live fire cooking, charcoal griller, backyard grilling, two-zone crew, fire management, vents open, direct indirect, chimney loaded, coals ready, and heat control culture.
Sear the Skin Side – 4‑5 Minutes on High Heat
Four to five minutes of direct, high‑heat searing will crisp the skin without overcooking the meat. Preheat the grill‘s high‑heat zone to 425‑450 °F, then place the chicken skin side down. Keep the lid open and watch closely; the heat should cause rapid fat rendering, which prevents flare‑ups later and builds a crisp crust. Flip the bird every minute or so to avoid hot spots and to promote even browning. Have a squirt bottle handy in case the rendered fat sparks a flare‑up. After the 4‑5‑minute interval, the skin will be golden, charred in places, and fully rendered, ready for the next cooking phase. Using a meat thermometer will help you verify doneness once you move to indirect heat cooking. The breasts should be brined overnight to ensure tenderness and juiciness.
Finish on Indirect Heat – The 18‑20‑Minute Sweet Spot
After the skin’s crisp sear, slide the chicken onto the grill’s cooler side and let it cook indirectly for the sweet spot of 18‑20 minutes. Keep the grill temperature monitoring steady at medium‑low, around 300‑325°F, with the lid closed to maintain even heat. Rotate the breast every 5‑7 minutes and flip once after the first 15 minutes, using indirect cooking techniques that prevent direct flame contact. This timing works for average thickness; thicker pieces may need a minute or two more, while smaller cuts finish a bit sooner. Trust the closed lid—if the internal heat stays near 140°F, you’re on track for the final direct‑heat finish that brings the meat to safe, juicy perfection. Using a thermometer for accuracy ensures you reach the target internal temperature without guessing. Cook time 5 to 6 minutes per side for boneless skinless chicken breasts ensures a quick sear before moving to indirect heat.
Check Temperature With an Instant‑Read Thermometer (165‑170°F)
Slide the instant‑read thermometer into the thickest part of the bone‑in breast, keeping the probe clear of the bone, and you’ll get an accurate reading within seconds. Aim for a meat temperature gradient that hits 165‑170°F across the thickest section; this range guarantees safety while preserving juiciness. Insert the probe into the center, avoid bone contact, and rotate the chicken to capture multiple spots. If you see 165°F, the chicken is done; if you prefer a slightly higher ideal pull temperature, let it climb to 170°F before removing. Remember that carryover cooking will add 5‑7°F while the meat rests, so you can pull at 155‑160°F for a finish at the safe zone. This method eliminates undercooking risks and yields consistently perfect bone‑in breasts. Even‑sized breasts help ensure uniform cooking. Letting the chicken rest a few minutes after cooking will seal in the juices for maximum tenderness.
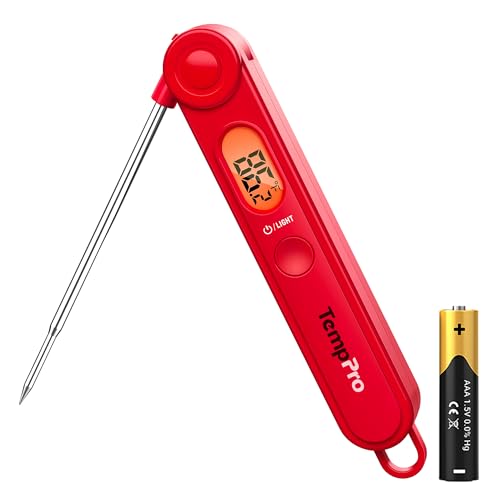
【Easy to Use】Easily release the meat probe at the push of a button, and control the backlight or power with another button. With TempPro, cooking becomes a seamless, stress-free experience

【Fast & Accurate】Our meat thermometer digital delivers accurate readings within ±1°F in just 1–2 seconds, with a wide temperature range of -58°F to 572°F (-50°C to 300°C). No more waiting over the heat - know your food's exact temperature instantly.

【8X Faster + 4X More Precise】: Upgraded with an industrial-leading professional thermocouple sensor, Themomonster meat thermometer digital with NIST certified ±0.5℉ precision provides you the accurate temperature of your food in just 0.5 Seconds.
Adjust Cook Time for Different Breast Sizes and Thicknesses
How long you grill a bone‑in chicken breast depends on its size and thickness, so you’ll need to tailor the baseline 18‑25‑minute window at 375‑400°F accordingly. For small bone‑in breasts, shave 2‑4 minutes off the baseline and sear 4‑6 minutes per side, then finish indirect heat; total time lands around 15‑20 minutes. Medium breasts fit the 18‑25‑minute range; sear 5 minutes per side, then move to indirect or a top rack, aiming for 20‑25 minutes. Large breasts need an extra 4‑6 minutes or more; start with 8‑10 minutes per side and expect 25‑35 minutes total. Apply bone in thickness adjustments by adding 1‑2 minutes for each extra inch of thickness, and always monitor the thickest part near the bone to guarantee even cooking. Remember that chicken is safe to eat when it reaches an internal temperature of 165 °F.
Baste and Flip Every 5‑10 Minutes for Even Flavor
Adjusting the grill time sets the stage, but keeping the flavor even hinges on regular basting and flipping. You’ll start with a quick sear, then move the bone‑in breasts to the cooler side. Every 5‑10 minutes, brush on reserved marinade or dip the chicken, keeping a consistent basting schedule that matches your flip cadence. Flip when the meat releases easily; this usually occurs after the first 3‑5 minutes per side, then every 4‑5 minutes during indirect heat. Simultaneously, perform precise temperature monitoring with an instant‑read thermometer, checking the thickest spot at each interval. Aim for 165‑170°F before the final two‑minute sauce finish. This rhythm locks in moisture, distributes flavor, and prevents burning. Let the meat rest for a few minutes after cooking to retain juiciness and allow carryover cooking to complete the process. Bone‑in chicken is generally less expensive than boneless, making it a cost‑effective choice.
Manage Flare‑Ups and Smoke When Grilling Bone‑In Chicken Breasts
When flare‑ups threaten your bone‑in chicken, keep the grill clean, trim excess fat, and set up a two‑zone fire so you can quickly move the meat to a cooler side and control the flames before they scorch the skin. Pat the breasts dry before they hit the grates; moisture fuels flare‑ups and adds unwanted smoke. Use a sharp knife to remove thick fat beyond a quarter inch, leaving a thin layer for flavor. Arrange a high‑heat zone for searing and a low‑heat zone for indirect cooking. Keep the lid open while searing, and have tongs and a spray bottle ready to douse sparks. Continuously monitor internal temperature to avoid overcooking and prevent excessive browning, shifting the chicken to the cooler side whenever flames flare. Regularly clean the grill to remove debris that can cause flare‑ups, including leftover charcoal and buildup on the grill grates that restrict airflow. For optimal performance, consider a deep cleaning of your grates with a stiff brush to ensure maximum heat distribution and minimize unexpected flare‑ups during cooking.

【The Safest Bristle Free Grill Cleaner】:No wire bristles at all, no melting like nylon grill brushes; With this safe grill brush and scraper, your food will stay 100% Bristle Free. No more worry about swallowing some metal pieces, Let's free to gobble up some favorite barbecue! Save your effort and time, let’s just have fun! (PATENTED design)

【[WIRE & Helix] 2 in 1 combo brush - Safe + Efficient】A Wire & Helix integrated brush -Wire brush side can efficiently clean stubborn stains left on grill, then helix side can dually clean it to ensure no possible stray wire can possibly stay on your grill. With this bbq grill brush, you can have the fast-cleaning efficiency of wire brush &stay away from wire ingesting case at the same time. Ever wanna keep your food stay 100% safe, but hate to give up faster cleaning?You'll love it
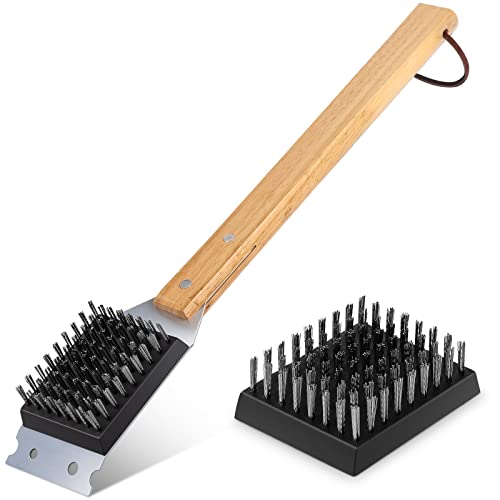
Efficient 2-in-1 Grill Scraper: Cut cleaning time with this dual-action tool. The sharp stainless steel scraper chips away stubborn residue, while thick bristles remove heavy grease instantly. The ultimate solution for restoring dirty gas or charcoal grills quickly
Rest the Chicken for 5 Minutes for Juicier Flavor
A brief 5‑minute rest after grilling lets the juices that escaped during cooking soak back into the meat, keeping the bone‑in chicken breast moist and tender. Transfer the hot breast to a clean plate, then cover it with aluminum foil to trap residual heat. This proper cooling technique prevents moisture loss while allowing carryover cooking to finish the internal temperature at a safe 165°F. During the rest, consistent heat application keeps the meat uniformly warm, letting muscle fibers relax and reabsorb released moisture. The result is a juicier, more flavorful bite with a uniform texture from exterior to center. Avoid stacking pieces; give each breast its own space to maintain even heat distribution and ideal flavor development. Using a medium heat zone (375‑400°F) ensures the chicken stays juicy while achieving a good sear. For optimal results, use a meat thermometer to verify the internal temperature has reached the safe minimum before resting.
Common Mistakes to Avoid When Grilling Bone‑In Chicken Breasts
A sizzling grill can quickly turn a bone‑in chicken breast into a dry, unevenly cooked mess if you ignore a few key pitfalls. First, skip preheating and you’ll lose the ideal grilling temperature for a good sear; aim for 400°F, oil the grates, and keep the chicken off direct flame. Second, overcrowding the grill starves each piece of airflow, causing steaming instead of char and uneven heat. Third, flip too often—one turn after 5‑7 minutes per side preserves juices and prevents flare‑ups. Fourth, neglect proper seasoning application; coat the meat evenly before it hits the heat to avoid bland spots. Finally, skip the thermometer and you’ll guess doneness, risking undercooked interiors. Use a digital probe to hit 165°F internal temperature in the thickest part, bone excluded. Pound the chicken breasts to an even thickness for uniform cooking. For bone-in chicken pieces specifically, aim to reach between 170°F to 185°F for optimal tenderness and safety.